Giardiniera – Mixed Vegetable Pickle

This is my version of a mixed vegetable pickle. There are some regions where the vegetables you put in the mix are a very specific combination but, I say add whatever you like the best. This is my preserved vegetable pickle often called Giardiniera in Italian. You can add or omit some chili peppers if you wish to make spicy and it is a combination of vinegar and olive oil, in my case….. lots of GREAT Extra Virgin Olive Oil!! 

You will need:

  • 3 small carrots
  • 2 stalks of celery
  • 1/3 of a small cauliflower (about 3 cups of florets when they are separated)
  • 150 grams or a handful of green beans
  • 3-4 fresh or dried small onions (I used both)
  • 1 sweet red pepper
  • 125 grams of eggplant cut into strips and salted for at least 30 minutes 
  • 2 chilies – I used a milder Fresno chili which was hot enough for me- you add whatever you prefer!
  • 1/2 small bulb of fennel 
  • 3-4 cloves of garlic sliced thinly
  • 1 cup white wine vinegar (I used champagne vinegar)
  • 15 peppercorns
  • couple of big bay leaves
  • 2 tsp of salt 
  • 1 cup of water
  • 1 bottle 500ml of great extra virgin olive oil- I used Casas D Hualdo Organic
  • 3 tsp of dried oregano
  • 3 cloves of garlic -sliced
  • 1/2 tsp chili flakes
  • 1/2 tsp celery seed
  • some fennel fronds chopped if you like
  • 100 grams of olives pitted and chopped.
  • 2-3 tbsp of chopped flat Italian parsley (it has better flavor than the curly in my opinion)

Step 1: sterilize 3 x 2 cup preserving jars by washing thoroughly. You can also rinse them with a little vinegar after they are washed. If you have new jars I like to wash them, place them in boiling water for 2 minutes and then rinse with a bit of white vinegar and dry well. 


Note* Once you have filled your jars you can pasteurize them by sealing them well with new lids, wrap the jars in tea towels, place in a lar pot filled just above the jars with water. Let come to a boil and then turn down to a medium low boil for 30 minutes. Then allow to cool in the water bath before removing jars. They can then be stored in the cupboard. Once opened they should be stored in the fridge. 

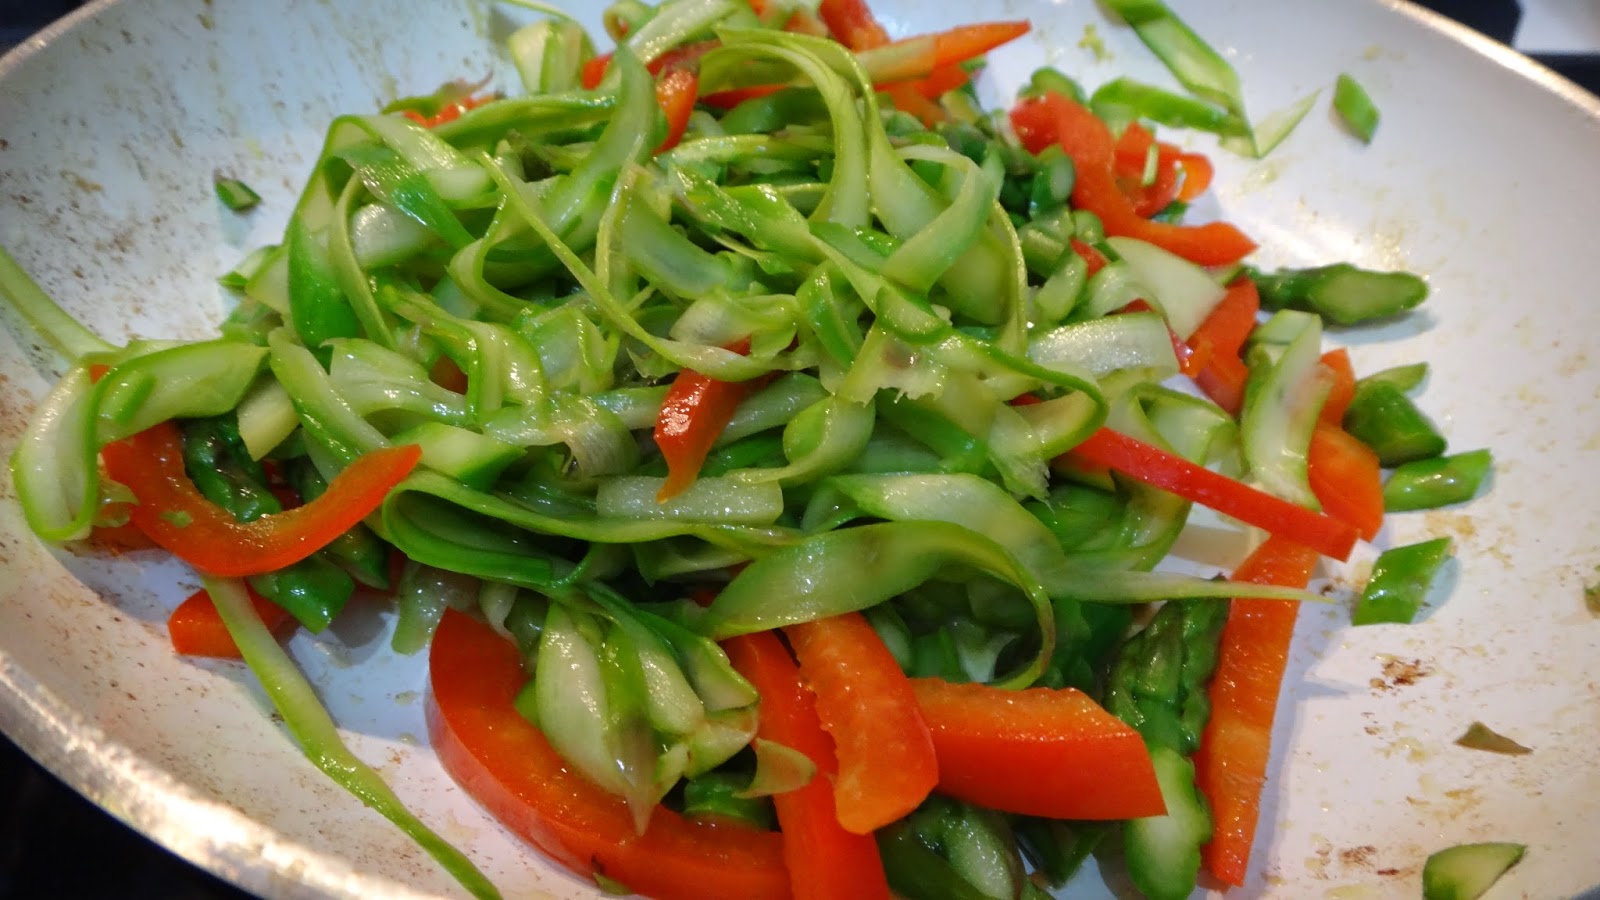
Step 2: slice or chop all vegetables in chunks or thin slices of a similar size (I like the look of the thinner finer slices but you can chop them in chunks if you like) 

Step 3: in a pot you will add the vinegar, peppercorns, bay leaves, 3 cloves of garlic, salt and water. 


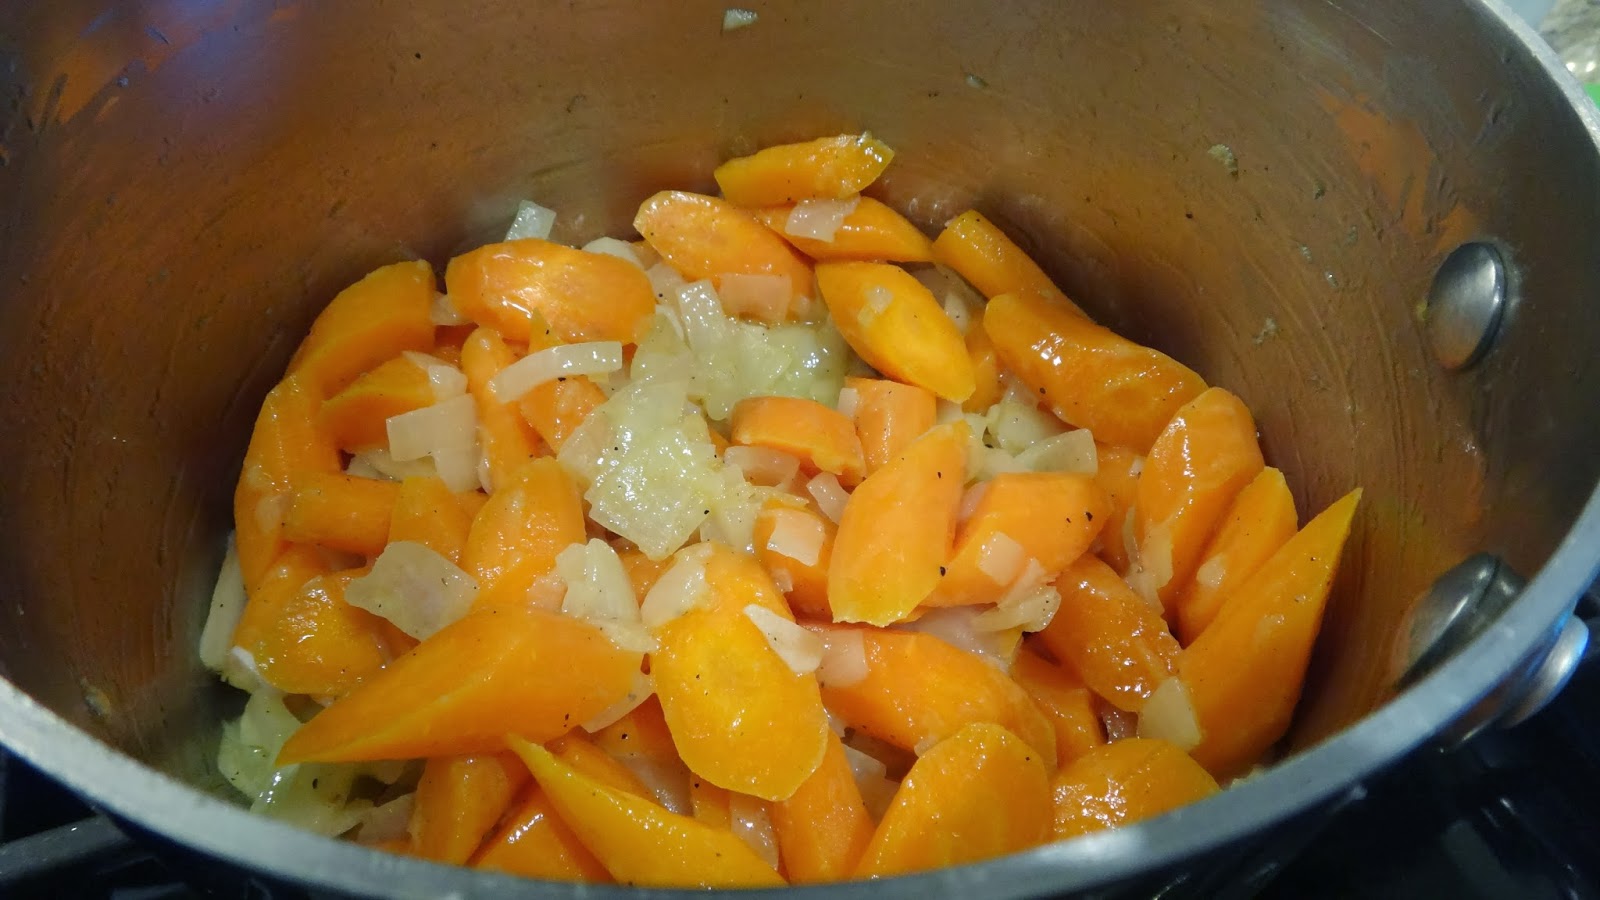
Step 4: in batches you will add the vegetables to cook and soften in the vinegar bath. Then remove with a slotted spoon onto clean towel. Then into a large bowl to dry slightly and cool. 


These are approximate times depending on how you slice your veggies, it could be a bit more or less. 

Carrots, celery and cauliflower 5-7 minutes

Green beans 4 minutes

Peppers, fresh chilies, fennel and onions 3 minutes

Eggplant 2 minutes

Step 5: add about 1/2 cup of the olive oil just to toss all ingredients in the bowl and then you will top off the rest once in the jars. 


Step 6: add the dried oregano, sliced garlic, chili flakes, celery seed, fennel fronds and chopped parsley and toss to combine. 

Step 7: carefully fill the jars, pressing down the ingredients trying not to break them while getting the jars filled. 


Step 8: using a chop stick you can pour over the great oil and move the veggies to let the oil get in all the cracks. Seal and Pasteurize as described in Step # 1. Or you can just store in the fridge and consume within a few days if you don’t wish to preserve.

Once the jar is opened you may wish to top off with a few more tablespoons of vinegar and you can also add a bit more olive oil. 

Any remaining pickle should be stored in the fridge once the jar is opened.

It is natural to have the olive oil solidify when in the fridge so don’t be alarmed. Before eating  leave the jar on the counter for a few minutes and it will go back to it’s liquid state. The cold will not harm the oil. 

Fire Roasted Salsa

You can make this salsa anytime! It is a simple salsa made with canned fire roasted tomatoes and a few other ingredients. Get out the food processor and in a few minutes you are done!

You will need:

  • 1/2 -1 fresh jalapeno pepper (ha- la payn-yo! pepper)
  • 1/4 -1/2 white onion
  • 2 garlic cloves
  • a handful of fresh cilantro/coriander
  • 1/2 tsp canned chipotle in adobo sauce
  • 1 fresh lime juiced
  • 1 tbsp extra virgin olive oil
  • salt and pepper to taste – it needs more salt than you think- so taste!
  • 1 8 oz can of fire roasted tomatoes
  • tortilla chips

Step 1: I add the jalapenos, onion, garlic and cilantro to the food processor first. I do chop most things at least a bit before adding it to the machine. Chop.

Step 2: add the salt and chipotles (you can buy them in a can or a jar typically) they are very hot so start with less and add more if you like.

Step 3: add the lime juice, olive oil, and finally the tomatoes.  Taste and adjust the salt and pepper as necessary. I also like mine with lots of lime.

Serve in a pretty bowl and get the Tequila baby!!

Mushroom Soup

You can easily make a mushroom soup that is clear or you can make it thickened without adding cream. I like to add a handful of rice to the broth while cooking it or add a handful of cauliflower. You can then blend half the mix or all of it to make a rich mushroom soup without the added calories.

You will need:

  • 2 pkg 227 grams white mushrooms and cremini mushrooms
  • handful of dry mushrooms – re-hydrated with boiling water
  • 1 litre vegetable broth
  • 1 small onion – chopped finely
  • 3 garlic cloves – minced fine
  • 3 tbsp Extra Virgin Olive Oil – Mandranova Cerasuola
  • 1/4 cup rice  or a cup of chopped cauliflower (or both)
  • 1 tsp fresh thyme leaves
  • salt and pepper to taste

Step 1: cook chopped onion with some salt and pepper in olive oil for 5-10 minutes until just starting to brown.

Step 2: add sliced mushrooms, chopped  re-hydrated dry mushrooms, thyme and chopped garlic. Saute for another 5-10 minutes until they are cooked and most of the water is evaporated.

Step 3: add half cooked mushrooms to a large pot with vegetable broth and rice. Cook 20 minutes until rice is soft.You can also add some cauliflower to thicken without cream instead of rice (or add both!)

Step 4: blend the entire mix in blender until pureed as you like it.

Step 5: add back the soup to the pot and add the other half of your cooked mushrooms. Stir and adjust salt and pepper as necessary.

serve with a drizzle more of great olive oil

or add a drizzle of cream or milk if you prefer.

Roasted Vegetable and Cheese Strudels

This is a great way to use up all those bits of vegetables and small pieces of cheese you have in the fridge and is a nice main for a Meatless Monday. Roast a medley of vegetables that you can toss with your favorite cheese and wrap in some Phyllo pastry.

 An individual flaky pocket served hot with a nice cool salad and dinner is served.

You will need:

  • 1 tomato
  • 1 red pepper
  • 1 green pepper
  • 4-5 cauliflower florets
  • 1 small onion
  • 1 leek
  • 1 small sweet potato
  • 1 small fennel bulb
  • 1/4 cup medium intense extra virgin olive oil – use your best quality stuff here
  • a generous sprinkle of salt and pepper
  • 1/4 grated Parmesano Reggiano
  • 3 cloves of garlic
  • a handful of your favorite mushrooms
  • broccolini – a few pieces
  • 1 small zucchini
  • a handful of baby spinach
  • more salt and pepper to taste
  • 1 tsp of herbs de provence
  • 2 tbsp great extra virgin olive oil
  • 1 cup shredded mozzarella
  • 1-2 tbsp pesto
  • 1/2 fresh grated Parmesano Reggiano
  • 4-5 sheets of phyllo pastry

This makes 4- 5 large hand pies.

Step 1: slice tomato, red pepper, green pepper, slices of cauliflower, onion, 1/2 leek – green portion (leave the white portion to cook later) sweet potato and fennel. Toss with olive oil and place on a flat baking tray. Add a generous sprinkling of salt and pepper. Roast in a 425 oven for 15 minutes.

 Step 2: with a spatula flip over vegetables and grate a generous sprinkle of Parmesan on top and bake for a further 10 minutes. Remove from heat and let cool.

Step 3: in a saute pan add a few tbsp of olive oil and saute your more tender veggies like the mushrooms, white portion of the leek, zucchini and I had some broccolini so I tossed it in as well. I added some herbs de provence and some salt and pepper. Saute on high heat until all veggies just start to brown and water evaporates.

Step 4: turn off heat once cooked and add your baby spinach. The residual heat with be enough to wilt the spinach.

Let all vegetables cool completely.

Step 5: rough chop all veggies and place in a large bowl. Add shredded mozzarella, grated Parmesan, pesto and mix. Taste and adjust salt and pepper as necessary.

Phyllo should be thawed according to box. Take out 5 sheets and cut in half.

Step 6: brush a sheet with a bit of olive oil or butter. Place a second sheet on top and brush the top  with a bit more oil.

Step 7: place 1 cup of mixed vegetables on the bottom of the rectangle. Fold like a spring roll making sure to brush the edges with more oil to have it stick. You can also freeze them at this stage.

Step 8: brush top with more oil, a bit of mozzarella cheese as well as some salt and pepper

Bake 20 minutes at 425 degrees F and serve hot.


Sweet Potato Gnocchi

Sheila asked me if I had ever used sweet potatoes to make gnocchi yesterday. I had always thought of sweet potatoes as being too wet for making gnocchi but, then I thought if you bake them or cook them in the microwave it could work. I found a few other recipes on the web and most used ricotta with the sweet potato or they were a paleo version using flours other than wheat. I wanted to try to make them just replacing the potato and here is my result. I am quite happy with how they came out. I prepared them with a bit of lemon zest, cooked in some buttery mild olive oil (you could use butter if you like) and a bit of parsley but I think fried sage leaves would work well too.

Thanks Sheila for asking me the question…YES you can use sweet potatoes.

You will need:

  • 350gr. or 2 small sweet potatoes – once cooked = 1 cup of mashed
  • 1 large egg
  • 1/2 cup finely grates Parmesano Reggiano
  • 10-15 scrapes of whole nutmeg
  • 1/4 tsp fresh grated pepper
  • 1/2 tsp sea salt
  • 3/4 cup all purpose flour (a bit more for dusting)
  • a few tbsp of great Extra Virgin Olive Oil – I used Temecula Estate a mild and buttery Californian
  • some fresh sage leaves or parsley leaves
  • more grated Parmesano

Step 1: wash and poke a couple of small sweet potatoes with a fork and microwave for 2 minutes. Flip over and cook 2 more and if still not completely soft cook another 1 minute and check until done. I suggest you place the sweet potatoes on a plate so that you get catch any leaks.

Step 2: slice open and scrape out hot flesh with a spoon into a bowl.

Step 3: you can mash with a potato masher or run them through a ricer. I always use a ricer for the regular russet potatoes but, this method worked fine because the sweet potato is not as dry as the potato.

Step 4: you should have a nice mash that is not too wet. Add a bit of fresh nutmeg.

Step 5: add an egg, freshly grated Parmesano Reggiano, salt and pepper. At this stage your mix will be rather wet. Add 1/2 cup of flour and gently fold in for a few seconds then turn out onto a counter or board. I basically use a scraper to fold over and incorporated the flour. Gnocchi can be tough if you work the dough too much.

I add the last 1/4 cup of flour by gently kneading the dough. You want it to hold together when you boil them but, you don’t want to overwork the gluten and make them hard.

Step 6: I divide the dough into 4 pieces and form into logs. I cut with a floured knife into pieces around 1 inch in size. I have a cute little gnocchi board to create some ridges but, you can form them on the back of a fork or just cook as is. Some people just press the tops to form a little dent. Place them on a floured sheet. You can cook them right away or freeze them.

Step 7: place some in a pot of boiling, salted water. Place them in the water and gently stir once so they don’t stick to the bottom. Wait until they float and cook 1 more minute. This will probably take 2 – 3 minutes in total. I remove them with a spyder and place them directly from the water to a heated pan.

Step 8: with a bit of great extra virgin olive oil or a bit of butter. Saute the gnocchi for a minute on each side to get a touch of browning. I grated a bit of lemon zest and tossed in some chopped parsley, salt and pepper.

Serve hot with a few scrapes of Parmesano Reggiano.

Asparagus and Pepper Soba Noodle Salad

Sometimes you just need something fresh and nourishing. Soba noodles are available in the Asian section of your grocery store and are made from Buckwheat which also happen to be a gluten-free option if made from 100% buckwheat flour. This salad is made with loads of fresh vegetables, all tossed with some Soba noodles and a tasty dressing.

You will need:

  • 1/4 cup mild olive oil (a bit more for sauteing your veg) – I used Temecula Olive Le Caprice de Nature
  • 1 tbsp toasted sesame oil
  • 1/4 cup soy sauce
  • 2 tbsp honey
  • 1/2 tsp flaked sea salt (if you don’t have it use regular sea salt)
  • 1 tbsp grated fresh ginger (I always freeze mine and grate it frozen. Keeps forever!)
  • 1 clove garlic – crushed
  • 1 tsp Sriracha chili sauce
  • 1 tsp finely minced red chili – mine is a medium spicy
  • 1 pkg of Soba Noodles – 250 gram pkg
  • 2-3 sliced scallions/spring onions
  • 10 spears of asparagus – sliced into stripped with a peeler then the rest chopped
  • 1/2 red pepper – sliced into thin strips
  • 1/2 apple – sliced into strips
  • fresh cilantro leaves
  • fresh sprouts or baby shoots or different greens

These noodles are easily found in your favorite Asian market or even in the Asian section of most grocery stores.

Step 1: I like to gather all my ingredients and chop, peel or measure all things so that when I am ready to cook everything goes quickly and more importantly you don’t accidentally forget something! Get your water boiling -add a good pinch of salt and cook your noodles according to the package. Drain and toss with a bit of your dressing or plain olive oil so they remain separated or these noodles will stick together like glue.

Step 2: take some washed Asparagus and peel long strips with a potato peeler. You will make strips along one side and then get to a point where the peeler no longer works properly. I flip it over at this stage and peel strips from the outer edge towards the center. I do this with each spear, then I take those centre pieces and chop them finely for another texture in my salad.

Step 3: chop some apple, red pepper and whatever other vegetables you love.

Step 4: in a saute pan add some of your favorite extra virgin olive oil, some salt and pepper and saute on high heat for a minute or two.

Step 5: in a small bowl create a dressing by adding  1/4 cup olive oil, sesame oil, soy, honey, salt, ginger, garlic, Sriracha and red chili for a bit of kick. Mix well.

Finally, toss all your briefly cooked vegetables, along with your noodles in the dressing. You can eat this salad warm or room temperature. I garnish with some cilantro leaves and some baby greens.

Fresh and rejuvenating!!!

Butternut Squash and Ricotta Ravioli with Pinenuts and Sage

This is delicious combination of Ricotta cheese and butternut squash served simply with good olive oil, some pine nuts and fresh sage leaves. If you do not have a ravioli form these can easy be made with a cookie cutter or even a glass to cut the ravioli. I have also added a bit of semolina to the dough to add some texture but you can make a smooth dough by using all flour and omitting the semolina or cornmeal. These can be frozen perfectly for a rainy day when you want something quick.

You will need:

  • 1 small butternut squash – roasted for 40 minutes – then pureed or squished- puree =1 3/4 cup
  • 1/3-1/2 cup grated Parmesan cheese
  • 1/2 tsp fresh grated nutmeg
  • 1 cup ricotta (drained for 1 hour or pressed in a paper towel)
  • 1 tsp salt and 1/2 tsp pepper
  • 3-4 fresh sage leaves (chopped fine)

Pasta Dough

  • 2 1/4 cups flour
  • 1/4 cup semolina or fine cornmeal
  • 1/2 tsp salt
  • 4 large eggs (room temperature)
  • 1 tbsp extra virgin olive oil
  • 1 tbsp water

Once ravioli cooked add to pan:

  • more best quality extra virgin olive oil finishing in pan (you could also add a bit of butter if you like)
  • few leaves of fresh sage
  • salt and pepper
  • fresh grated Parmesano Reggiano
  • a sprinkle of pine nuts (as much as you like or just a tbsp per serving)

Step 1: Take a small butternut squash and slice into a few large pieces. Add 1 tbsp olive oil and cover with foil. Roast at 375 degrees F for 45 minutes – 1 hour depending on the size of the squash. You want the squash to be very soft once cooked. I don’t remove seeds or skin until the squash is cooked. I scoop out seeds (which you can roast and salt) and then scoop out the very soft flesh. I discard the skin.

Step 2: in a small bowl add the squash and puree easily with a fork. You do not want the squash too wet so roasting is better than boiling it. If you find the squash very wet you can press in a paper towel or clean tea towel. You are looking for an end product that is like a thick paste.

Step 3: add salt (mine is grey salt but, any kind you like is fine)

Step 4: add a few scrapes of fresh nutmeg.

Step 5: add the ricotta cheese and grated Parmesan cheese. If your ricotta is very wet you can drain it for 1 hour in a sieve or press in a cloth/ or paper towel to remove most of the water.  The squash has water in it and you do not want the filling too wet. You can also add more cheese!

Step 6: add about a tbsp of chopped sage leaves. Put in fridge while you make the pasta.

Step 7: add the pasta ingredients into a food processor. You can add the semolina or omit it entirely. If you omit it add the 1/4 cup equivalent in flour to the recipe. The “all flour” dough is a much smoother, fine dough.

Step 8: process until it starts to form a ball (maybe 15 seconds)

Step 9: take ball out of processor and with a bit of flour form a nice smooth ball. Knead it for a minute or two to get a nice smooth ball.

Step 10: wrap the dough and let rest in the fridge for 30 minutes.

Step 11: remove from fridge and cut ball in half and then each piece into 4 = 8 even pieces.

Step 12: flour each piece and start to run through the largest setting on a pasta roller (of course you can roll this by hand with a bit more effort!)

I run the dough through a few settings. You do not want it too thin or the filling will break open when cooking the ravioli.

Step 13: roll out 2 sheets and place one on the bottom of a generously floured ravioli form (I just got this one and I love it!) I used to make them by placing one sheet on the bottom and placing spoonfuls in the same kind of order then placing the next sheet on top and pressing in between and either cut with a knife to make squares or use a small glass to form round ravioli.

This press has a need form to make the ravioli.

Step 14: add a teaspoon of filling to each hole. I add a bit of water around each  by dipping my finger in a glass of water.

Step 15: place top sheet on ravioli and take a rolling pin to seal and cut each. I love the open bottom to this mold so you get nice fat ravioli. Remove excess dough around edges. Flip mold and knock on counter for ravioli to release from mold.

Step 16: toss in lots of flour and place on a plate or sheet to be frozen individually. Do not let them touch while freezing.

Step 17: once frozen put them in a Ziploc bag. They can be removed and boiled frozen right from the bag when you want to cook them.

Step 1: to cook: boil a few ravioli in salted water at a rolling boil. Wait until they float to the top and cook 1 minute. In a saute pan add a few tbsp of extra virgin olive oil. I used a lovely Tuscan variety called Viola Sincero which is a Moraiolo oil that is a nice medium oil with a nice peppery finish.

Step 2: add some buttery pine nuts and toast for a minute or two until just starting to brown. I keep the pine nuts in the freezer since nuts go rancid easily if left out. Add some fresh sage leaves. They will fry and get nicely crisp. Cook 1 minute.

Step 3: add your cooked ravioli to the pan and cook another minute.

Serve with a generous shaving of Parmesan or Pecorino and don’t forget the salt and pepper!


Sun Dried Tomato, Garlic and Olive Oil Pasta

“Butta la pasta!” is an expression in Italian which means throw in the pasta. This was what the farmer would yell from the field on his way in. I like to say this for the simplest, fastest pasta sauces like this one. In the time it takes to make the sauce the pasta is cooked!!

This is a variation on a typical pasta with a simple pomodoro (tomato) sauce. I have taken a combination of sun dried tomatoes, fresh tomatoes, garlic, chili flakes, fresh basil and great extra virgin olive oil to create a fast dinner. You can add a drizzle of aged balsamic vinegar and a sprinkle of Parmesano Reggiano to finish this classic. You can also use a penne or spaghetti pasta if you prefer but, try this. The sun dried tomatoes add another layer of flavour and the olive oil creates a simple glorious sauce.


You will need:


  • for 2 people
  • 250 grams or half a box/bag of dried pasta – I used a Casarecce which is a tube shaped like an S
  • 1/4 cup extra virgin olive oil (bit more to serve) – I used a robust Mandranova Nocellara
  • 1-2 ripe tomatoes – I want to have a fruit with lots of water (chopped = around 1 cup)
  • 1/2 tsp hot chili flakes (peperoncino)
  • 6 sun dried tomatoes soaked in oil – chopped finely
  • 3-4 cloves garlic – sliced or rough chop
  • 1 tsp dry oregano
  • 1 tsp Italian or Tuscan dry seasoning mix
  • generous sprinkling of salt and pepper
  • 2-3 tbsp sliced basil for serving
  • 4 tbsp of freshly grated Parmesan or Pecorino cheese (grate it yourself for best taste)
  • 1 tbsp aged balsamic vinegar (optional*)


Gather your ingredients.


Step 1: in a large pot of boiling, heavily salted water cook your pasta according to directions on package. You want your pasta to be cooked to al dente (still a bit hard to the tooth)

Step 2: chop your fresh tomatoes – you want them to have a lot of water content because this will create your simple sauce.

Step 3: chop your sun dried tomatoes and garlic. Have everything ready to go because your sauce will be done in the time it takes to cook the pasta.

Step 4: in a large pan on medium heat add good quality extra virgin olive oil and tomatoes. I want the tomatoes to sweat out their liquid which will mix with the olive oil to help create a gorgeous sauce. You may think this is allot of oil however, it is a glorious healthy fat that will create the most beautiful simple coating for your pasta. Add a generous sprinkle of sea salt and pepper. Cook for 2 minutes. Tomatoes love salt don’t omit this. You can always start with some and add more at the end once you taste it if you feel unsure of your amounts. I never like to add measurements for salt and pepper because you need to add and taste to get accurate amounts.

Step 5: add your chili flakes, your sun dried tomatoes, garlic and seasonings. Stir and cook on medium low for another 4-5 minutes. The oil gets beautifully infused with the other components and slowly thickens slightly. Taste it and adjust seasonings as you like. It is not allot of sauce however, it is just enough to coat the pasta and Italians do not typically over sauce their pasta like North Americans do. Try it!

Step 6: add your pasta to the sauce and always keep some pasta water. The starchy liquid always helps to thicken the sauce and helps to create a glossy coating. I have used maybe a 1/4 cup of the pasta water in my preparations here. Toss and cook another 2 minutes. This is why you never over cook the pasta because it will continue to cook in the sauce.

Toss in your chopped basil and half of your grated cheese, taste it. Add more salt and pepper if necessary. Mix and serve.

 On the plate I add the additional cheese and a drizzle more of fresh olive oil for another layer of taste and if you like a drizzle of aged balsamic vinegar. It is simple, sweet, a bit spicy from the chili flakes and perfectly balanced and delicious.

I love a great plate of pasta and tomatoes, basil, cheese, garlic and good olive oil is once of the best.

Mamma Mia!!

Marino’s Magnificent Pesto

Pesto, Pesto, do your very besto!! 

In the 1958 movie Houseboat starring Sofia Loren and Cary Grant she sings “Presto, Presto” but, I always replace it with Pesto.

I have made pesto lots of times however, when I was recently in Imperia, Italy. Marino a Master known for his pesto (and that is saying something in Liguria where pesto is from!) taught me and my class of Olive Oil lovers his secret formula for making the BEST you have ever had!!

Try it once and you will be ruined for life!

 I dream about this pesto.

You will need:

  • a mortar and pestle
  • 1 large clove of garlic (yes! you heard me only 1 large one. I promise it is all you will need)
  • 1 heaped tsp of Maldon flaked sea salt
  • 4 bunches (21 gram containers) of tender young basil leaves – just use the tender small ones
  • 1/4 – 1/3 cup fresh pine nuts
  • 1 cup (a bit more if you like) finely grated Pecorino Romano or Parmesano Reggiano – only fresh
  • 1/4 – 1/3 cup best quality extra virgin olive oil – I used Mandranova Nocellara from Sicily

This is Marino. He is a chemist and the Vice President at ONAOO which is National Assoication of Olive Oil Tasters in Imperia. One evening we were all at a beautiful dinner and Marino shared his secrets to making truly the best pesto I have ever had in my life!

First, let me tell you he is very particular about every component and the order in which you must add these parts to make the perfect pesto. This is his mortar and pestle which he has had for over 50 years. The stone mortar is over 1000 years old and the pestle is make from boxwood. What you can’t really see in the photo is the small bunches of tender, small basil leaves have a DOP designation around each bunch to certify they are grown in the area. This is the kind of designation that certifies extra virgin olive oils and wine. Seriously!

He makes his mix in the mortar in a specific order which I will show you. Once he has completed the pesto up to the last stage he removes every trace of the mix into a bowl and then only will he add the olive oil. He explained that he doesn’t want the oil to soak into the stone and he doesn’t want the oil on his pestle which is wood and could penetrate and ultimately go rancid after time.

This is my mortar and pestle. Not as pretty as his but, it will have to do.

Now, I understand that this is the wrong time of year to be making pesto but, like I said I was dreaming about how good it was and I was lucky enough to find these living basil plants in my grocery store (not DOP!) and they were pretty close to the size of bunches he had when he was making his pesto so I thought why not. These packages are 21grams each and I used 4 to make this recipe.

Step 1: add the 1 large clove of garlic to the mortar along with the flaked sea salt. Crush and make circular motions to get the garlic to almost dissolve and form a paste.

Step 2: carefully remove only the leaves from the plants and start to crush and blend in circular motions to completely pulverize the basil. This will probably take 3-4 minutes eahc time. You want it as smooth as possible before you add the next package.

Step 3: add each bunch and mix until very fine and smooth. In the end you will think you don’t have much pesto at all. It will be maybe 1/2 cup total. Take your time on this stage, you must make it smooth and creamy.

Step 4: add your pine nuts. You can add up to 1/3 of a cup if you like. I used a big heaping 1/4 cup. Crush and move pestle in circular motions until you have a smooth paste. At this stage it will turn a light green and the room will be gloriously scented with pesto!

Step 5: add your beautiful cheese and mix again until smooth and perfectly combined.

Step 6: scrape every bit out of the mortar and into a small bowl. It will not seem like much. It is approximately 1 cup of paste.

Step 7: add your oil a bit at a time until you get it to the consistency you like. I added just over 1/4 cup of Mandranova Nocellara. Now taste it and be prepared to be amazed!

Go on! taste it….perfect!

Toss it on your favorite pasta. Serve with a bit more grated cheese and a drizzle of oil. I think I wiped every bowl clean so I didn’t waste a drop! You can also just lather it on a piece of bread and you should, to taste that super concentrated flavour. I think I hear angels singing!

If you have any left you can freeze it in cubes then save in a Ziploc bag for another day.

Carrot – Coconut Soup from the Clayburn Village Store & Tea Shop


This soup is simple to make with few ingredients, but the flavour is complex and just a bit spicy.


 The recipe comes from the November issue of Bon Appetit magazine. It is a reader favourite from The Clayburn Village Store & Tea Shop in Abbotsford, British Columbia, Canada. I was there recently and enjoyed a wonderful lunch.


 It is located just 1 hour outside of Vancouver on Clayburn Rd. and is definitely worth the drive. An old fashioned Tea Shop with exceptional soups and sandwiches. It is the perfect place for a delicious lunch or great dessert. I make a special trip there for their warm current scones and the perfect pot of tea. The store also has a tremendous selection of candy and at the back there is a little section with a wonderful array of olive oils, vinegars, mustards and  loads of special pastas and food products. 


The place is quite special! Follow past this recipe for more pictures.


You will need:


  • 1/4 cup (1/2 stick) unsalted butter
  • 1 lb. carrots, peeled, chopped
  • 1 medium onion, chopped
  • Kosher salt, freshly ground pepper
  • 2 cups low-sodium chicken broth (a bit more to thin out later if you like)
  • 1 13.5 oz. can unsweetened coconut milk
  • 2 tbsp Thai-style chili sauce, plus more for serving
  • Fresh cilantro/coriander leaves (for serving)


Thai Sweet Chili Sauce is similar to a plum sauce, but with a bit of heat (not much) and can be found in most Asian sections of any grocery store.


Step 1: gather all ingredients. Peel and chop carrots. My bag is a 2 lb. bag so I used half which was 7 small carrots. Chop onion.


Step 2: Melt butter in a large saucepan over medium-high heat. Add carrots and onion, season with salt and pepper, and cook, stirring often, until carrots are softened, 15-20 minutes.


Step 3: Stir in broth, coconut milk, and 2 tbsp chili sauce. Bring to a boil, reduce heat, and simmer, stirring occasionally, until vegetables are very soft and liquid is slightly reduced, 40-45 minutes.


Step 4: Let soup cool slightly, then puree in a blender until smooth. Reheat in a clean saucepan, thinning with water or broth to desired consistency; season with salt and pepper.


Divide soup among bowls (serves 4) and drizzle with a bit more chili sauce and some fresh cilantro leaves. Soup can be made 3 days ahead. Let cool: cover and chill.


The perfect cup of English Tea which you can buy in the back along with their best selling item a fantastic dill mustard from San Francisco.


They have the best warm scones served with double cream and jam!! heaven.


They also serve excellent pies and desserts like this Sticky Toffee Pudding.


Don’t you want to sit buy the fire and have a nice pot of tea and something delicious to eat?? I wish I was there right now.


Take a bag and fill it up with your favourite candy.


This is my favourite section of the store. I spoke with the owner for a good solid hour about his passion, balsamic vinegar. He shared his knowledge and memories from wonderful trips to Italy. He explained the various differences to the good quality vinegars and olive oils they sold. He then took out a small wooden box and shared a few precious drops of his personal bottle of best balsamic vinegar. A tiny bottle, extremely aged to perfection and worth over 300 Euros. This vinegar was simply glorious, sweet and thick like magnificent syrup!


The shop is closed each Jan, May and Sept so they can travel to places like Spain and Italy discovering wonderful oils, vinegars and speciality products to sell back in Abbotsford.


 Good food and magical experiences can happen in the most unlikely places! 


Thank you Trish and Bryan for a wonderful lunch and fascinating conversations about balsamic vinegars and your travels. Keep up the good work, I will be back soon!


If you are near Abbotsford you must stop by.