Sweet Potato Rolls

These are yummy soft rolls that are great as a dinner roll or a hamburger bun. They have the added benefit of having sweet potato in them and freeze really well. You could of course make this recipe into a single loaf. I would braid it and make a sweet potato challah.


You will need:


  • 2 small sweet potatoes (to equal 1 cup puree) or you can use canned
  • 1 cup milk – warmed 45 seconds in micro
  • 2 tsp regular dry yeast
  • 3 tbsp olive oil
  • 2 egg yolks
  • 4 cups flour (all-purpose or bread flour)
  • 1/2 tsp sea salt


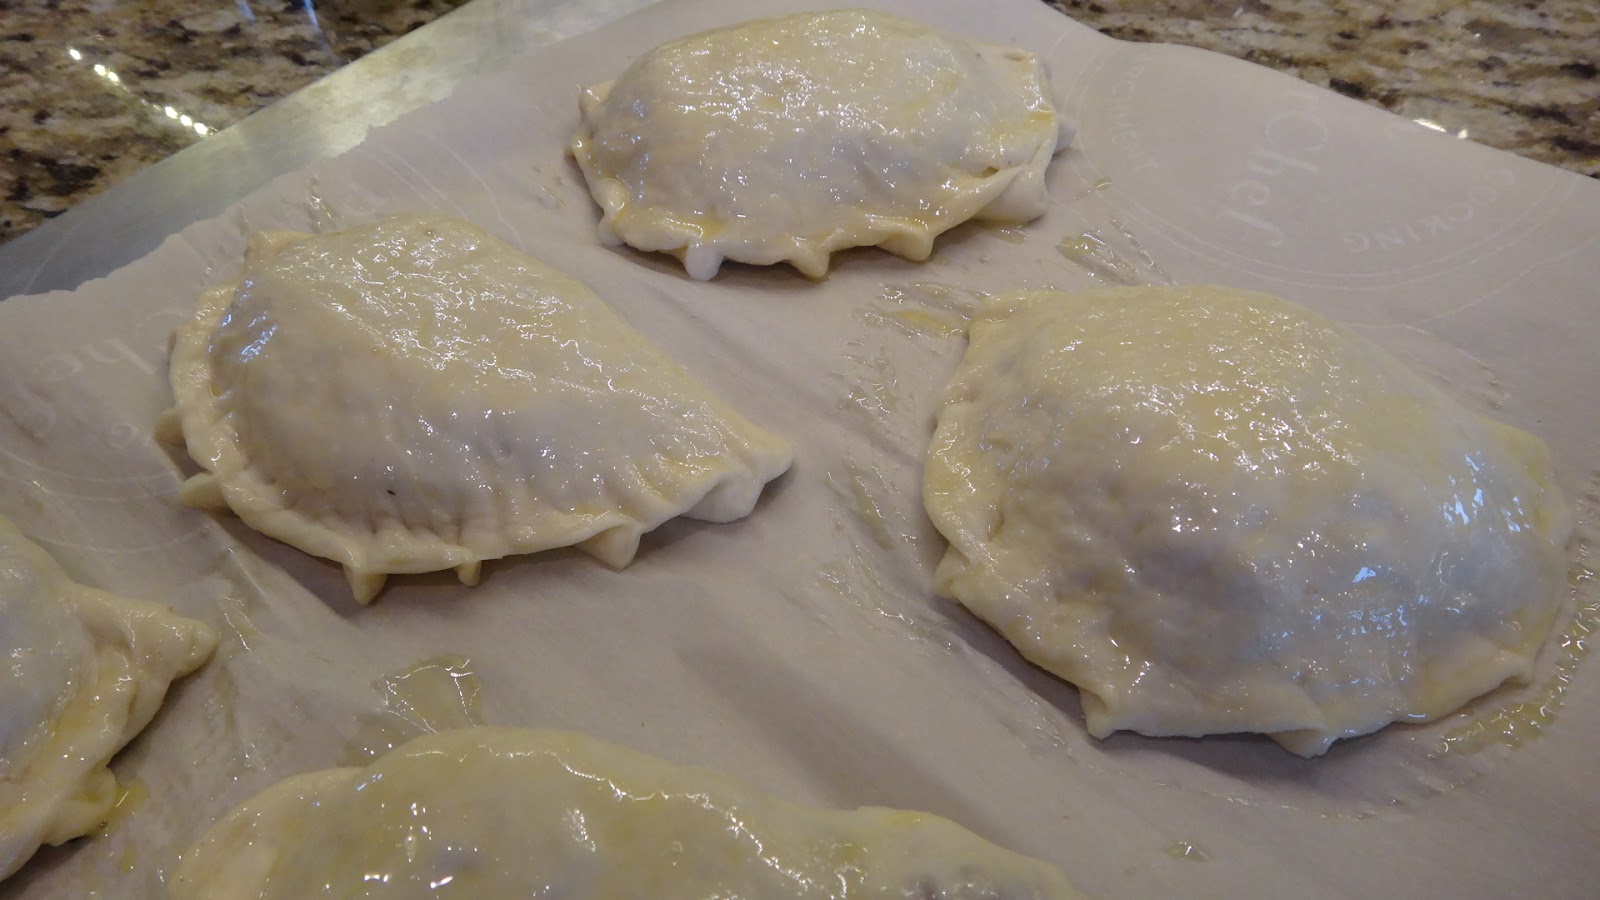
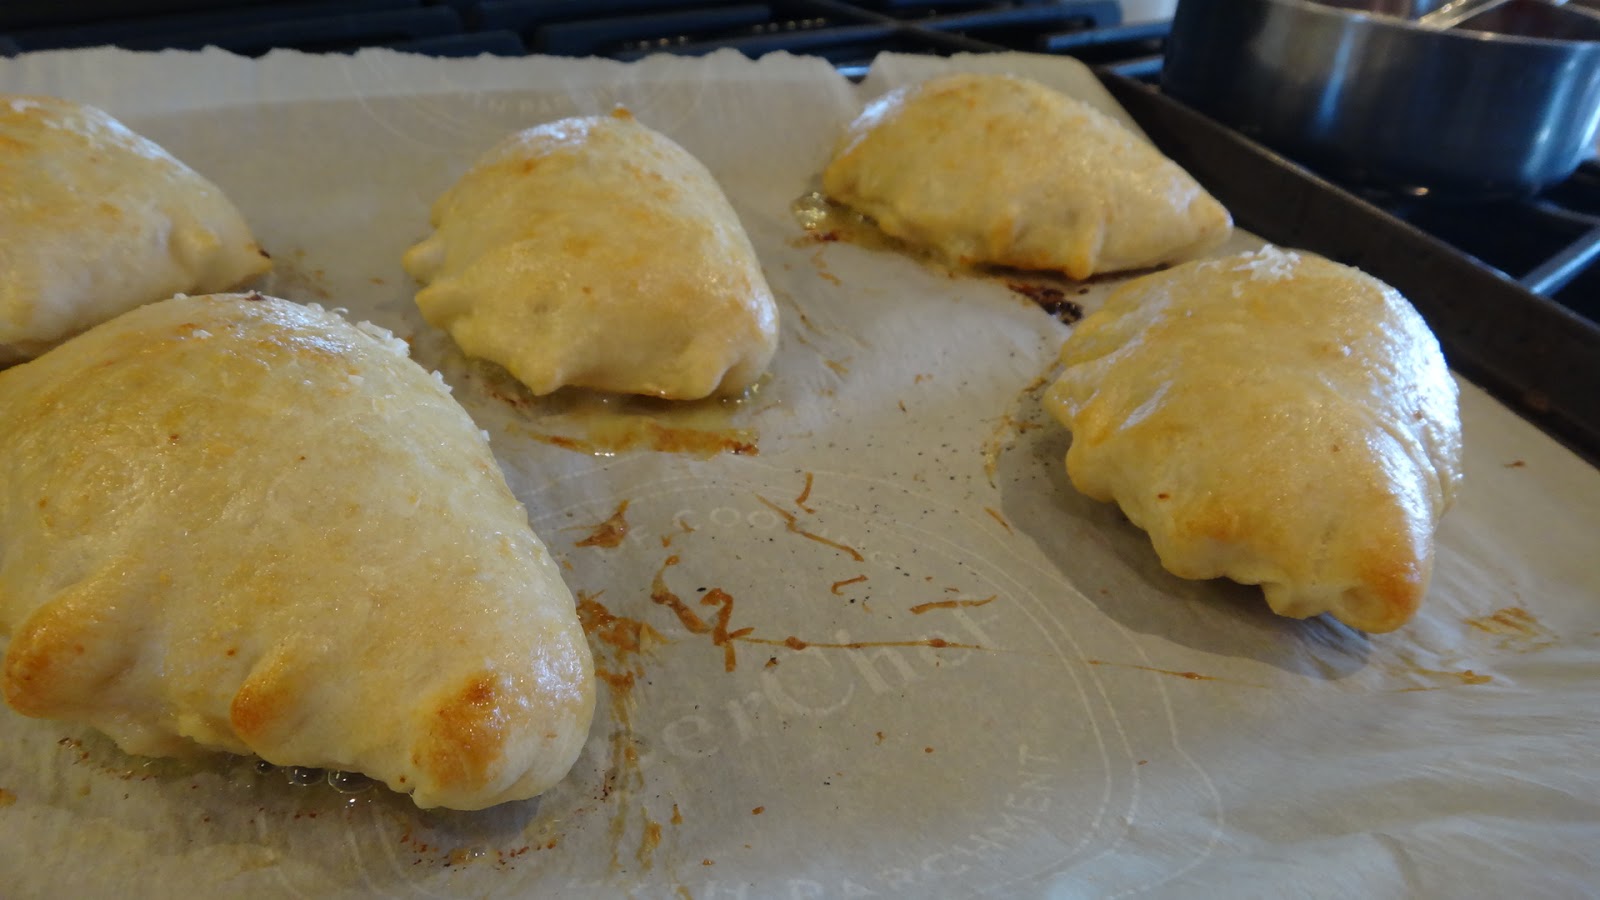
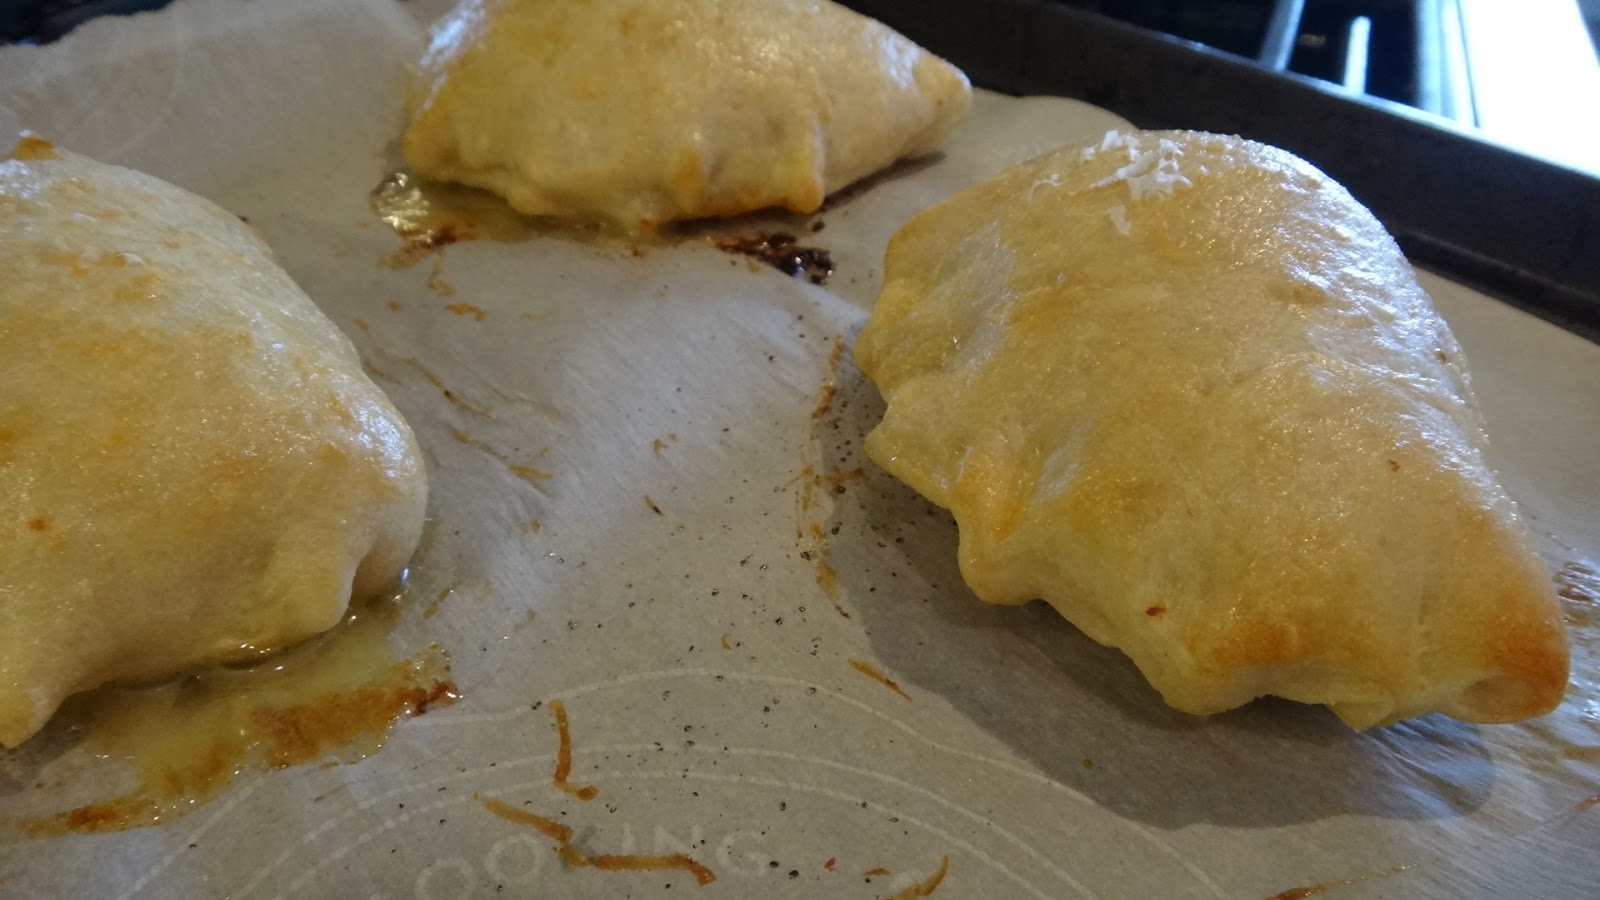
Heat oven to 400 degrees F bake 8 minutes then rotate pan and bake another 8 minutes. Brush with butter or olive oil when they come out of oven.


Step 1: I cooked  2 small peeled sweet potatoes (this is not a yam…look it up on the web) until soft. This takes approximately 20 minutes.  Drain water.


Step 2: place in food processor and puree until smooth. Let cool.


Step 3: place milk in a measuring cup and microwave 30 seconds or until warm to the touch but, not hot. Add yeast, stir and wait 5 minutes until it starts to bloom. (float to the top)


Step 4: in a large bowl add your sweet potato puree, the milk and yeast, olive oil and egg yolks. Stir to combine.


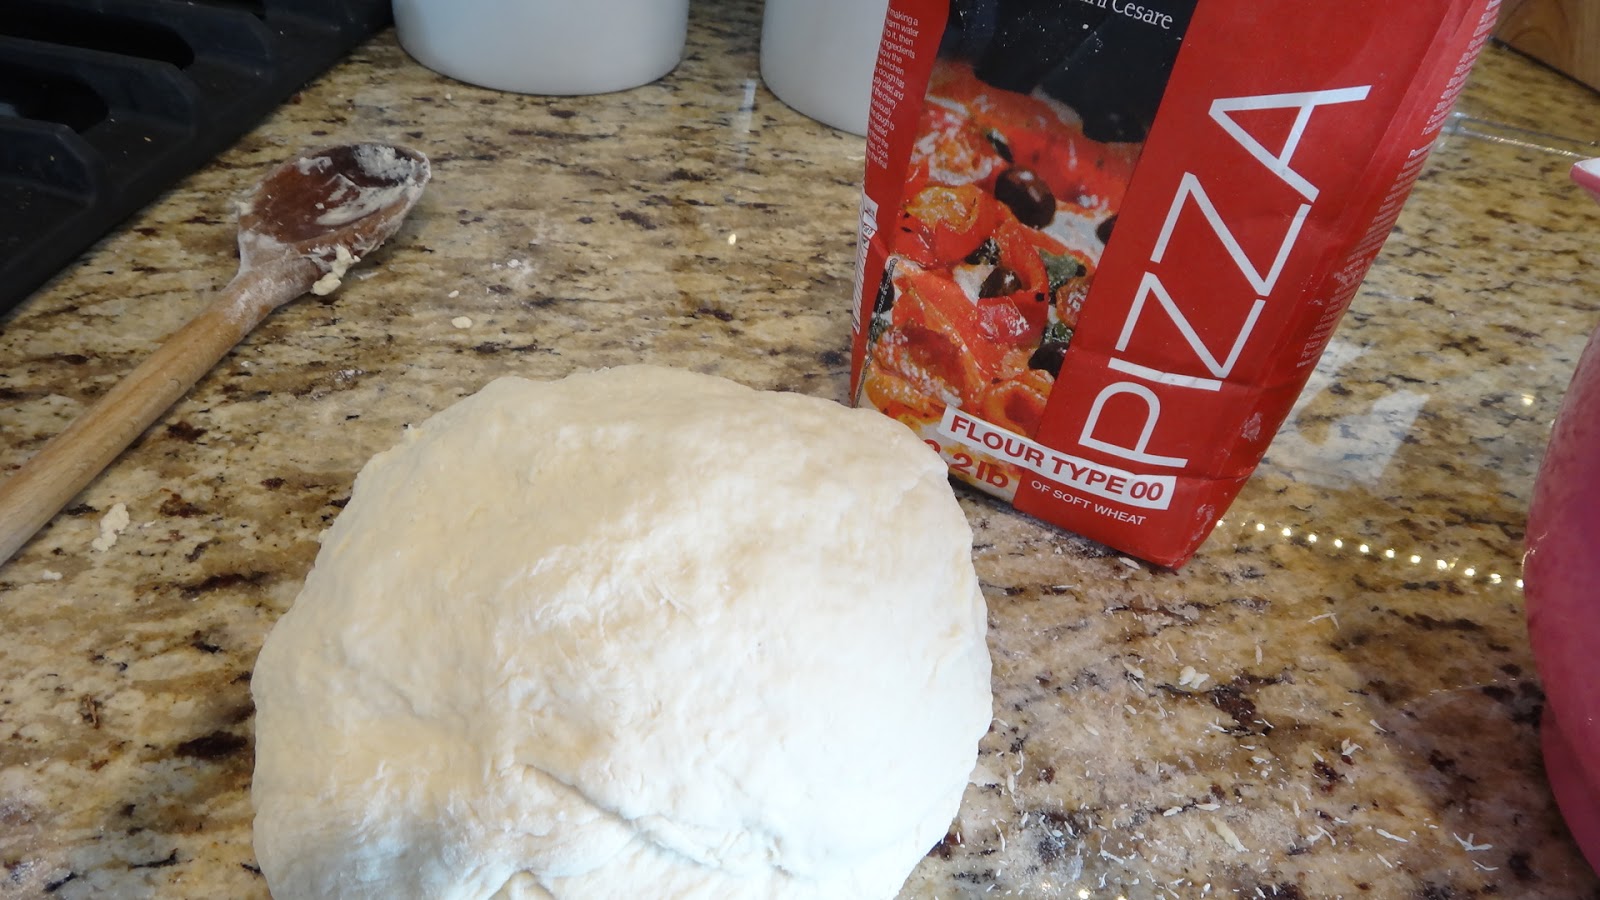
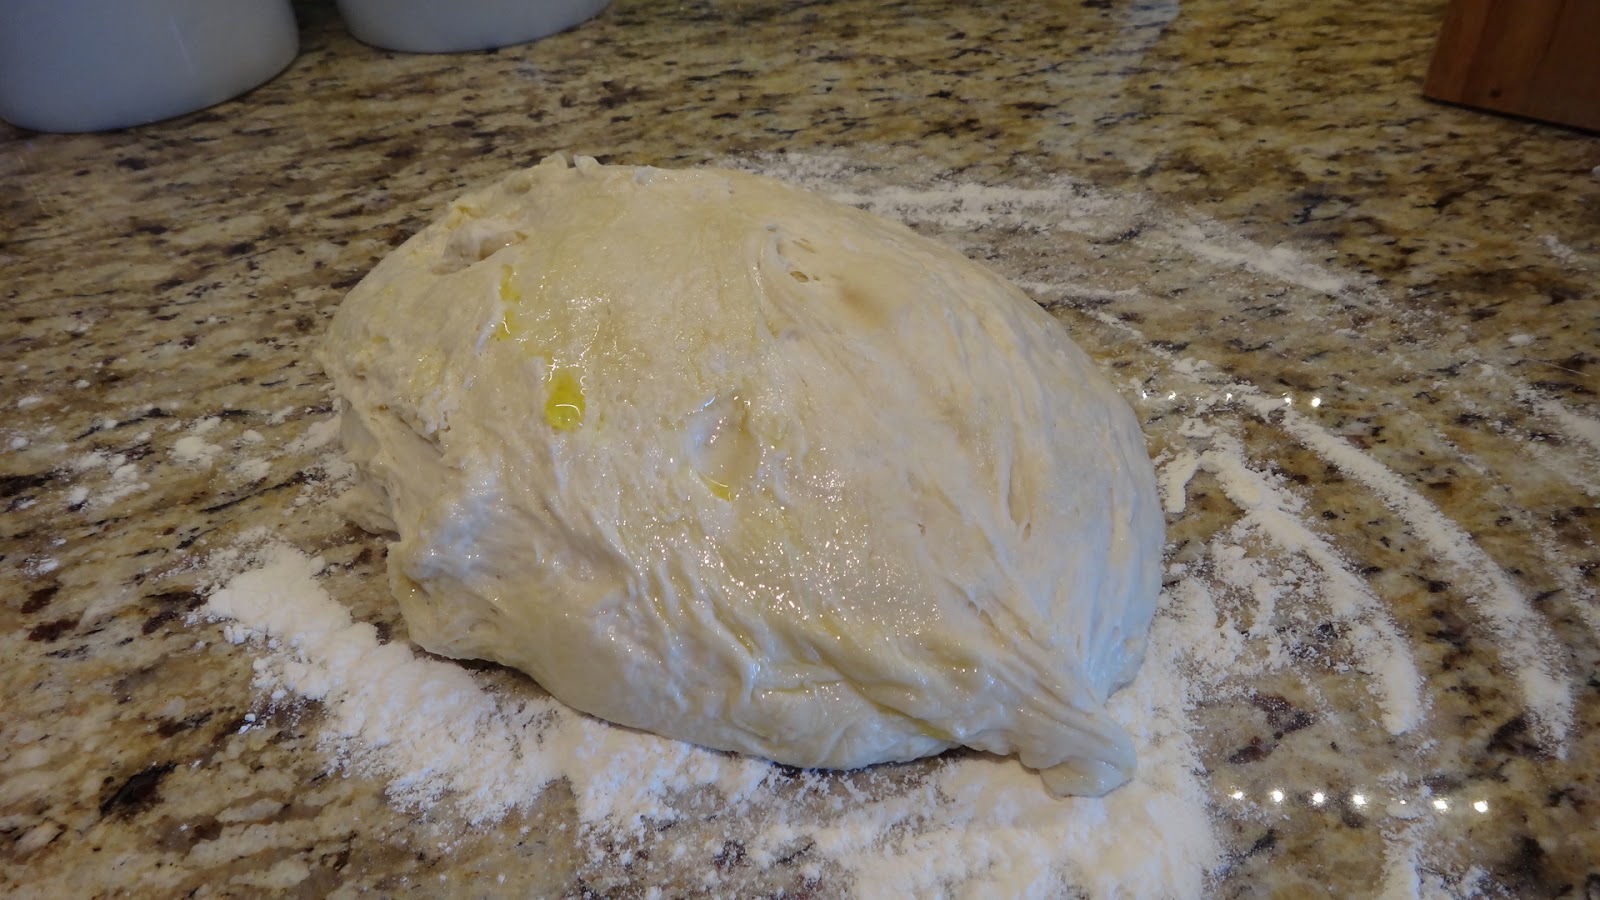
Step 5: add flour and lastly add salt. Mix in bowl until it becomes too stiff and then scrape out contents onto counter and continue to mix and incorporate flour until it forms a smooth dough and add flour until no longer sticky. You may need a bit more flour but add a tbsp at at time until dough is soft and smooth.


Step 6: place dough in an oiled bowl and cover. Let rest until doubled in size, 2 hours.


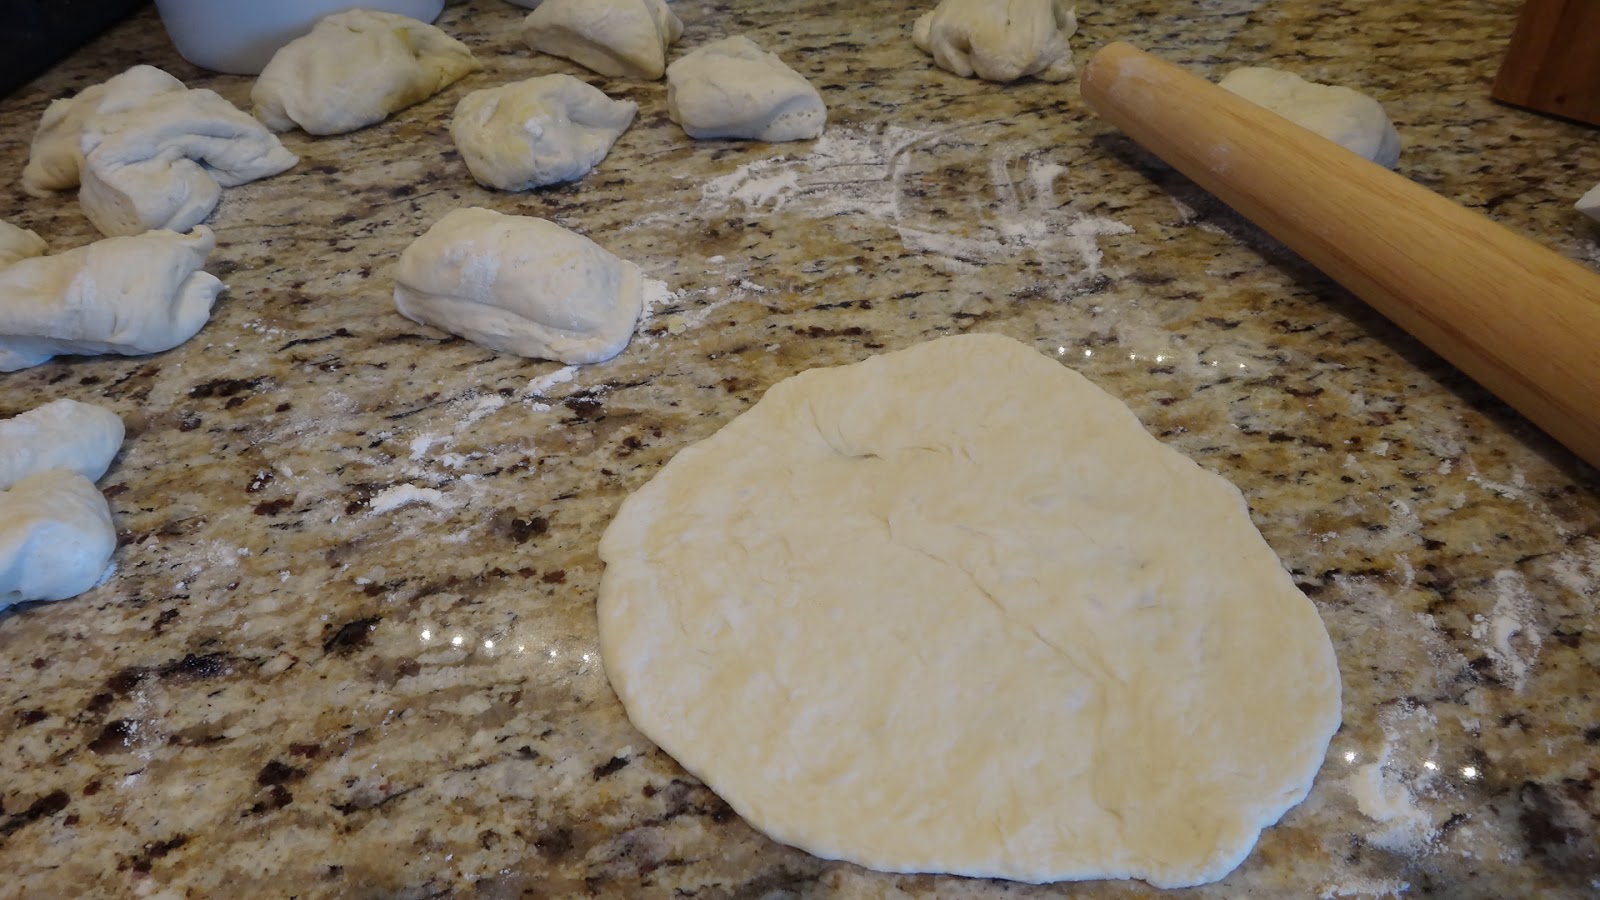
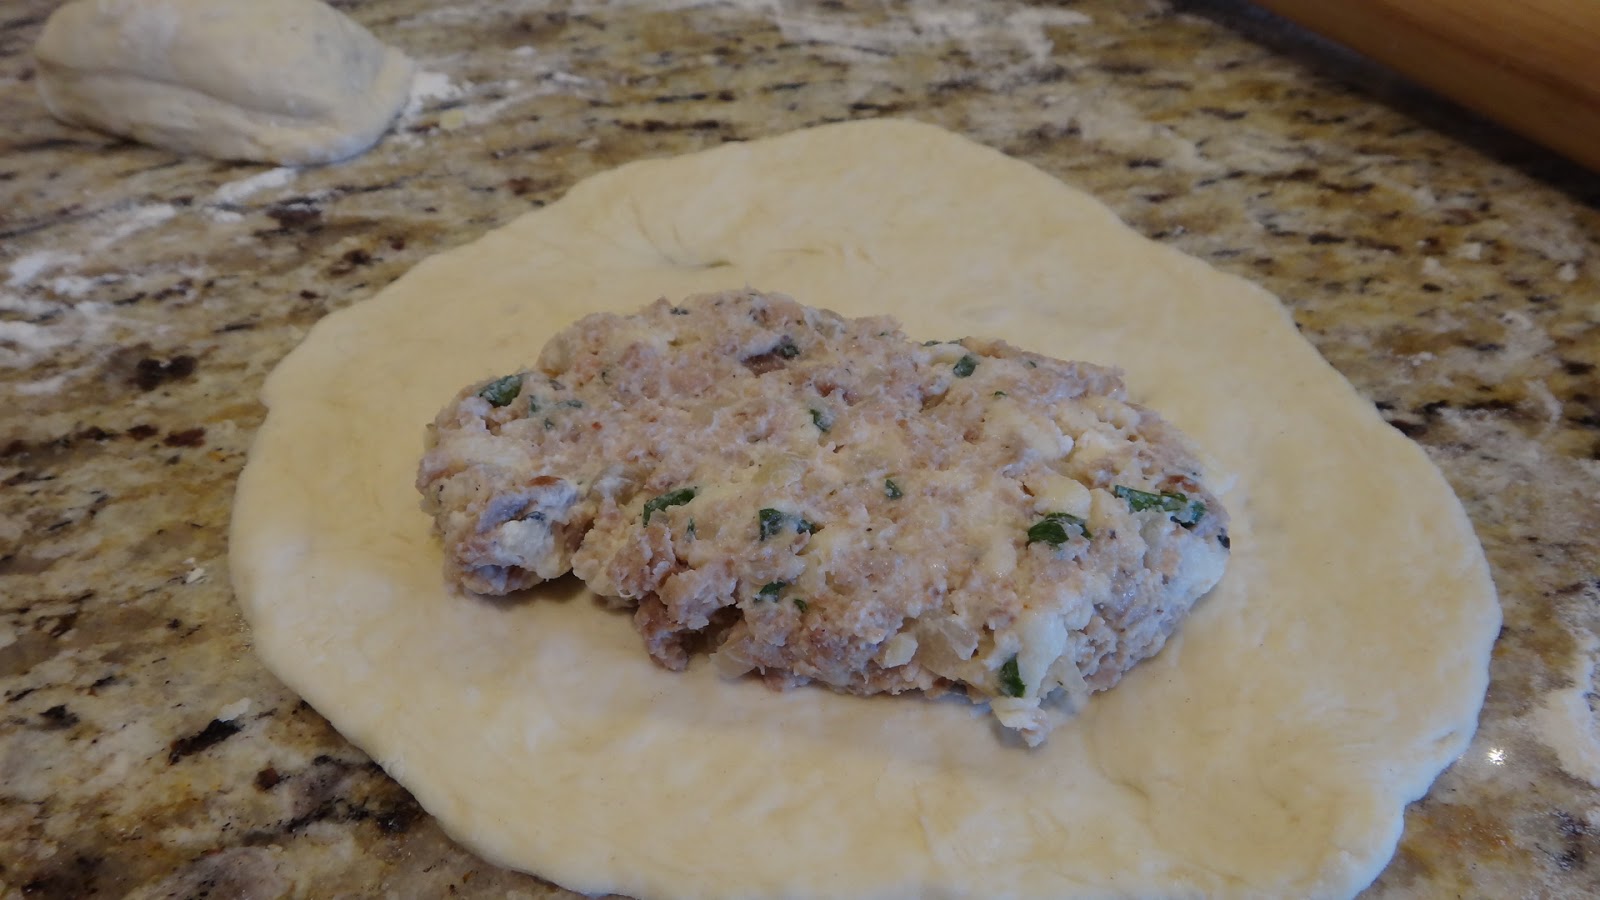
Step 7: turn out dough onto lightly floured counter and divide dough into half and then each half into halves and keep doing this until you have 16 balls if you wish to make rolls. I then roll out the dough ball and then create a knot.  Let double in size again which takes approximately 45 minutes.


Step 8: place on parchment lined sheets and bake in a 400 degree F oven for 8 minutes, then turn the pan and bake another 8 minutes until lightly browned on top.  You can brush them as soon as they come out of the oven with a bit of butter but, I use great olive oil. Cause I like it better than butter and it’s so much healthier than butter. You do whatever makes you happy!


YUM!


Ma

Lemon Kale Ricotta Shells


Pasta shells stuffed with Ricotta and Kale served with a simple marinara sauce.


You will need: 


10 shells cooked – perfect for 2 people

1 cup ricotta

1/4 cup Parmesan (plus a bit more to top)

1 tbsp lemon zested finely

1 egg yolk

1 spring onion – chopped

1 tsp fresh thyme – chopped

1 tsp fresh basil – chopped

1 tsp fresh parsley – chopped

2 kale leaves- cut into strips cooked with 1 clove garlic and 1 tbsp olive oil

salt/pepper to taste


Marinara Sauce

  • 1 14oz. can of tomatoes
  • 2 cloves garlic
  • 1/4 tsp chili flakes
  • a few basil leaves
  • 1 tbsp fresh parsley
  • 3 tbsp olive oil – I used a beautiful Italian Titone
  • salt and pepper to taste


Step 1: prepare your ricotta filling. Remove the soft leaves from the base of the kale leaves.  Slice kale into small strips.


Step 2: chop your spring onions basil and parsley. Add to the ricotta cheese (mine is a cow and goat cheese combination and is really nice) Add egg yolk, Parmesan and lemon zest.


Step 3: add chopped kale, chopped garlic and olive oil to a pan and cook 5 minutes or until softened. Let cool.


Step 4: chop kale and garlic into fine mince and add to ricotta mix. Taste and add salt and pepper. Set aside.


Step 5: boil pasta shells in boiling heavily salted water according to directions on box. I always add a couple extra in case some break during cooking.


Step 6: prepare easy marinara. Chop and mix all ingredients in a bowl. You do not need to cook this sauce.


Step 7: fill cooled shells with cheese and place in an individual ramekin. Add sauce to the bottom and then place shells and drizzle a bit of sauce or alot of sauce depending on what you like. You can add a bit of grated Parmesan or mozzarella to top.


Bake in a 350 degree F oven for 20-30 minutes until cheese and sauce is hot, bubbling and melted.


I prefer a bit of sauce.


Charmoula on Baramundi


Charmoula is a condiment that is common in Algeria, Morocco and Tunisia. It is a sort of salsa or some people puree it to create a marinade that is delicious on fish or chicken or even toasted bread. It has tomatoes, peppers, chilies, mint, cilantro, parsley, great olive oil and loads of spices.


You will need:


  • 2 pieces white fish – I used a Baramundi
  • 4 tbsp olive oil – I used a strong Spanish Fuenroble
  • 1/2 tsp ground coriander
  • 1/2 chili d’arbo flakes
  • 1/4 tsp ancho chili powder
  • 1/2 tsp cumin seeds
  • pinch of saffron in 2 tbsp hot water
  • handful fresh mint
  • handful fresh cilantro
  • 1 chopped tomato
  • 1/2 cup chopped jarred peppers- I used 1/2 small jar
  • handful of parsley
  • 1/2 lemon zested and juiced
  • 1 tsp fresh grated ginger
  • 2 spring onions
  • salt/pepper to taste


Step 1: in a small pan add good olive oil. I have used a strong, fresh Spanish olive oil. Do not be afraid of a strong oil the more you use them the more you will love them. Add ground coriander, chili flakes or chili d’arbo ground (but use half as much), ancho chili flakes and cumin seeds. Cook 1-2 minutes and set aside off the flame.


Step 2: in 2 tbsp hot water add a pinch of saffron. Let bloom while you chop all your ingredients.


Step 3: chop mint, cilantro, tomato, roasted peppers (you can use jarred or fresh roasted), parsley, lemon zest and juice, grated ginger and your garlic oil and saffron. Mix.


Taste it and add salt and pepper.


Prepare your fish by quickly cooking in some olive oil, the oven or on the grill. (mine was frozen, then thawed) I have added some salt, pepper and old bay seasoning to mine. Cooked for a few minutes on each side. You can prepare any vegetables you like or a fresh salad. The point is to add lots of fresh veggies to the plate.


Spoon over some of your charmoula and be prepared to be amazed and how complex and fresh this topping is from the saffron to the fresh herbs and good oil!!


Caponata

This is a great southern Italian appetizer. It is normally stewed eggplant, tomatoes, celery, vinegar, capers, olives, fresh basil and other herbs. I prefer to grill my eggplant and tomatoes for a bit of roasted flavour. It can be served hot or cold. I prefer it on toasted ciabatta or crostini and served warm with a drizzle of excellent olive oil. It is like jazzed up bruschetta.


You will need:


  • 1 medium eggplant- sliced
  • 4 plum tomatoes – sliced
  • 1/4 cup olive oil – I used an Italian Teraliva
  • 1 stalk celery – diced fine
  • 1/2 onion – diced fine
  • 2 cloves garlic – chopped
  • 1/2 fresh chili or 1/2 tsp dry chili flakes
  • 1 tbsp red wine or balsamic vinegar
  • 1 tbsp capers – chopped
  • pinch sugar
  • 3 green olives – chopped fine
  • 1 tsp chopped fresh basil
  • 1 tsp chopped fresh parsley
  • more oil to drizzle!
  • salt/pepper to taste
  • ciabatta bread or baguette for crostini
  • Parmesan grated to top


Step 1: slice the eggplant and tomatoes into thick slices.


Step 2: heat the grill to high and brush both the tomatoes and eggplant with olive oil. Grill for a few minutes so that the tomatoes do not lose their shape but get a bit of char on them. Cook the eggplant the same way. You will continue to cook the eggplant in a bit of olive oil in step 3, so it does not need to be cooked fully on the grill.


Step 3: chop eggplant into small dice and cook in 1-2 tbsp olive oil for 2-3 minutes until cooked completely and nicely coated in olive oil. Place eggplant in a medium-sized bowl. Chop tomatoes into small dice and add to bowl along with eggplant.


Step 4: in the same pan cook finely diced onion and celery, garlic and chilies in 2 tbsp olive oil. Cook 5-7 minutes until softened and just starting to brown. Add to eggplant and tomatoes.


Step 5: add vinegar, chopped capers, pinch of sugar, chopped olives, chopped basil, parsley and salt and pepper. Taste it and adjust if necessary.  I sometimes add a squeeze of lemon at this point if it needs something but, it is not required.


Step 6: slice some bread and toast first, then add your caponata.


I like to add a bit of Parmesan and broil for a minute or two to melt.


yum.


Grilled Miso Pork Ribbons


These are really tender and quick cooking. The miso glaze is sweet and salty and makes a perfect dipping sauce so don’t use it all while cooking save some to drizzle over these delicious ribbons of meat.


You will need:

  • 1 pork tenderloin cleaned of all fat and sliced thin and pounded (you can easily double the recipe for a bigger crowd)
  • soaked bamboo skewers or metal ones
  • 1 tbsp miso paste (soy bean paste)
  • 1 tsp sesame oil
  • 2 cloves garlic- crushed
  • 1/4 cup soy sauce
  • 1 tbsp honey
  • 2 tbsp coffee
  • spring onions
  • sesame seeds
  • nectarines/peaches, apricots or pineapple to grill with the meat


Step 1: create sauce in a small bowl. Add miso, sesame oil, garlic, soy sauce, honey and coffee. Stir to dissolve honey and set aside.


Step 2: clean the pork tenderloin (which is the leanest cut of pork) remove any silver skin ans slice into small medallions. Between wax paper gently pound the meat to flatten. These also make great scalopini or schnitzels.


Step 3: soak bamboo skewers (or use metal) and thread the meat on in a ribbon or satay like fashion. Pour on some good olive oil and some finely zested orange. Let marinate for a few hours or you can cook right away.


I put mine in the fridge for the day and cooked them later.


You can add some fruit to your skewers like a peach, apricot or tangerine. Pork loves fruit. Heat up the grill and brush on a bit of your miso glaze.


Cook on medium heat for a few minutes on each side and leave some glaze to drizzle when serving. I served with some rice, a bit of fresh fruit slices and a crisp green salad. This glaze would be great for chicken as well.


Zucchini Linguine with Lemon Ricotta and Asparagus


This is a lovely pasta primavera with asparagus shavings and grated zucchini, beautiful olive oil and just a bit of ricotta to form a creamy semi-sauce. Fresh, light and quick.


You will need:


  • Linguine or Filini for two (thin egg pasta)
  • 1 grated small zucchini
  • 3-4 asparagus – shaved thin
  • 3- 4 kale leaves- sliced thin
  • 1 small chili- chopped fine
  • 1 clove garlic
  • 1 tsp finely grated lemon zest
  • 2 tbsp ricotta –  I used a half goat and half cow’s ricotta and it is perfect.
  • 2 tbsp good olive oil – I used Mandranova -Cerasuola from Italy
  • salt/pepper to taste
  • reserve at least 1/2 cup of the starchy pasta water before draining
  • grated Parmesan optional to serve


Step 1: gather all your ingredients. Grate the asparagus spears with a vegetable peeler.


Step 2: grate your zucchini I used a simple box grater. Chop kale and chili pepper.


Step 3: in a large pan saute kale, lemon zest and garlic in a few tbsp of good olive oil. Cook 5 minutes to soften the kale.


Step 4: boil a large pot of generously salted water and cook your pasta. This pasta takes only 3-4 mins at most (read your box) and always keep at least 1/2 cup of the starchy pasta water before draining the noodles.


Step 5: add all the vegetables to your kale and cook 2 minutes.


Step 6: once your pasta is cooked add it and toss with the vegetables. Taste and add salt and pepper.


Step 7: add a few tbsp of pasta water and the ricotta cheese. The water will loosen the ricotta and form a nice sort of sauce. Cook and toss . 1 minute. If you like it creamier add a bit more ricotta or water.


Serve right away with another drizzle of olive oil and a bit of shaved Parmesan or Peccorino cheese. You could also add a bit more ricotta on top if you like but, I think it is excellent as it is.


Mini Sausage and Cheese Calzones

These were really great. A little pocket filled with some cooked apple sausage and a mixture of ricotta and mozzarella cheese. Baked and served with a bright marinara sauce. Big Pete could not stop eating them. I think leaving the ingredients inside fairly dry contains the mini calzone while baking and then you can add as much sauce as you like one you are eating it. I just pour in inside but, you could also smother the top of them .


You will need:


  • 1 cup warm water
  • 1 tsp regular yeast
  • 3 cups flour (00 if you can get it)
  • 1/2 tsp sea salt

Filling

  • 2 fresh sausages- I have used a gorgeous apple pork sausage but Italian would be great too
  • 1/2 onion- minced fine
  • 2 cloves garlic – chopped fine
  • 1 tsp Italian seasonings
  • 1/4 – 1/2 tsp chili flakes
  • 1 tsp parsley
  • 3-4 fresh basil leaves
  • 1/2 cup ricotta cheese
  • 1 cup grated mozzarella
  • salt and pepper to taste

Marinara Sauce

  • 1 14oz. can of tomatoes
  • 2 cloves garlic
  • 1/4 tsp chili flakes
  • a few basil leaves
  • 1 tbsp fresh parsley
  • 3 tbsp olive oil – I used a beautiful Italian Titone
  • salt and pepper to taste


Step 1: just like making any other pizza start with warm water in a large bowl and add yeast and honey.  Stir and leave 5 minutes to activate the yeast. Add flour and mix in the bowl until it becomes too stiff to stir, then pour every bit on to the counter and continue kneading until your dough is no longer sticky. Add some oil to the bowl, roll the dough to coat in oil and cover with plastic wrap. I leave the dough in the fridge at least 24 hours but, it is good to use after 1-2 hours if you don’t want to wait.


Step 2:  remove casings  from 2 good quality sausages. I have used an apple pork sausage but, a great Italian sausage would be perfect here. In a small pan add sausage and cook while breaking up the meat. Set aside to cool.


Step 3: in the same pan add onions, garlic, Italian seasonings and chili flakes. Cook until softened. Set aside to cool.


Step 4: take cooled sausage and onion mix and place in a food processor. Add fresh parsley and basil and pulse until pureed.


Step 5: add meat mix to a large bowl and add ricotta, mozzarella, salt and pepper. Mix and set aside. I really like this ricotta I just found which is a combination of cow and goat’s milk.


Step 6: in a blender add a small can of diced tomatoes, garlic, chili flakes, fresh basil and parsley. Blend for 1 minute.


Step 7: Place sauce in a small saucepan and cook 5 minutes. Taste and adjust salt and pepper or more chili flakes. Turn off heat and add good olive oil. I used a beautiful Italian oil called Titone.


Step 8: I always remove my dough from the fridge at least an hour before rolling it to get it to room temperature. Then I turn out dough onto a floured surface and divide dough in half and half again until I get the sized balls I want for my calzones. I like them small because they don’t tend to break as much and they are nice and easy to hold while eating.


Step 9: roll out dough but, not too thin or your baked calzone with break open while baking. If you have any leftover dough you can always throw it in a ziploc bag (with room to expand) and make a pizza the next day or just put it in the freezer for another time, then just thaw and use when you are ready.


Step 10: Place some filling on the dough. I like to flatten it out. Fold over and pinch closed. You can seal with a fork pressed along the edge or I have just pinched every few Cm to create a decorative edge. I personally do not like a calzone to have too much of a doughy edge so I don’t have too much excess dough on mine.


Step 11: place on a parchment lined baking pan (makes for easy clean up) brush with egg wash (optional) and bake in a 400 degree oven for approx 15 minutes or until browned. Your filling is cooked so just are just baking the pizza dough.


Serve with hot marinara sauce and just try to eat only one!


Strawberry Spinach Salad with White Balsamic Vinaigrette


This is a beautiful fresh salad simply dressed with white strawberry balsamic vinegar and olive oil. If you have never tried white balsamic it is really very delicious. My friend Debra gave me a bottle and it is my favourite go to vinegar these days. Debra also sent me this Strawberry balsamic vinegar which amazing too. A few handfuls of spinach, some mushrooms, strawberries, blueberries and some spring onions and you have lunch. Hmmm? maybe add some pistachios or candied pecans or add some orange slices instead of blueberries??


You will need:


  • a small bag of baby spinach
  • 5-6 beautiful strawberries – sliced
  • a handful of blueberries
  • 5-6 white button mushrooms
  • 1-2 spring onions – sliced finely
  • 2 tbsp Strawberry white balsamic vinegar – I used Lucero Strawberry White Balsamic Vinegar
  • 4 tbsp olive oil – I used a fruity Lucero Ascolano Extra Virgin Olive Oil.
  • salt/pepper to taste

Options: sliced oranges, dried cranberries, sliced almonds, pistachios or candied pecans


Step 1: place spinach in a large bowl. Slice mushrooms, strawberries and spring onions. Add to bowl.


Step 2: make dressing in a small jar or just mix in a bowl and pour over your salad at the last second before serving. This salad waits for no man! You add the oil and vinegar, toss gently with your hands and serve. Finish with salt and pepper and eat right away.


don’t you want to eat that!?


Big Pete and I had a beautiful pizza Margarita and this fresh salad for lunch!


Chicken Teriyaki


This is a chicken teriyaki made with quick cooking chicken breast and a sauce that can easily be kept in the fridge for a week if you have extra. I have added some black and white rice and some easy quickly cooked vegetables to make a colourful and very tasty meal. I find because you slice the chicken once cooked a little goes a long way. I made two chicken breasts and we only ate one and saved the other for leftovers. You really don’t need to eat that much meat to feel satisfied if you have so many other delicious options on the plate.

PS. There is no reason to buy teriyaki sauce when you can so easily make it yourself!


You will need:

  • 3 cloves garlic -crushed
  • 2 tbsp honey
  • 1/3 cup soy sauce
  • 2 tbsp rice wine vinegar
  • 1 heaped tbsp hoisin sauce
  • 1 tbsp fresh grated ginger
  • 1 tsp Worcestershire sauce
  • a few drops of sesame oil
  • 2 chicken breasts
  • 1 tsp Chinese five spice powder
  • 1/2 tsp ground coriander
  • 1/2 tsp curry or garam masala spice blend
  • 1 green tea teabag
  • olive oil
  • sesame seeds
  • fresh cilantro


  • cooked rice 
  • a handful of spinach – sliced thin
  • 1 red pepper -sliced thin
  • 1 red chili – chopped fine
  • 1 spring onion – sliced thin
  • mushrooms -sliced
  • broccoli- broken into small florettes


Step 1: gather all your ingredients for the teriyaki sauce.   In a small bowl add crushed garlic, honey, soy sauce, rice wine vinegar, hoisin sauce (it is used as a thickener instead of cornstarch) grated ginger (I keep mine in the freezer and grate it frozen) Worcestershire sauce and sesame oil. Mix to dissolve honey and pour into a jar. Any that you don’t use can be popped in the fridge.


I kept my teriyaki sauce in a small mason jar.


Step 2: chop any vegetables you like to accompany your chicken. This was for two people.


Step 3: butterfly your chicken breasts (slice almost through to open up like a book ) Place chicken on a sheet of wax paper (makes for easy clean up) Sprinkle on the Chinese five spice powder, the ground coriander, the curry blend and sprinkle some green tea (I used about a half of a tea bag) Try to get some of the spice mix on the other side of the meat by patting it over the spiced side of the other piece and pressing the meat over the spices that have fallen over the paper. Then place wax paper over the chicken and pound gently to flatten both pieces. This allows the meat to be cooked quickly and evenly.


Step 4: In a pan with some olive oil saute chicken on medium heat for 3-4 minutes on each side. You should get a nice browned exterior.


Step 5: Add a drizzle of teriyaki sauce and cook another minute on each side. Remove to rest while you prepare your vegetables.


I just cooked the broccoli and mushrooms in a bit of olive oil and salt and pepper for a few minutes until still crunchy. I cooked the red peppers in the same way right after.


Slice the chicken breast into thin strips and place over your rice and vegetables pour over some more teriyaki sauce and a sprinkle of fresh cilantro and some sesame seeds.


Bean and Quinoa Koftas or Burgers


These are a lovely meat substitute and are jammed full of bold flavour. The kidney beans make them look like they are a meaty little bite. They are made in a food processor, left to set in the fridge and then quickly fried like a falafel or kofta. I personally think the key to making a good veggie burger is to bake it in the oven to sort of dry it out if your goal is for them to feel more like meat.You can serve on their own or with a salad, add to a wrap like a falafel or with some cucumber fries as a burger. Vegetarian or not we all can enjoy a meatless meal without feeling like something is missing.


You will need:


  • 14 oz can of Kidney beans- rinsed
  • 3 cloves garlic
  • handful of cilantro/coriander
  • 1/2 onion
  • 3-6 mushrooms
  • 1 piece of butternut squash (unpeeled)
  • 1/2 fresh chili pepper
  • 1 tbsp chili jam
  • 1 tsp curry spice blend
  • 1 tsp zahtar
  • 1/2 tsp salt
  • 1 slice bread crumbled or chopped
  • 1/2 cup cooked quinoa (according to package directions)
  • chopped pistachios or sesame seeds
  • olive oil for cooking

optional serve with a drizzle of honey


Step 1: rinse a can of kidney beans under cold water to remove some of that slime and puree in a food processor to make a dry paste. Remove to a bowl.


Step 2: add garlic, cilantro, onion, mushrooms, butternut squash and red chili to processor. Puree  and remove to the bowl with the beans.


Step 3: add chili pepper jam, curry or garam masala mix, zahtar, salt, bread, cooked quinoa and mix to combine.


I have used a red sprouted quinoa just because it is dark and I want my patties and koftas to look like meat (so my meat eater husband will eat them and not feel deprived)


Step 4: to make little bites take 2 teaspoons and form a little ball or quenelle (football shape) Roll in chopped pistachios.


or roll in sesame seeds.


Cook in olive oil and saute until cooked well on both sides. You can eat them at this point if they are the small shape however, I prefer to place them on a piece of parchment paper and place them in the oven at 350 degrees F for 30-45 minutes to get them set for a burger.


I served mine with cucumber fries and some spinach and chopped tomatoes.


or with a bit of honey drizzled over them as an appetizer.