Come See The New YouTube Channel


Big News!! we are now on YouTube creating all the recipes from the blog and more.


There will be olive oil classes and tastings along the way too!

I hope that you will find them to be a helpful addition to our blog. 

The recipes are available along with lots of pictures on the blog and now videos on YouTube to guide you.

I want to cook that on YouTube

If you want to receive notifications of new videos please hit the Subscribe button along with the Notification Bell. 

Please ask questions and make comments to engage and tell me what you want to learn to make. I hope you use my ideas and recipes as a start to make them in your kitchen. 

Modify the recipes and make them your own family favorites. 

My goal is always to get you try something new, to make it yourself, and always use great olive oil when you can!

Thank you

I hope these recipes make you say “I want to cook that!”

Love

Hildie

Orange Chocolate Panettone

 I haven’t posted in ages! but I am back! There is so many good things to eat and this is definitely one of them!

Look at this glorious chocolate orange panettone!!

An enriched sweet bread originally from Milan loaded with candied fruit and raisins. It is a typical offering during Christmas. I have chosen to make mine with chocolate and orange. Most people feel that it is just too intimidating to even attempt to make and I am here to tell you you can make this!!

Gorgeous for days and if you have left overs they can be frozen or make into crazy gorgeous French Toast or the bread pudding of your dreams.

You will need:

Starter

  • 3/4 cups of bread or all purpose flour
  • 1/2 tsp instant yeast (dry)
  • 1/2 cup warm (not hot) water

Candied Orange Peel

*You may skip this if you purchase good quality candied orange peel

  • 1 large organic orange
  • 1 cup water
  • 1 cup sugar
  • 1/2 cup sugar – to toss peel in once removed from syrup

Dough

  • 2 1/2 cups of bread or all purpose flour (you may need more)
  • 1/3 cup sugar
  • 1/2 stick of butter (1/4 cup) softened/room temp.
  • 1/2 cup of orange juice (if you make the peel use this orange for the juice)
  • 3 eggs room temperature
  • 1 tbsp instant yeast (dry)
  • 1 tsp kosher salt
  • 1 tbsp vanilla paste (or pure extract )
  • 1 tsp orange extract
  • 1 bar of best quality chocolate chopped finely

Plus: egg wash for brushing before baking

Note: you will also need a tall pan or panettone molds

Step 1: if you do this over 2 days. In the morning make the starter. In a small bowl mix the flour, the instant yeast and the water. Leave this covered for the day -This was mine after 8 hours on the counter.

Step 2: peel the order (not the pith just the rind) place in the sugar and water and let it come to a gentle boil for 10 minutes to soften.

Step 3: Once you have simmered the peel strain out the peel and toss in the 1/2 cup of sugar to coat them all and separate. I keep the syrup to brush on top of the bread when it comes out of the oven.

Allow the peel to dry overnight until you are ready to add to the dough the next day.

Step 4: squeeze the orange that you just used and set 1/2 cup of the juice aside to be added to the dough.

Step 5: add all your starter to a large mixing bowl if you are making this by hand or I definitely recommend making this in a stand mixer for ease and also so that you do not add too much flour to this wet dough. I made this recipe both ways and it turns out well either method.

Step 6: add the rest of your ingredients except the peel and the chocolate that goes in after the first rise (proofing) Add the starter, the flour, the sugar, the soft butter, the orange juice, the eggs, 1 tbsp of dry instant yeast, kosher salt, vanilla paste and the orange extract.

Vanilla Paste is an expensive product but I find it very good and worth the money- if you don’t have it use good quality pure vanilla extract (never artificial as its made from a wood product and really makes such a difference)

This is the orange extract I used however, the product on the right is also a good product called Fiori di Sicilia and is a citrus based extract from King Arthur Flour.

Step 7: if using the stand mixer (with the dough hook) let the machine mix for at least 5 minutes and if working this mix by hand you can start by mixing with a wooden spoon however, once it gets too difficult scrape out all your ingredients on the counter and knead for 5-7 minutes. You may need to add another 1/4-1/2 cup if its too sticky. Try not to add too much flour. Once soft and tight place your dough back into a large bowl with a greased piece of plastic wrap and leave overnight in the fridge. Let it stay in he fridge for 8-12 hours.

**The next morning leave it covered on the counter for another 2-3 hours to come to room temperature.

These are Panettone paper molds that you can buy from Amazon or at specialty food stores like Sur La Table, or even Michael’s arts and crafts. They are inexpensive and important to get the bread to rise tall. You can also make a collar or some people even bake them in coffee cans. I think these make the bread look professional and festive and makes a perfect gift wrapped in cellophane and a big bowl.

Step 8: I  buy a decent quality bar of chocolate which also works out to the correct amount. I like both of these as options (you only need 1 chopped bar for this recipe) Chop your orange peel finely and include both the sugar and peel here.

Step 9: remove your dough from the bowl and place on a lightly floured counter.

Step: 10: make the dough into a flattened disc and add your chocolate and orange.

Step: 11: roll up and knead the dough to make sure the chocolate and peel get worked into the dough evenly. You might need a bit more flour – knead 1-2 minutes until you can feel the contents have been distributed throughout.

Step 12: place your dough into the paper form – You can add a bit of butter to the bottom of the form. Butter a large sheet of plastic wrap to cover the dough (the dough will stick to the plastic if you don’t grease it)

Cover and I place this heavy loaf in another pan just for ease of moving. I then leave this covered in a warm place to rise until it is over the bread mold. You MUST be patient here. It may take 3-4 even 5 hours to get it nicely proofed (or proved as the English say!)

This is my bread raw after the final proof ready to be baked. I have added some large sugar here as a topping after brushing the top gently with an egg wash. The egg wash is 1 egg and 1 tsp of water whisked and brushed carefully as not to deflate the bread and sprinkled with sugar.

The oven is set to 350 degrees F and I bake in the lower to middle for 20 minutes uncovered and then I make a tent and cover the panettone for the last 25 minutes so it does not get too brown- you may also want to spin the pan halfway through the baking.

Remove from the oven and let almost come to room temp – do not eat this when it is hot. Brush with your leftover orange syrup when it comes out of the oven and is still hot.

Gorgeous!!

So delicious with a cup of coffee and someone you love!! I promise it’s worth the effort.

Banana Yeast Bread

OK ! this is the bread I am going to make in my diner when I quit my job and do something crazy!

 Makes the BEST French Toast!

This is the French Toast Guy Fieri is going to tell me is money! I am sure it will have a blob of whipped cream on it and some crushed praline nuts on it as well but that’s just glamming up for the cameras!

You will need:

  • 3 over ripe bananas
  • 1/2 tsp fine zested orange peel
  • 2 eggs
  • 2 tbsp butter
  • 1 tbsp great Extra Virgin buttery mild oil
  • milk (I will explain the amount further in the recipe) -less than 1 cup
  • 2 tsp dry yeast
  • 3 1/2 cups all purpose flour (possibly a bit more or less depending on humidity)
  • 1/2 tsp flaked salt

Step 1: using the bread or paddle attachment- squish bananas in a stand mixer – of course you could do this recipe by hand if you want a workout.

Step 2: add eggs to a liquid measuring cup, whisk with fork. Add orange zest, 2 tbsp of melted butter, olive oil and then fill with milk of your choice until you reach 1 cup on the measure.

Step 3: add the liquid to the bananas and change to the paddle attachment.

Step 4: add the yeast and leave for 10 minutes.

Step 5: add flour and salt and mix on slow to incorporate and then on high for at least 3-4 minutes with the dough hook. Turn out onto the counter and hand knead for a few seconds to make sure that the dough is not sticky. This is where you feel the dough and add small sprinkles of additional flour until it no longer sticks to your hands.

Step 5: wash the bowl and butter sides, then coat the soft dough with enough butter so so that the plastic wrap that you will cover the bowl with doesn’t stick to the dough if it rises to the top. Leave in a warm place for 2 -2/12 hours. this is a rich bread and you are looking for it to be doubled in size how ever long that takes.

Step 6: turn out the dough from the first proof and gently deflate and roll up to fit into a buttered bread pan. Cover with a buttered or oiled piece of plastic wrap -I just use the one I had on it for the first rise. Leave until doubled again this is only about 1 hour.

Step 7: bake at 350 degrees F 30-45 minutes. If bread appears to be browning too quickly tent with aluminium foil for the last 10-15 minutes.

brushed with a bit of butter !

Great the next day as French Toast (just mix eggs with milk or cream a bit of sugar or honey, soak bread for a minute they fry in some more butter and top with maple syrup,sliced bananas and powdered sugar!!

Get the coffee you are gonna love this!

Orange Cardamom Baklava

This is an orange, lemon, cardamom and honey scented baklava. I also use butter and olive oil to brush in between the filo (fee-low not fy-low!) layers.

You can use all almonds or pistachios however, I prefer half and half.

You will need:

  • 1 box of frozen filo/phyllo dough- thawed in the fridge.

Nut filling

  • 1 lb/454 grams of nuts (pistachios and almonds)
  • 1/2 cup sugar
  • 1 tsp ground cinnamon
  • 1/4 tsp fresh ground cardamom (I use a mortar and pestle)
  • 1 stick unsalted butter -melted
  • 1/4 cup buttery mild olive oil

Syrup

  • 3/4 cup sugar
  • 1/2 cup of honey
  • 1/2 tsp orange extract (optional if you can’t find it)
  • 1 tbsp orange finely zested
  • 1 tsp lemon finely zested
  • 1/3 cup water
  • 1/3 cup orange juice (or the juice from a big fat orange)
  • glass pyrex dish wide enough to fill a sheet of phyllo/filo width -3 qt size or 9×13 -glass is easier to cut on

Step 1: in a food processor pulse almonds and pistachios until rough chop- you don’t want to take it too far or it will turn to a nut paste. There can be some larger chunks. If you have a scale weigh the nuts before putting in the food processor.

Step 2: Put the nuts in a large bowl and add, sugar, cinnamon, crushed cardamom. I use the cardamom that is whole in the pod and then remove seeds and crush in the mortar and pestle. You can also buy it ground. Mix to distribute.

Step 3: some boxes have a perfect 24 sheets which can make 3 layers of 8 buttered sheets in between 2 layers of nuts. If your box has more divide into whatever works and if a few get torn no problem – no one will know! I thaw in the fridge over night.

Step 4: butter the glass dish.

Step 5: melt the butter and mix in the olive oil. Get a brush to paint on the butter and oil gently between each layer or filo/phyllo.

Step 6: with a gentle hand paint a light coating on a sheet of filo and then add the next sheet and repeat until you have 8-10 buttered sheets (depending on how many sheets come in your box some have 24 sheets some have 40)

Step 7: if you are doing 2 layers of nuts in between 3 x 8 sheets of buttered filo then divide the nut mixture in half- if you want 3 layers then divide nuts into 3 equal portions. Sprinkle on top and spread evenly.

Step 8: brush another 8 sheets buttered to form the next layer, then add your nuts  and finish with another 8-10 sheets for the top. Make sure the top has a generous coating of butter to finish.

Step 9: carefully with a sharp serrated knife cut all the way through to cut squares or diamond shapes. If your dish has rounded edges you can carefully trim your filo to make it neat in appearance.

Bake at 350 degrees F for 30- 35 minutes until browned.

Step 10: while the Baklava is baking make your orange/lemon syrup in a small pan. Add the sugar (mine is Vanilla sugar- I just stick vanilla beans in sugar and leave them for months and keep adding sugar) add honey, orange extract or Fiori Sicilia, orange zest, lemon zest, orange juice and water. Heat to melt sugar and set aside.

Step 11: as soon as you remove the baklava from the oven carefully pour the syrup to cover the entire surface. It will make noise because its hot but that’s ok. Make sure to drizzle the syrup all over the entire top. You will think that it is too much liquid but it is not.

Re-cut the separations one more time while warm.

Let cool, dig in!!

Continue reading

Orange Chocolate Olive Oil Truffles

Dark chocolate enriched with extra virgin olive oil is associated with an improved cardiovascular risk profile, according to research presented  in 2017 at the ESC Congress.


So of course I had to create a recipe! I just happened to have this really fabulous Orange Extra Virgin Olive Oil from California. I have been using this Orange Olive Oil from Bondolio in my donuts and a sweet orange Panettone and now these truffles.


They are so easy to make and how great its this that they are also good for your heart as well as your chocolate SOUL!!


You will need:

  • 8 oz of best quality dark chocolate chopped
  • 1 tsp finely grated orange zest
  • 1 tbsp Cointreau or other orange flavored liqueur
  • 1/3 cup Orange Olive Oil – I used Bondolio from California
  • a pinch of sea salt -I used Maldon Flaked Sea Salt
  • 1/2 room temperature Mascarpone Cheese
  • 1/3 cup good quality cocoa powder to roll in


Step 1: chop 8 oz of the best quality dark chocolate you can find. The better the quality chocolate the better the truffle. I had a few kinds in my pantry so I chopped them all up as well as a few chocolate chips.

Step 2 : add all ingredients except the Mascarpone cheese and melt in a bowl over a pot of gently boiling hot water.

Step 3: once melted and still warm add the Mascarpone cheese and whisk until smooth.

Step 4: remove from bowl and place in shallow dish. Let chocolate come to room temperature and then place in fridge for 30 minutes to harden. Scoop small balls and roll in your hands to make into neat balls. You may need another small spoon to get the chocolate mixture out of the scoop as it is sticky.

Step 5: sift good quality cocoa powder into another shallow dish and place balls in cocoa- moving bowl to roll and coat. Tap off excess cocoa and place in a pretty dish to serve or place in a candy cup – like a muffin paper cup only smaller.

They are very rich with a beautiful subtle hint of orange from the zest, the oil and the Cointreau. They make a very nice gift or are perfect served with coffee after dinner. 

Italy – Imperia and Rome

“Travel is the only thing you buy that makes you Richer!”-unknown

I really think travel opens you up to new languages, customs, wonderful people and of course good food!

We are all more alike than different, and food and music always has a magical way to unite us.

Let me share my most recent Trip to Italy and show you all the sights and beautiful food from my point of view.

I must stop and have a glass of Prosecco at the Dallas airport to celebrate that I am going to Italy !

I have been lucky enough to go to Italy each year for the last 4 years.

 It all started with a phone call and a friend telling me I needed to become an olive oil sommelier. Once I decided to do it I located the oldest and most reputable school, which happened to be located in Imperia Oneglia, Italy. This is in the north of Italy about an hour from Nice, France.

 ONAOO is the National Organization of Olive Oil Tasters and is dedicated to teaching people about tasting oils and identifying defects from all over the world. I started with the first class which basically sees if you have sensory ability to taste. This is a 5 day course in order to determine if have the sensory ability to taste. I have been taking an additional 3 year course to become a Certified Professional Olive Oil Taster (all of these previous years are in this blog -search Travel to read)

THIS post is my last year of this course and my travels to Rome after.

Flying into Nice is always spectacular even in December but if you get a chance to go when it is warmer please do it is sooooooo beautiful!!

I meet my fellow student Karen in London where we take the 1 hour train to Imperia. Of course we have a bottle of wine for the train!

You are just passing the French and Italian Rivieras.

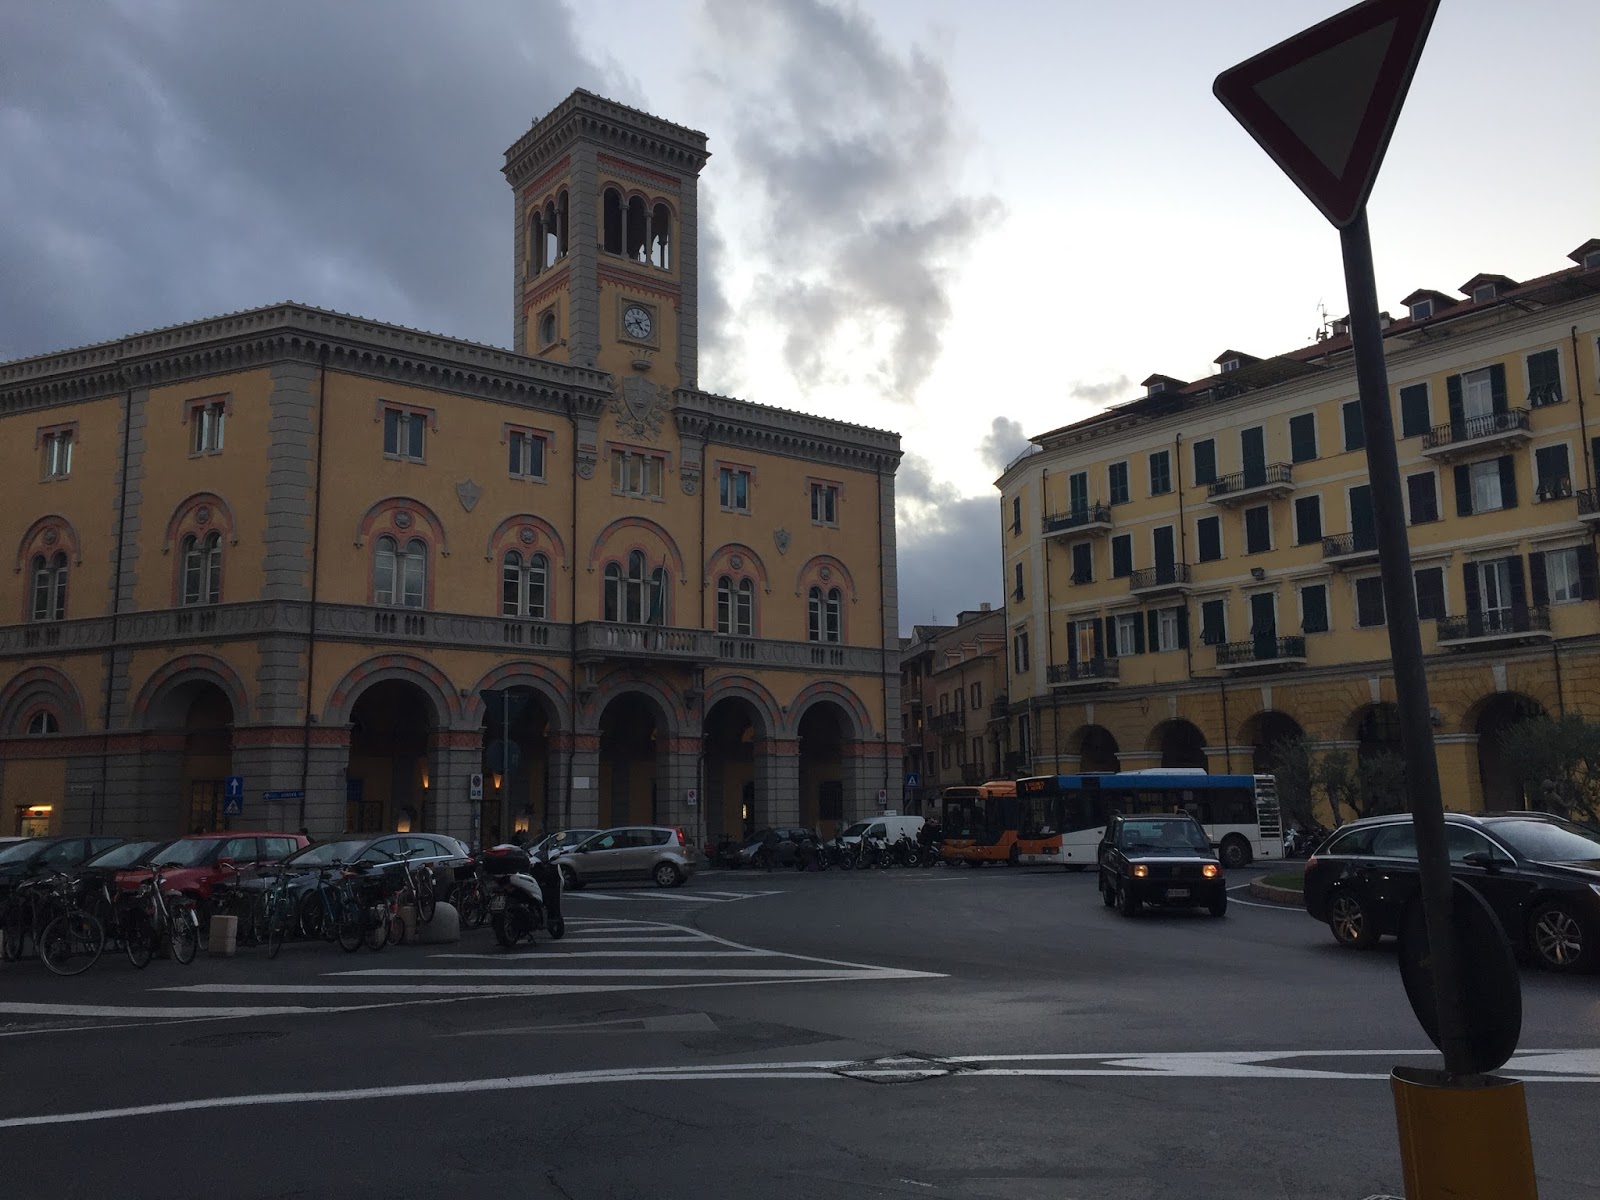
Imperia Oneglia is a little port town with a wealth of people with generations of olive oil knowledge. It’s sister town of Porto Maurizio is a pretty little harbor with lots of giant yachts parked waiting for  sunny days to sail these beautiful waters.

The town square and port are easy walking distance to the school and our hotel. My favorite big olive tree  is right by the water.

It’s almost time for dinner.

We stop by Gusto for an aperitif before dinner. They have a great selection of wines by the glass and affordable prices by the bottle.  I love how in Italy when you stop for a drink they bring a big plate of appetizers for you to enjoy with your wine.

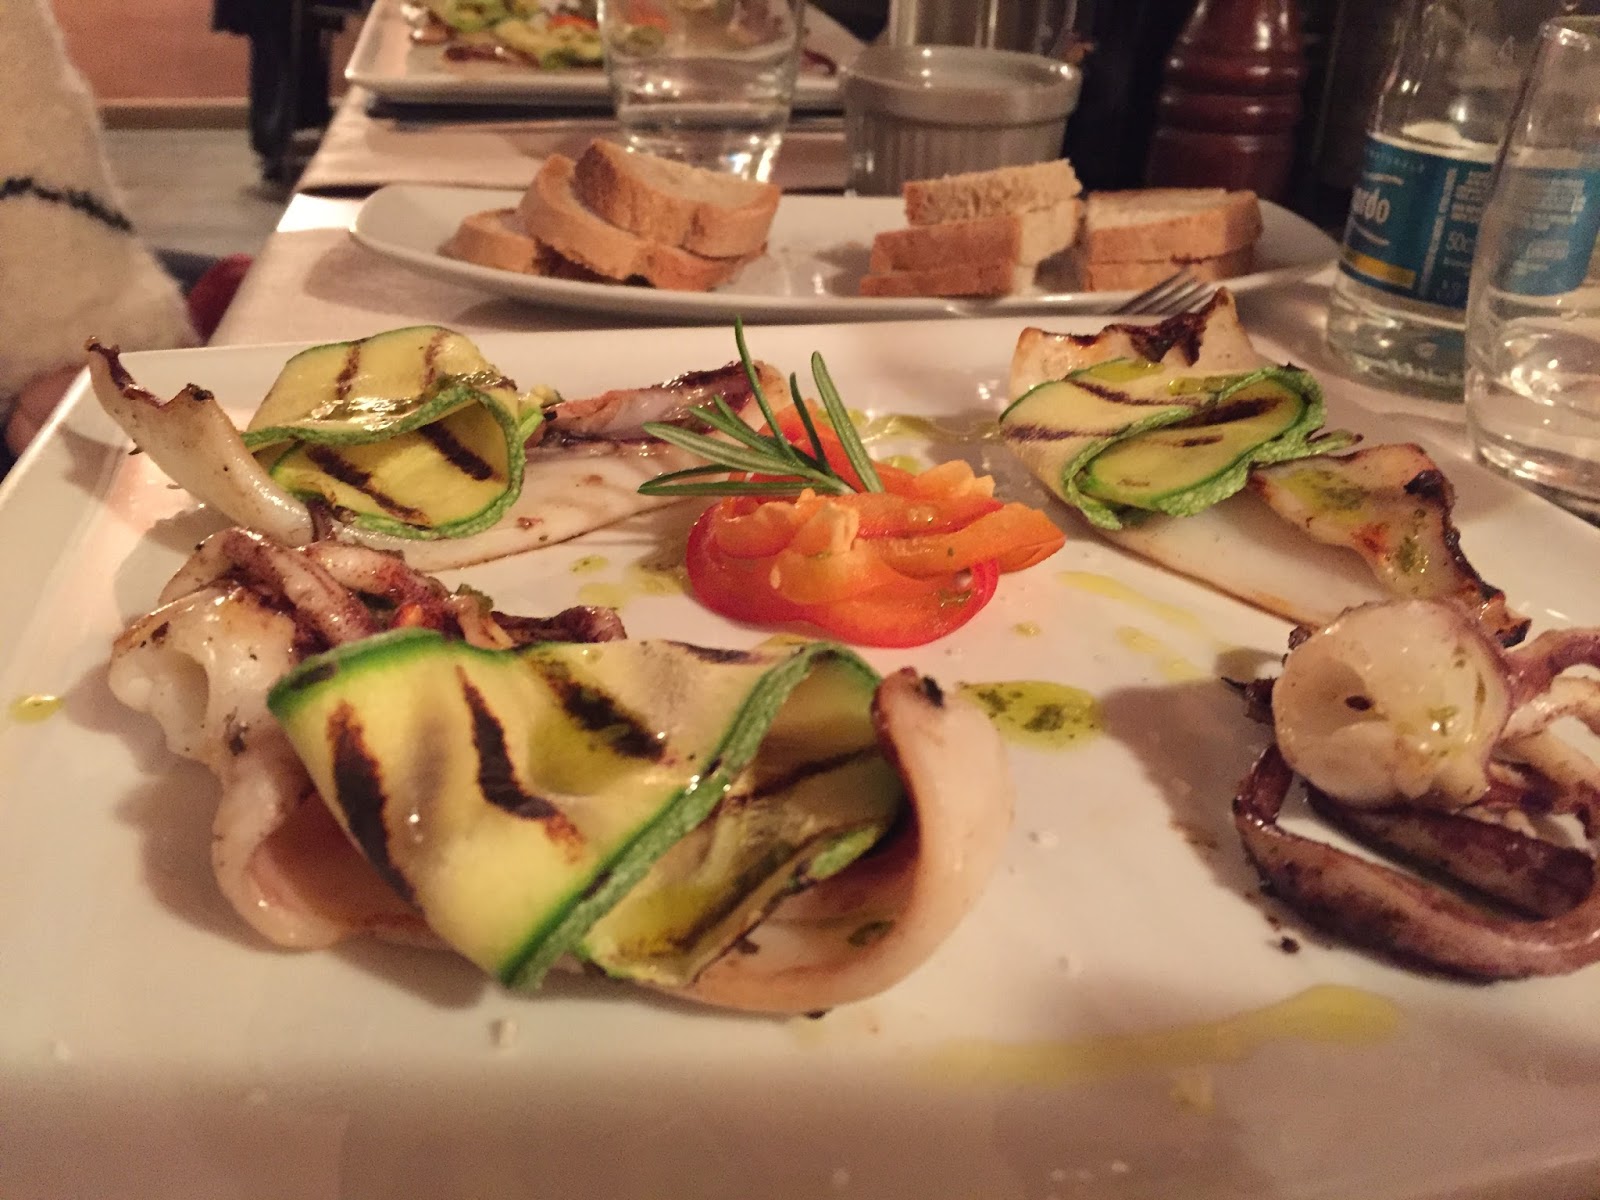
Dinner at a pretty little restaurant we have never been to before. Dalla Padella alla Brace is fantastic and great value for the money.

This is the Liguria region of Italy and the home of Pesto. This is a typical dish from the area. I love it Trofie pasta with pesto.

Always fish because this is a seaside town.

We have 2 days of prep before our exam in class

Tasting defects- YUCK

Getting our overview on the global status of production for this recent harvest and being prepped by the Master Taster Marcello Scoccia.

Our translator Silvana is really really good !

More tasting oils both good and bad from all over the world!

Isn’t it amazing the differences in color! By the way color does not indicate quality of oil – it can deceive you!

After my last day of prep I am taking home my best defects so I can study tonight and first thing in the morning before the exam. You have to memorize smells and tastes and they can be strong or mild and you have to be able to determine the levels. It’s not easy and we are all anxious!

There are people coming in that will be our unbiased judges. They will give us our exam and we are just known to them by our number. I am number 15. We have to smell, taste and evaluate several oils determining the positive attributes and  those levels. We then taste several more with defects doing the same. A theory exam and an oral and we are done. Phew!!

 A coffee and a Rum Baba from Picardo. Remember a cappuccino is only for the morning!


Melograno (pomegranate) is always great for a pizza and wine at crazy good prices!

 No visit to Imperia is complete without a trip to Salvo Cacciatore always elegant with great service.

A beautiful risotto with artichokes

Grilled Tuna was so tender and perfectly seasoned.

 Sarri is a 1 star Michelin restaurant with fantastic food.

stuffed anchovies

Tuna that exploded with flavor

a foam with Bacala (salt cod) and pesto, was probably my favorite

Oh wait the ravioli with fish and lemon zest maybe that was my favorite?!

 more beautifully prepared fish.

Apple pie and raspberry sorbetto! Roll me home I am full!!

Now on to Roma!

The eternal city is fantastic to just wander and explore It is also a great food town!

 No matter what your religious point of view you cannot be amazed at the beauty all around you.

could that sky be any bluer? wow what a day!

I just love churches and St. Peter’s is the most magnificent.

Michaelangelo’s Pieta greets you when you first arrive.

look at this light! sometimes things are just magical.

Time for dinner!

 look at those truffles…..YUM

 Our first dinner in Rome was the best!! at Roscioli right near our apartment. We sat in the deli in front of these cases and had one of the best meals ever! 

The most tender beautiful Iberico Ham – Pata Negro

 (I know its from Spain but seriously folks!! Ahhh!!!)

That’s really good mortadella with Parmesan shaved on top

Ok ! this is 7 euros worth of pasta and 40 euros for 5 grams of white truffles…yup I ate every bite and it was worth every penny.

Typical dish from Rome Cacio e Pepe – 4 ingredients but to make it well is an art!

Cannoli to die for and a Vin Santo to finish. Just when we thought we were done they brought us some shortbread cookies and warm melted chocolate to dip in ! Mamma Mia!!!

Our apartment was a few feet away from the Campo de Fiori and each day there was a fabulous market. I love seeing what is available at different markets while travelling.

artichokes were on every menu- I love them

This was my new find! I couldn’t stop ordering it. This is Punterelle- a slightly bitter chicory that is typical of Rome. They slice it thin and make a salad served with a garlic, anchovy dressing!

bitter greens

they will even clean your artichokes for you.

How is it that this is December and these tomatoes look so good?

Karen taught me how to make coffee in a Moka, Now I want one!

My husband would be out of his mind with this Parmesan!

Roasted chestnuts always remind me of my father. Hi Dad!

Spaghetti alla Carbonara- another typical Roman dish of bacon and eggs

oooy gooey Torrone! (nougat) I love it

Turn a corner and out of the blue a magical courtyard invites you in.

Another beautiful day to explore

\

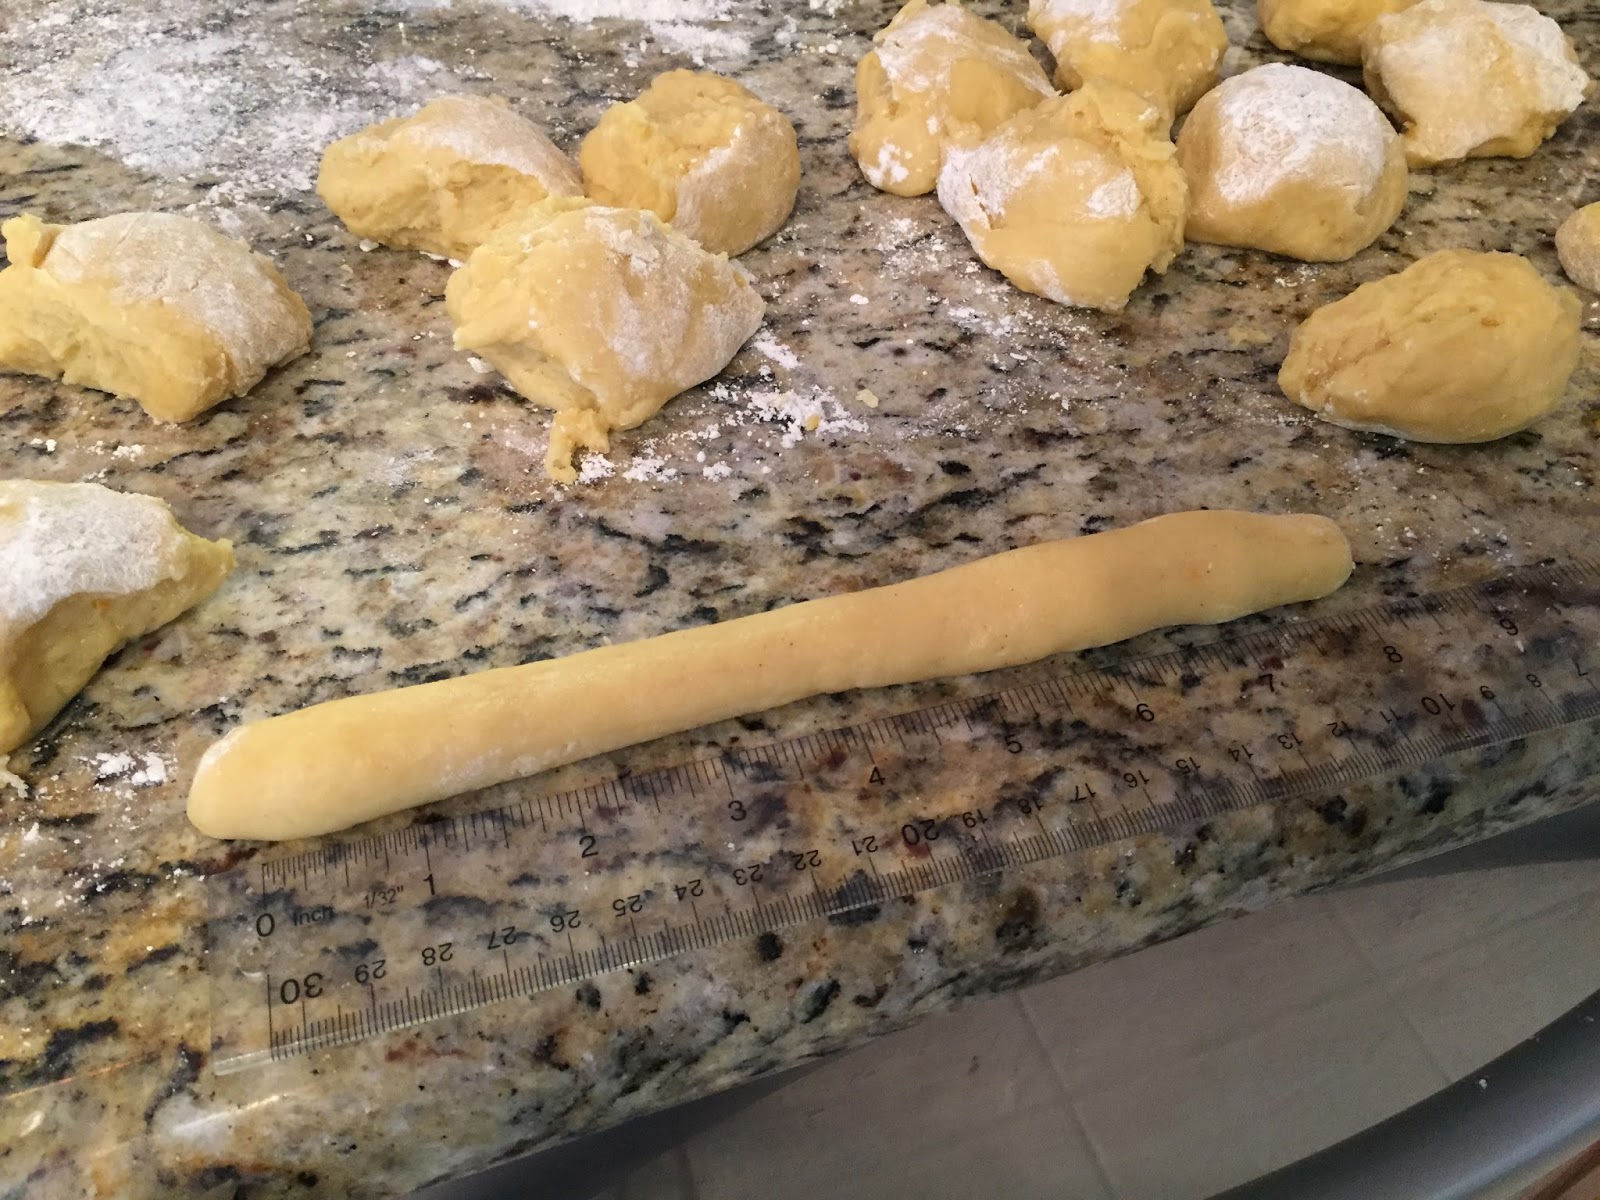
 More gorgeous pasta with ricotta and spinach -sitting beside the window with a woman rolling pasta.

Arancini and Supli – rice balls

come on!

pasta with black truffles

I cant forget the Gelato

Torrone and chocolate from Venchi

Caramel and chocolate from Fatamorgana

Mint choc chip from  Fatamorgana

this is really good by the way!

glaced chestnuts reminded me of being in Paris

Piazza Navona

The Spanish Steps with the sparkly Bulgari Tree

Ah Roma!

Oh by the way Karen and I both passed!! we are Certified ONAOO Professional Tasters !!

 It’s official I made a wish at the Trevi Fountain so I will be back!!

Herb and Olive Oil Focaccia

Is there anything more inviting on a cold day than a warm bowl of soup and the aroma of freshly baked bread…ok, maybe a blanket and a fire but this goes with that too!

You will need:

  • 1 cup water
  • 1 tbsp honey
  • 2 tsp dry yeast
  • 2 cups of flour
  • 1/2 great extra virgin olive oil – do not use the stuff from the grocery store for $9.99 that’s junk!
  • 2 cloves of garlic- minced finely
  • 1 tbsp dry Italian Seasoning herb mix
  • 1 tbsp fresh chopped Basil
  • 1 tbsp fresh chopped Parsley (flat Italian)
  • 1 tsp flaked sea salt (like Maldon)
  • 1 finely minced spring onion
  • 1 tsp dry chili flakes (pepperoncino)
  • 1/4 tsp fresh cracked pepper
  • 1/2 cup of finely grated Parmegiano Reggiano cheese and more sea salt

Step 1: heat water in microwave for 1 minute. Add yeast and honey and mix. Leave 5 minutes to activate yeast.

Step 2: chop the fresh herbs and mince garlic. Find a delicious Olive Oil – this one is a Hojiblanca from Spain. Place the oil, garlic, dry seasoning, fresh herbs, salt, green onion, chili flakes and pepper in a small pot and heat on low for 1 minute so that the garlic blooms and all the herbs open up then turn off and set aside.

I add 2 cups of flour to the yeast mix and stir in a large bowl. Let sit 20 minutes.

Step 3: add half the oil blend to the dough, the other half will be spread on top.

Step 4: I add another cup of flour to the counter and plop the wet mix on top. I use a bench scrapper to fold in more flour until it becomes manageable. I knead by hand and keep adding a sprinkle of flour until no longer sticky. This might be up to 2 more cups for a total of 4 cups.

Place in oiled bowl and cover with plastic wrap until double in size. This will take 1 -1 1/2 hours.

Step 5: Add a generous glug of oil to the bottom of the sheet pan and place the soft dough on top pushing down with your fingers pressing into the corners. Pour the rest of the oil mix on top and don’t forget the grated Parm and another sprinkle of sea salt.

Bake at 325 for 20- 25 minutes until golden and fragrant!

Soft and delicious !!

Khachapuri -Georgian Cheese Bread

This bread is often topped with an egg and put back in the over until it is just set but the center is still runny. I am not a fan of runny eggs in anything so they are not on my breads. The original is just made with just cheese (top)

I created another one with a thin layer of pesto under the cheese and I have to say I loved that one better! But that is the beauty of cooking and baking you can make it your own and add what you love best!!

You will Need:

Dough

  • 1 tsp flaked sea salt (like Maldon)
  • 1 pkg or 2 tsp dry yeast
  • 1 tbsp honey
  • 4 – 4 1/2 cups of all purpose flour
  • 1 cup water
  • 1/2 cup milk
  • 1 tbsp olive oil (yes use the EVOO – don’t save it )

For the filling

  • 1 1/2 cups crumbled FETA – I beg you not to use North American Feta it is not the same as the Greek Feta not even close!
  • 1 1/2 cups of shredded mozzarella cheese
  • olive oil or melted butter to brush on crust
  • eggs if you like that sort of thing on your bread

Step 1: in the bowl of a stand mixer add the dry ingredients: salt, yeast and flour.

Step 2: In a large measuring cup or microwave safe bowl add the wet ingredients: honey, water, milk and olive oil. Heat in microwave for 1 minute.

Step 3: add the wet to the dry and with the dough hook mix for about 4 minutes until the bowl is almost clean. Then I always do a few minutes of kneading on the counter to get the correct amount of flour added until the dough is no longer sticky.

Step 4: Once smooth oil a bowl with more olive oil and then cover an let rise until double. 1 1/2 hours in a warm place.

Step 5: Crumble and grate your cheeses and leave in fridge until ready to assemble.

Step 6: Once doubled gently deflate and place back in oiled bowl for a second rise about 45 minutes this time.

Step 7: cut dough into 4 equal pieces and flatten out into a sort of square shape then roll up edges for form a ledge. Pinch sides to create the traditional shape or just make them round like a pizza

fill with cheeses

or add your favorite spread like pesto on the bottom and then top with cheeses.

Step 8: Bake for about 15 minutes or until they are the level of browned you like (by the way in Italy the best pizzas have some level of char on them because that is considered a component/ingredient – they are not just melted cheese and bread)

EAT Warm!! and if you have lots left let them cool and freeze them for later. When you are ready to eat them toss them in a hot oven again for 5 minutes to warm up

Koulouria – Greek Easter Cookies

These Greek cookies always remind me of my first boyfriend Peter’s Mother. She was a great cook! They remind my husband of his grandmother. I have never attempted to make them before so I thought I would try. All the recipes on the Internet have enormous quantities that make 150 cookies or use crazy amounts to make enough to feed thousands. My recipe is for 2 dozen and they can be frozen, if you don’t have an army to feed. They turned out great and the house smells of orange and vanilla when they are in the oven. Simply glorious!  They are a dry dense cookie that is not too sweet and perfect for dunking into to steaming hot mugs of coffee or tea. My version uses Olive Oil instead of butter because…well, I love Olive Oil and will always choose it first.

You will need:

  • 1/2 cup mild Extra Virgin Olive oil (there are lots of mild options from California or Texas)
  • 1 cup sugar
  • 4 eggs
  • 1 tbsp fine orange zest
  • 1/2 cup fresh orange juice (1 orange)
  • 1 tsp pure vanilla extract (or vanilla paste if you can find it)
  • 1/4 whipping cream
  • 1/4 tsp ground cinnamon
  • 1 tsp baking powder
  • 1 tsp baking soda
  • 5 1/2 cups of fine pastry flour
  • 1 egg & 1 tsp water for egg wash
  • some sesame seeds for sprinkling on tops

Step 1: gather all ingredients so you don’t forget anything – measure and place them in order.

Step 2: With a paddle to begin and the dough hook to finish, add the Extra Virgin Olive Oil and sugar and blend for 1 minute.

Step 3: add eggs, orange zest, orange juice and vanilla, cream and cinnamon. Mix until blended well. Leave it running for a good 2 minutes.

Step 4: In a bowl add flour, baking soda and baking powder. Mix with a whisk to incorporate. Change the paddle for the dough hook- this will get dense because you are going to form cookies with your hands. Add flour 1 cup at a time and just mix until incorporated a few seconds, then add more flour until you get a heavy dough. This will be sticky but if you pat it will not stick to your hands. Once you are there stop. (don’t over mix)

Step 5: place dough on floured surface. You wont need too much flour since there is oil in the batter. This is where you can use an ice cream scoop to get even sized balls or just divide the dough in half and then keep cutting everything in half until you get 24 even sized balls. Should be a ball that can fit in your hand slightly larger than a golf ball.

Step 6: roll out each ball into a log with a bit of flour so it doesn’t stick to the counter. You can roll out to about 10-12 inches in length. Fold in half and roll it around itself until it looks like a rope.

Step 7: place on parchment lined cookie sheets -there should be a bit of room between them as they will rise a bit. Mix the egg and water and whisk with a fork to make the egg wash. Brush each cookie and sprinkle on sesame seeds.

Bake at 325 degrees F for 20 to 25 minutes turning to make sure they bake evenly.

Served warm they are great but they will last a few days in a Ziploc bag and this is when they are perfect for dunking! or you can freeze some for another day. The Easter Bunny came to the window because it smelled so good too….I guess that is a lucky sign!

Happy Easter!

Baked Jalapeno Poppers

OK! I must admit these were pretty good. They are perfect for a party because they can be made made ahead of time, then just baked until “melty” and delicious!

You will need:

  • 5-6 Jalapenos (this recipe can easily be doubled for larger crowds!)
  • 2 Spring onions (scallions)
  • 1-2 cloves garlic -minced finely
  • 1 tbsp your favorite Bar-B-Q sauce
  • 2 heaping tbsp of cream cheese
  • 1 tbsp chopped cilantro (coriander)
  • 3 strips of bacon- cooked well and chopped finely
  • 1 tbsp panko breadcrumbs
  • 1 cup of cheddar or spicy cheese I used a Habanero cheese!

I found this Habanero cheese which has some pretty nice heat but you can use any sharp cheddar or jack cheese you prefer.

Step 1: If you are sensitive use gloves when handling chilies. Slice Jalapenos in half, lengthwise, then clean out seeds and membranes with a spoon. Place on a foil lined baking sheet.

Step 2: cook bacon and then chop info small dice.

Step 3: chop all ingredients finely and place in a bowl. Reserve a few bacon bits for topping.

Step 4: fill mixture in jalapeno boats and top with some breadcrumbs. Bake in a 425 degree oven for approximately 20 minutes or until peppers are soft and topping is browned.

Finish with a few more bacon bits and serve with a bit of sour cream to cool that heat!!