Orange Grilled Mahi Mahi Salad


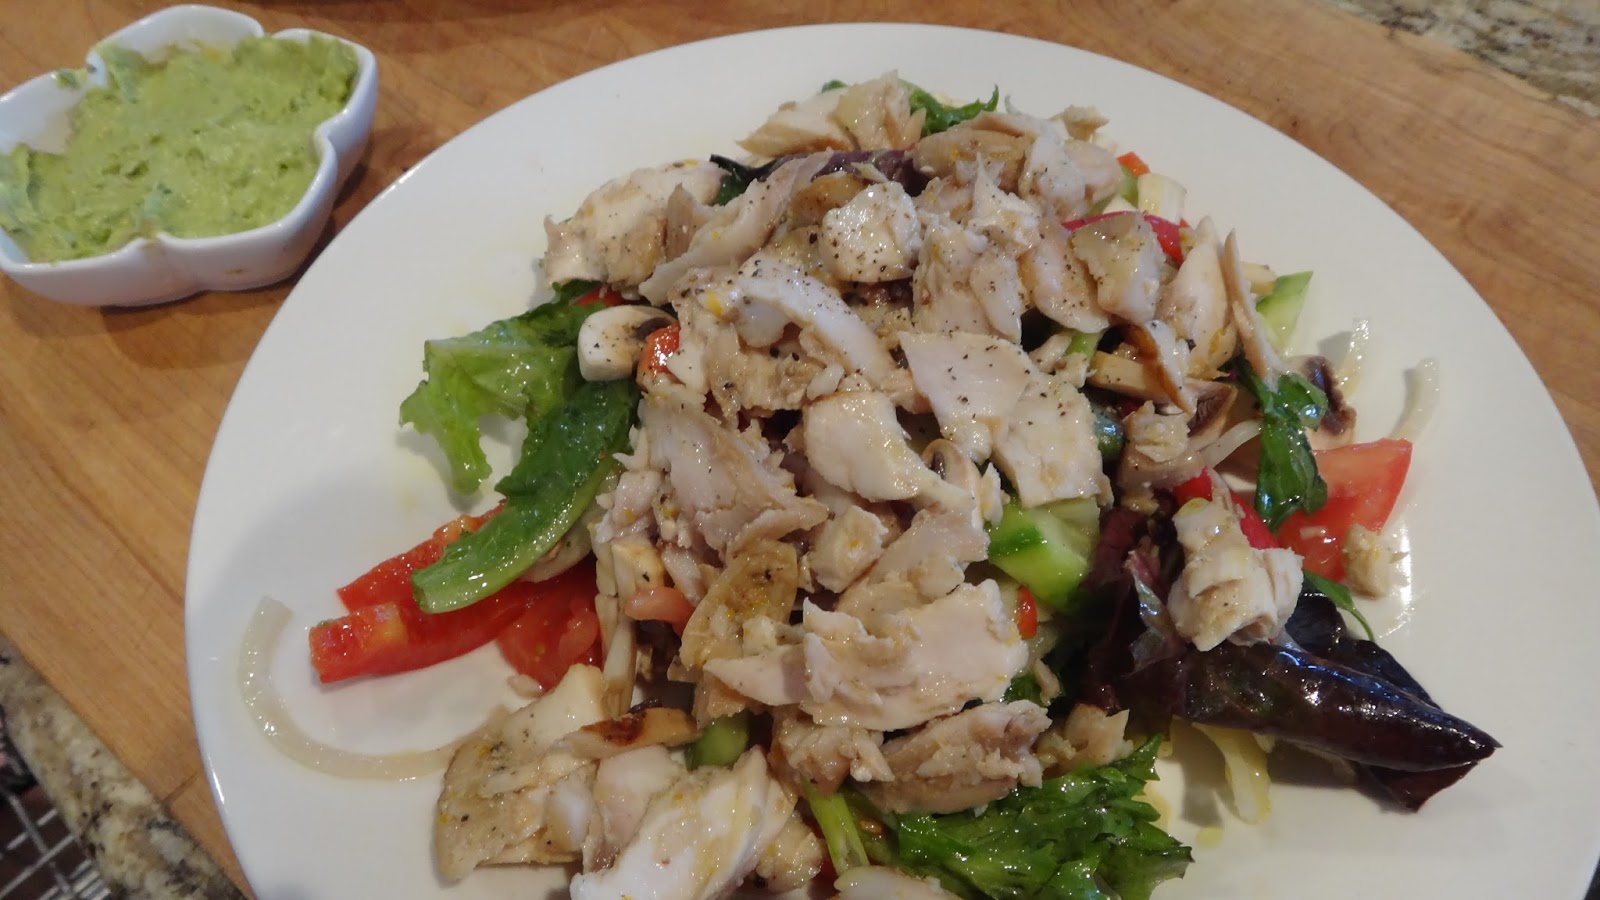
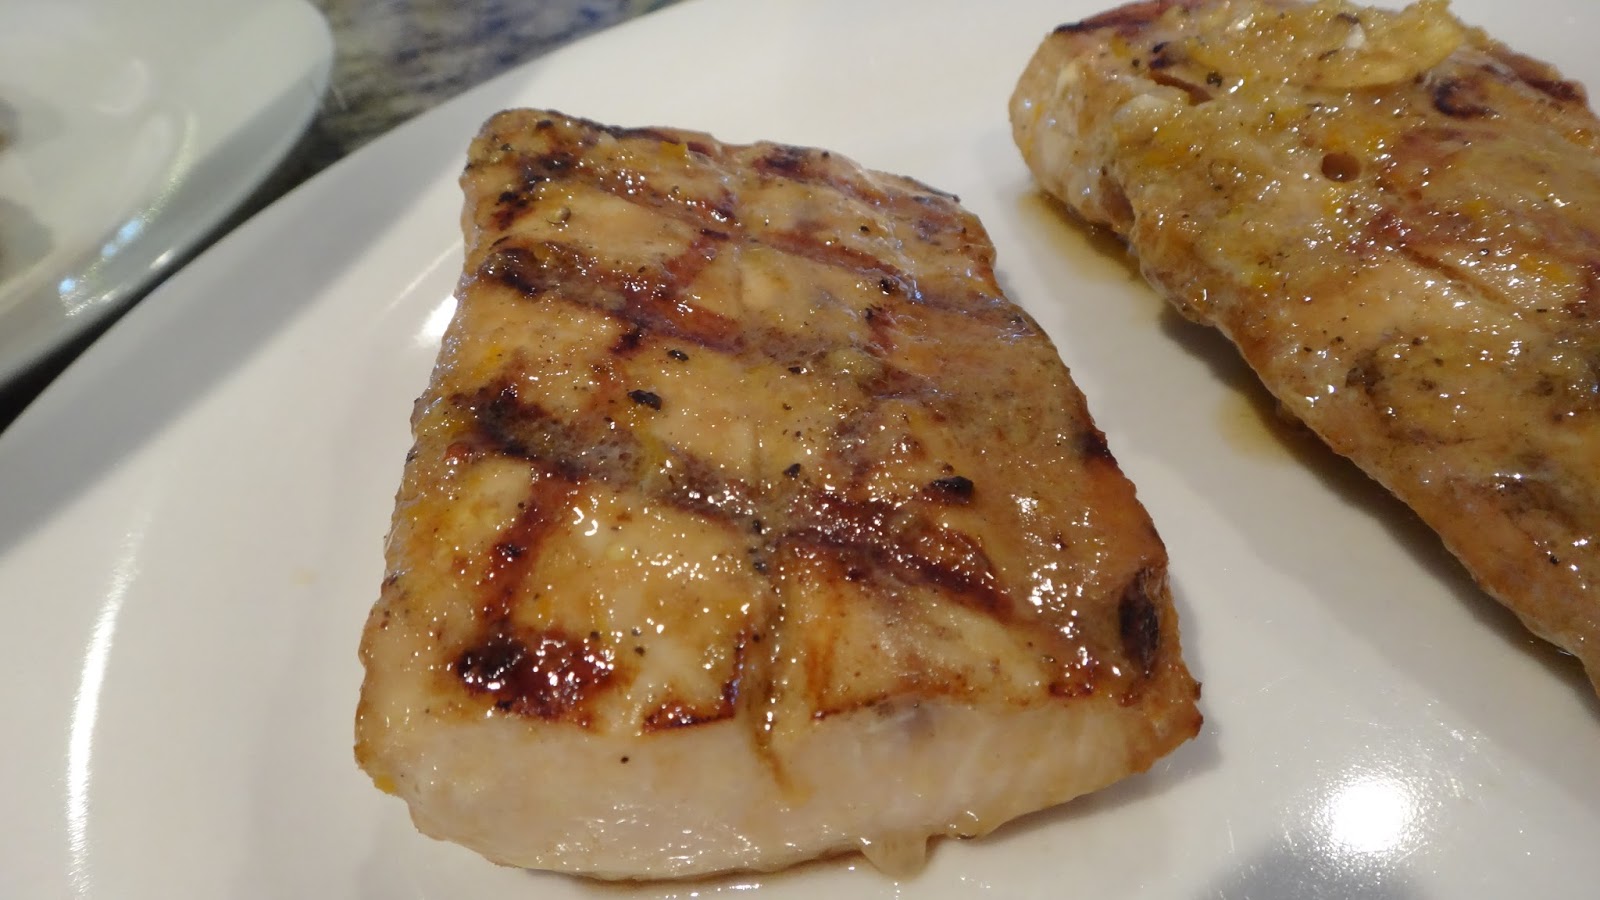
Orange grilled Mahi Mahi served whole, sliced or crumbled over your favorite vegetables makes a delicious, hearty meal.  You can use fresh if you are lucky enough to get it however, frozen fish is still a fantastic product. Create your favorite combinations of vegetables and toss in an orange vinaigrette and you have dinner.


You will need:

  • 2 pieces of Mahi Mahi
  • 2 tbsp soy sauce
  • 1 tsp dried or fresh ginger
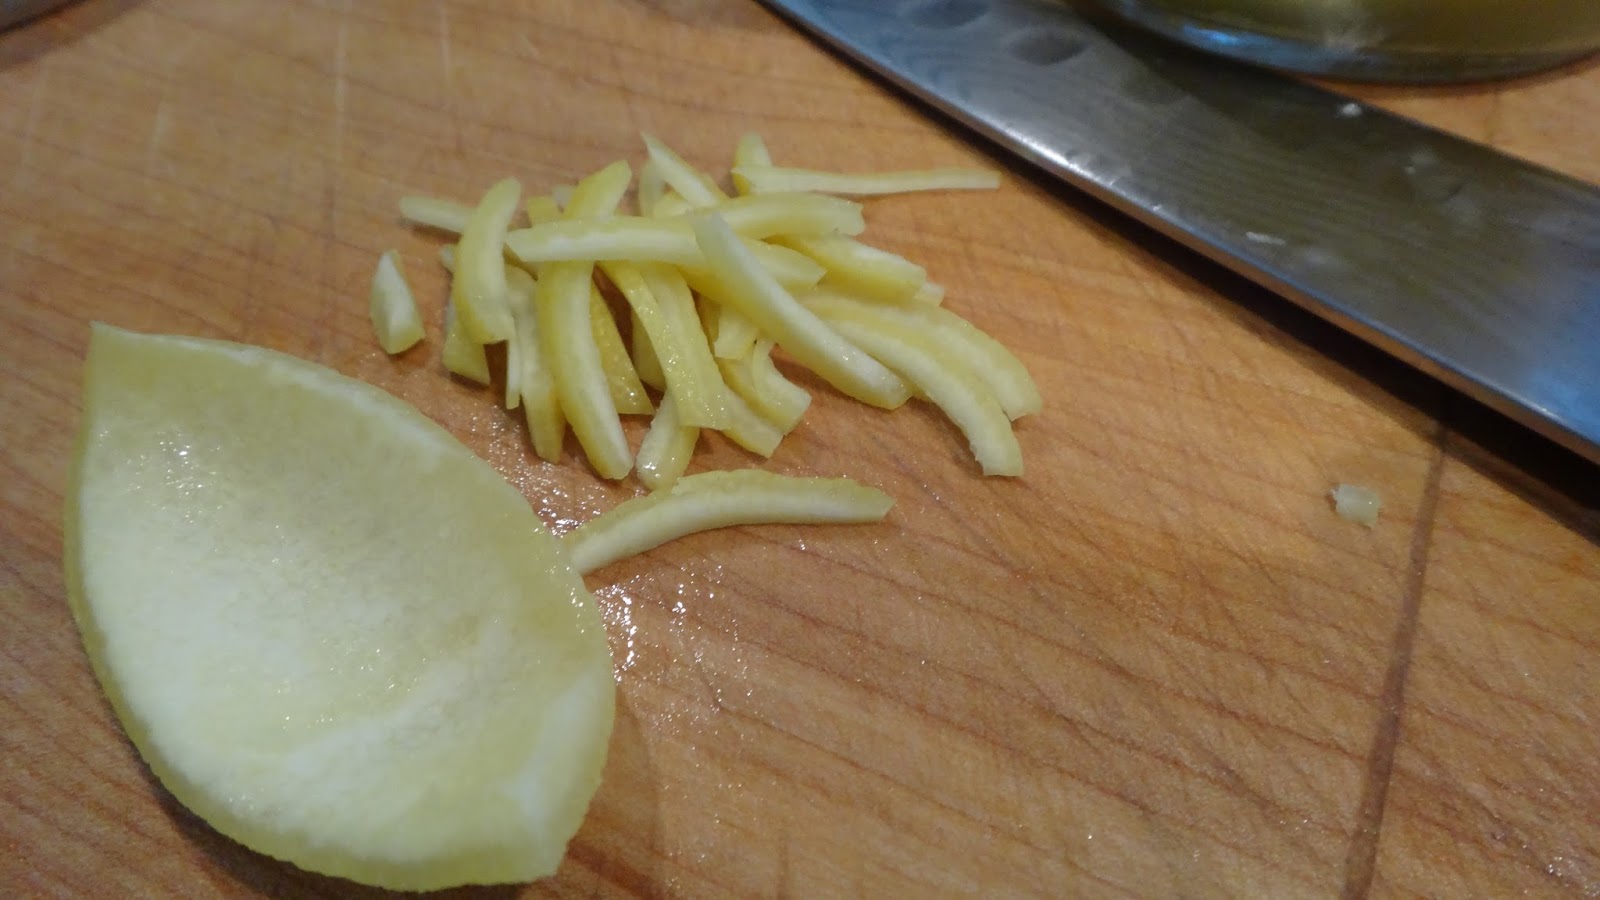
  • 1/2 orange juiced and 1 tbsp orange zest
  • 1 clove garlic – crushed
  • 2 tbsp olive oil
  • salt and pepper to taste

Dressing

  • 1/2 orange juiced
  • 2 tbsp rice wine vinegar
  • 3 tbsp olive oil- use your best extra virgin olive oil
  • 1 tsp honey mustard
  • 1 tsp sesame oil
  • salt/pepper to taste

Plus all your favorite vegetables chopped for a nice big salad


Step 1: in a large bowl add thawed fish, soy sauce, ginger (fresh grated is always better) orange zest, orange juice, crushed garlic, olive oil and salt and pepper. Toss, cover with plastic wrap and keep in fridge while you prepare salad and heat grill.


Step 2: in another large bowl add all your ingredients for the dressing. Add orange juice, rice wine vinegar, extra virgin olive oil, honey mustard, sesame oil, salt and pepper to taste. Mix taste and adjust if necessary. Add more salt and pepper or more vinegar if necessary.


Step 3: chop all the vegetables you like for your salad. I add the chopped vegetables directly over the dressing but, I do not toss until just before I serve. Make sure you put hearty vegetables like peppers or cucumbers directly on the dressing and leave the tender greens to last so they do not touch the dressing and get wilted before you serve.


Step 4: grill your fish for a few minutes on each side until just cooked through basting with the remaining marinade.


Toss salad, crumble or slice fish (or leave it whole ) and pour the wine!

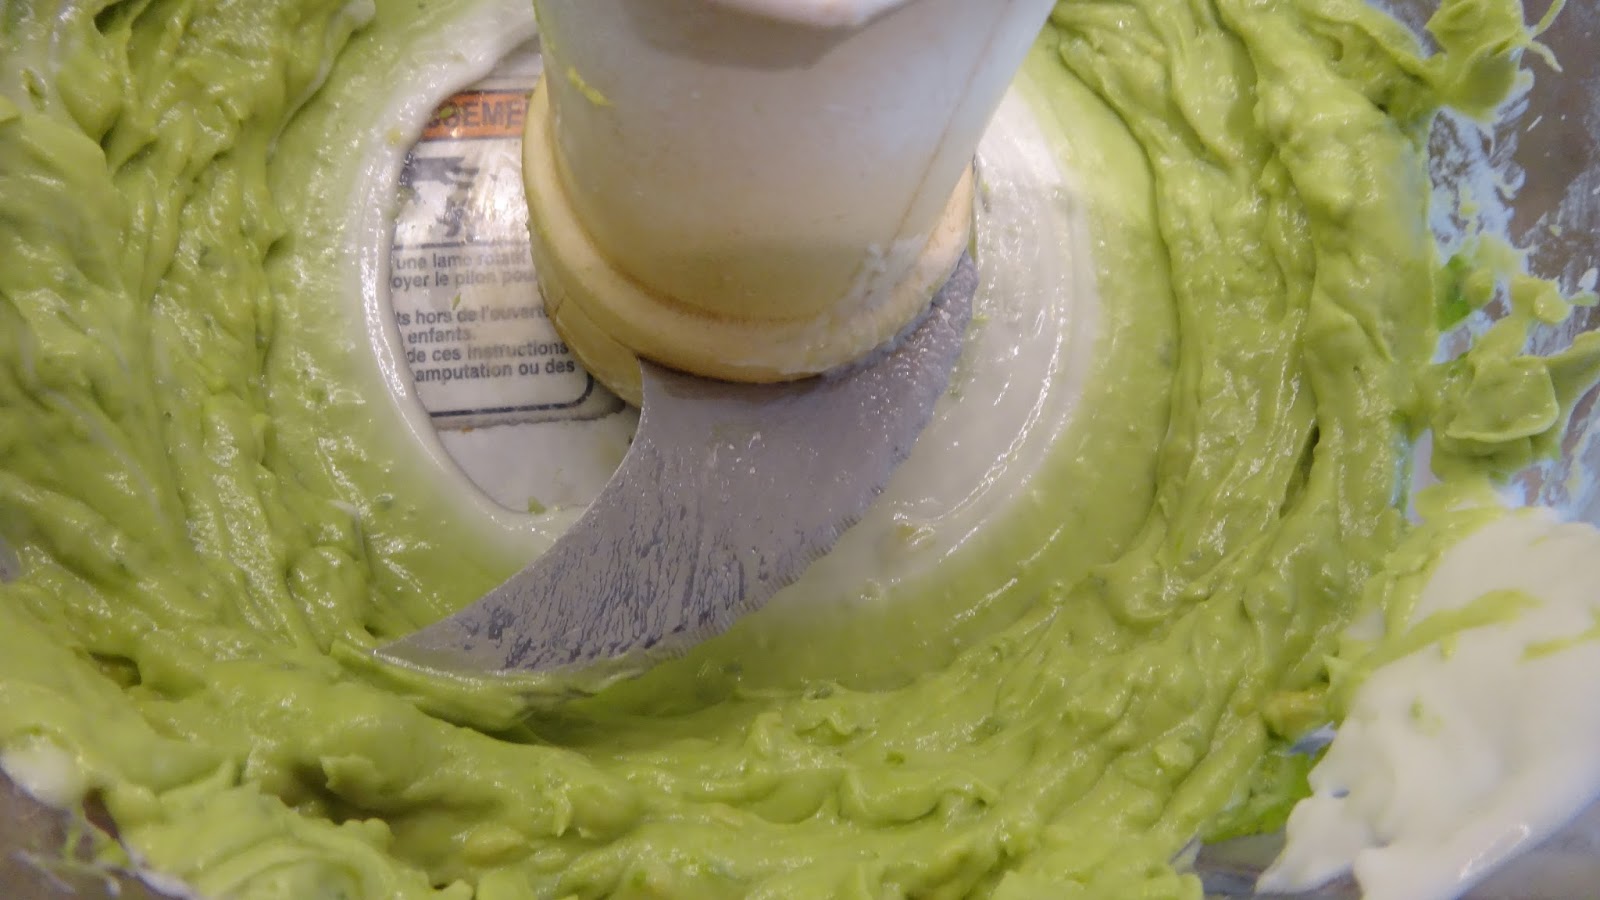
I have also used some Avocado lime cream that I had from a meal the day before which went very well.


Eggplant Meatballs


Even if you are not a vegetarian you can enjoy some meatless meals. This one does not disappoint. These meatballs are packed full of bold flavour and even the biggest carnivores will feel satisfied. You can serve these simply with a basic tomato, some fresh basil and a shaving of grated Parmesan.


You will need:


  • 1 small eggplant – baked should equal 1 cup
  • 1 large bun or a few slices of bread crumbled
  • 1/2 cup milk or water
  • 1 ounce or a handful of dried mushrooms -soaked in 1/4 cup boiling water.
  • 1 egg yolk
  • 1/2 cup grated Parmesan
  • another bun or couple of slices of bread
  • 1/2 cup breadcrumbs
  • 1 tbsp parsley and basil – chopped fine
  • 1/2 onion grated
  • 3 cloves garlic -chopped fine
  • 1 tsp Italian seasoning
  • salt/pepper to taste
  • your favourite tomato sauce to drown the meatballs in


Step 1: slice eggplant in half and place on a lightly oiled baking sheet (I always cover in parchment paper) bake 30-45 minutes or until very soft to the touch. Let cool until you can handle and with a spoon scoop out flesh. Chop until pretty much pureed. Set aside. If there is too much liquid you can drain in a colander.


Step 2: in a small bowl add torn bread and milk. Let sit for 10 minutes until completely wet and falling apart.


Step 3: take your favourite dried mushrooms and rehydrate by soaking in some boiling water. Leave 5 minutes and then drain liquid (this is great liquid to keep for the pasta sauce) Chop mushrooms fine.


Step 4: in a large bowl add eggplant, bread, mushrooms, Parmesan, chopped herbs, grated onion, garlic, Italian seasoning, salt and pepper. Mix with your hands to determine how wet your mix is.


Add the egg yolk and another crumbled bun or 2 slices of bread. Mix again and add breadcrumbs if too wet. At this stage you can form a ball and fry it to see how firm it is and if it holds together well. If it falls apart add a bit more breadcrumbs or some more Parmesan cheese to the remaining mix and fry another test meatball. I like these to hold together but they are still on the softer side compared to a true meatball.


Step 5: using a small ice cream scoop or your hands form even sized small meatballs.


Step 6: in a large pan with some olive oil. Cook meatballs until browned on all sides.


Step 7: add some tomato sauce to your pan with the meatballs. I keep the olive oil because I always use great oil but, if you prefer to drain the oil you can. Cook 15 minutes.


I serve a few meatballs with a bit of sauce and a grating of fresh Parmesan.


Grilled Fish Tacos with Avocado Lime Cream and Fresh Tortillas


These pictures do not do this justice, These were some of the best grilled fish tacos I have ever made. I think I moaned during every bite!! Fresh made flour tortillas, grilled tuna, pico de gallo (peek-o de guy-o) and a smooth avocado lime cream…..divine!! You have got to make these! If you want to buy store-bought corn or flour tortillas you can but, the fresh are out of this world and you can make them and keep them warm while you prepare the rest of the meal. Simple grilled fish, a fresh salsa and some warm tortillas make a truly fantastic dinner. Big Pete said these were good enough for company!


You will need:

  • a couple of tuna steaks – mine were frozen which are great if you can’t find fresh
  • 1 tbsp taco seasonings or make your own
  • 1 lime juiced and 3 tbsp olive oil

Taco Seasoning

  • 1 tsp dry oregano
  • 1 tsp garlic powder
  • 1 tsp onion powder
  • 1/4 tsp chili flakes (you can grind or leave whole)
  • 1/2 tsp smoked paprika
  • 2 tsp ground cumin
  • 1 tsp salt
  • 1 tsp fresh cracked pepper

Avocado Lime Cream

  • 1 ripe avocado
  • 1 small individual serving container yogurt- I used coconut and it is really great in this!
  • 1/2  lime – juiced
  • 1 garlic – crushed
  • 1/2 tsp onion powder
  • 1/2 jalapeno
  • 1 tbsp fresh cilantro
  • salt/pepper to taste

Pico de Gallo

  • 2 tbsp onion – diced fine
  • 1/2 small jalapeno- chopped fine
  • 3 tomatoes – diced
  • 1 lime – juiced
  • 1 tbsp chopped cilantro
  • 2 spring onions – diced fine
  • 1 clove garlic – minced fine
  • salt/pepper to taste

Garnish

  • thinly sliced cabbage
  • fresh cilantro leaves
  • thinly sliced onions

Tortillas

  • 2 cups flour
  • 1/2 tsp salt
  • 3 tbsp olive oil
  • 1/2 tsp baking powder
  • 1/2 – 3/4 cup warm water


Step 1: if you can get fresh tuna or halibut great but, I used frozen and it was perfect. I thawed the fish in the fridge (my bag had 2 pieces which was perfect for 2 people) Place the thawed fish in a few tbsp of olive oil and return to fridge while preparing the rest of the toppings. I don’t add the spices or the lime until just before grilling because the lime will start to cook the fish and the salt in the mix can dry the fish out.


Step 2: in a food processor add flour salt, olive oil (lard is traditional but I like olive oil) and baking powder. Add 1/2 cup of the flour and process until a ball starts to form in the machine – less than 1 minute. If the dough is very soft and wet at this stage I remove from the machine and knead on the counter. I add just enough flour to make the dough no longer sticky to the touch. Wrap the dough in plastic wrap and place in the fridge at least a half hour which is really the time it takes to make the other parts of the meal. You could also make this the day ahead.


Step 3: chop all your ingredients for the Pico de gallo and add to a small bowl. If you prefer you can do this in the food processor using a few pulses but, I like the chunkier texture created by the hand chopping. Get a good knife I promise you you will enjoy chopping things with a good knife. Set aside.


Step 5: add ingredients for the avocado lime cream to the food processor. I add everything except the yogurt first. Pulse and then add the yogurt and process again to get a smooth texture. You may need to stop the machine and scrape down at least once.


you can certainly just put this in a bowl to serve or you can put in a ziploc bag or squeeze bottle to drizzle over tacos.


Step 6: thinly slice a few leaves of cabbage, thinly slice some onions, some limes and gather lots of cilantro for your garnishes.


Step 7: divide your dough into approx 12 balls. I just form a log and cut in half and then continue to cut each piece into halves until I have 12 even balls. I personally like little tacos which stay nice a fresh and don’t tend to get soggy. Cute little tacos! Roll a basic circle with each.ball.


Step 8: in a small hot pan (without oil) cook tortillas on each side for a few minutes. They may puff up and you just want a bit of colour on the tortilla.


Once cooked place in a foil wrap and you can keep these in a warming drawer or low oven to stay warm while you cook fish.


Step 9: prepare your taco seasoning mix or you can use a store-bought one. There will be lots leftover for another time just store in a small jar.


Step 10: sprinkle both sides of fish with taco seasoning and squeeze the lime over the fish as it is cooking. Cook for a few minutes on each side on a hot grill. Crumble the cooked fish into pieces and place on a plate for people to assemble their tacos. I just have a board and let people make their own.


My tacos had cabbage on the bottom, tuna, pico de gallo, a squeeze of Avocado lime cream and a squeeze of fresh lime. Big Pete likes to add some Frank’s Red Hot sauce.


I am not kidding you will go crazy!!!


Sweet Feta Cheeseburgers


I have said it before but, I truly love a great juicy burger and this one does not disappoint! It is made with grated sweet potato and crumbled feta cheese and is moist and yummy. If you have people in your house that don’t want to eat vegetables I always say “chop them fine and they won’t notice.


You will need:


  • 1 lb ground beef – don’t use extra lean you want some fat%
  • 1/3 cup finely grated sweet potato (this is not a yam )
  • 1/4 cup crumbled feta cheese
  • 1 spring onion – diced fine
  • 2 tbsp grated onion
  • 1 tbsp finely chopped parsley
  • 3 tbsp Worcestershire sauce
  • 1/2 tsp lemon juice
  • salt and pepper to taste when you are grilling


Step 1: finely grate 1/3 cup sweet potato (this is not YAM folks!! look it up.)


Step 2:  In a large bowl add ground meat, sweet potato, crumbled feta, finely diced spring onion, grated onion, chopped parsley, Worcestershire sauce and lemon juice.


Step 3: lightly toss rather than compress meat to mix all ingredients. You want a nice moist burger, don’t overwork that meat.


Step 4: form 4 patties.


Step 5: salt and pepper patties and grill to the way you like them.


Serve with your favourite toppings!!


Herb and Ricotta Ravioli


This recipe is for my friends Mary Ann and Gina who think making pasta is too difficult. It does take a bit of time but, honestly the effort is so worth it when you enjoy these delicious little pasta pillows filled with ricotta ad herbs and served simply with some olive oil, a handful of pine nuts, a sprinkle of spinach and finally a fresh grating of Parmesano Reggiano!! Come on you know you want to eat this!!


You will need:


  • 500 grams of ricotta – drained for 1-2 hours in fridge
  • 2 tsp finely grated lemon zest
  • 1 tbsp lemon juice
  • 2 tbsp chopped basil
  • 1 tbsp chopped chives
  • 1 tbsp chopped flat parsley (Italian parsley)
  • 1 clove garlic – crushed
  • 1 egg yolk
  • 1/2 cup freshly grated Parmesan cheese
  • 1/2 cup breadcrumbs
  • 1/2 tsp fresh nutmeg
  • salt/pepper to taste

Pasta

  • 3 eggs
  • 2 cups flour (all purpose or 00)
  • 1 tbsp olive oil
  • 1 tsp salt


  • 1 cup baby spinach
  • 1/4 cup pine nuts
  • 3-4 tbsp exceptional olive oil
  • 2 cloves garlic sliced thinly
  • salt/pepper to taste
  • fresh grated Parmesan


Step 1: drain your ricotta for 1-2 hours in the fridge. Discard liquid.


Step 2: place ricotta in a large bowl. Add lemon zest, lemon juice, chopped herbs (makes about 1/4 cup once chopped) garlic and egg yolk.


Step 3: grate Parmesan and add to bowl with breadcrumbs and freshly grated nutmeg. Stir to combine. If you find it too wet add a bit more Parmesan or breadcrumbs. You don’t want the filling too wet. Place in fridge while you make pasta.


sorry terrible picture!


Step 4: in a food processor add eggs, flour, olive oil and salt. Process until it just starts to turn into a ball (less than 1 minute)  Remove and knead with your hands to form a ball. Cover in plastic and let rest for at least 1 hour on counter.


Step 5: sprinkle some flour over your dough and cut into 4 pieces, then each of those into half so that you have 8 equal pieces of dough. Flatten each piece in some flour and then roll out 2 pieces at the time. Leave the others under your plastic wrap.


Step 6: roll out 2 sheets.  I use an attachment on my KitchenAid mixer but you can use a crank roller or even a rolling pin. I get my sheets to number 6 which is a few from the end. I don’t want them so thin that the sheets will tear while cooking and fall apart.


Step 7: place a small teaspoon of filling on one sheet leaving room so that you can cut out your ravioli with a cookie cutter or even a glass or cup. I take a small cup and fill with water and dip my finger in the water and run a wet edge around the area to be sealed on each ravioli. I then place the second sheet on top and carefully seal allowing all the excess air out before making the final seal. I do this around each ravioli using my fingers and also the base of my palm. Once sealed I use the cutter to cut out ravioli. Place them on a floured cookie sheet, coating each in flour. I will take all the extra ravioli and freeze on the cookie sheet and then once frozen toss in a Ziploc bag.


Step 8: to prepare either fresh or frozen. Add to salted boiling water. Allow the ravioli to float to the top and then cook 1-2 more minutes. Remove carefully with a slotted spoon and place directly into your pan.


Step 9: in a hot pan add exceptional extra virgin olive oil along with 2 sliced garlic cloves,  a handful of pine nuts and spinach. Cook on medium heat for a minute or two. Add your ravioli and cook another minute. Add salt and pepper to taste.


Serve with another fresh drizzle of good olive oil and some freshly grated Parmesan cheese.


HEAVENLY!!!


Salmon Burgers


It is very easy to take pieces of salmon and process them with some aromatics and quickly grill them for a delicious meat substitute. I have added some Asian flavour to these and topped them off with a crunchy coleslaw.


You will need:


  • a few pieces of wild salmon
  • 1/2 onion- pureed
  • 2 cloves garlic
  • 1 tsp finely chopped chives
  • 1 tsp finely chopped parsley
  • 1 tsp finely cilantro
  • 1 tsp dry wasabi powder
  • 1 tbsp sesame oil
  • 1 tbsp black sesame seeds
  • 1 tbsp lemon grass (comes in a tube ground or freshly chopped fine)
  • salt/pepper


Step 1: clean fish and remove any skin. Place the fish in a food processor and pulse a few times(3-4) until there is still some form to it but it will stick together. If you go too far it will become mush. You can also hand chop with knife but, you need to chop it in small enough pieces that it will hold together. This photo shows the first cuts and needs to be chopped much finer. A food processor works better (I was just too lazy to get it out today!)


Step 2: prepare all your  flavourings. Grate or puree onion and garlic. Add to a large bowl. Chop herbs and add wasabi powder, sesame oil, black sesame seeds, lemongrass and a sprinkle of salt and pepper.


Step 3: add chopped salmon and mix well. Form patties and place in freezer while you prepare the coleslaw and heat the grill.


Step 4: I prepared a basic coleslaw with sliced cabbage, grated carrot, sesame seeds (black) a bit of mayonnaise, some olive oil, rice wine vinegar and some grated cucumber (seeds removed)


Brush with olive oil and grill on medium heat for a few minutes on each side. They cook quickly. Top with coleslaw and some baby cucumber slices and serve. I have also fried a sweet potato in some olive oil.


Poppy Seed and Chestnut Rolls


This dessert always makes me think of my Mother. She would occasionally make this with ground nuts or poppy seeds but, she would also always buy them from the local delicatessen. My parents loved this with big mug of tea. I can still hear her moaning and licking her fingers in pleasure, sitting at the grey Formica table in our kitchen on Greenwood Avenue.


This is a lovely soft brioche like dough and can be used for cinnamon buns or filled with anything that makes you happiest with a mug of tea!!


You will need:


  • 2 tsp regular dry yeast
  • 1 cup warmed milk
  • 1/2 cup sugar
  • 1/4 cup honey
  • 3 eggs – room temperature
  • 1 stick of butter (1/2 cup or 8 tbsp) melted
  • pinch of salt
  • 1/2 tsp real vanilla
  • 4 1/2 -5 cups all-purpose flour
  • 1 large can of poppy seed filling 32 oz or 900 grams
  • optional can of chestnut spread with some chopped chestnuts or walnuts


I bought this can of poppy seed filling several months ago from a European speciality shop and finally got around to using it in this recipe. I also found these chestnut spreads and I used the smaller can from France in the second roll. If you buy this large can of poppy seeds filling it is enough for both rolls in this recipe. If you cannot find this product there are several recipes on making poppy seed filling on the web. It is poppy seeds, sugar, orange and lemon peel.


Step 1: add milk to a heat proof measuring cup and microwave for 1 minute to warm. Add warm milk to yeast and stir in a large bowl. Leave 5 minutes to bloom yeast.


Step 2: melt butter in same measuring cup for 40 seconds in microwave. Add eggs, melted butter, salt and vanilla.Whisk to combine.


Step 3: add 4 of the five cups of flour and mix well with a wooden spoon. Add another 1/2 cup of flour to counter and continue to fold and knead dough until the dough is no longer sticky. I found the 1/2 cup was enough  (the remaining 1/2 cup is reserved for rolling out the dough – you may not use all of it depending on the humidity in your kitchen)


Step 4: cover and let dough rest 2 hours.


Step 5: slice dough into two and roll out each into a rectangular sheet (not too thin or the filling will pop) This is a lovely, soft and easy to roll dough.


Step 6: place half the can of filling on one roll and the other half on the second roll. Leave an edge around entire sheet of dough to provide a good seal.


For something different you can create a paste with nuts and honey or I used this small jar of chestnuts & a sprinkle of walnuts (silly because I had some frozen chestnuts in the freezer that would have been perfect. Try some jam and some fresh fruit or fruit and cream cheese??


Step 7: Roll up and fold ends under to seal. Sprinkle with some raw sugar. Place on a parchment lined baking sheet. Leave to rest another 30 minutes. Bake in a 350 degrees F oven for approximately 30-35 minutes or until browned.


Let cool and slice. Can be wrapped and stored at room temperature for a few days and it is still delicious the next day.


Preserved Lemons and a Lemon Couscous Recipe


Preserved lemons are easily made with just two things: lemons and salt. They keep for months in the fridge and you typically use the skin in your Middle Eastern dishes. Try making a batch you will never want to buy them. Before using them you rinse off the salt and remove the flesh and pith, eating the thin skin. This is a good place to use Organic lemons since you are eating the skin once preserved.


You will need:


  • a clean jar- sterilized in boiling water 5 minutes
  • lots of kosher salt
  • lemons as many as will fit in your jar


Step 1: wash your lemons. I suggest organic for this application but, if you are using non organic than wash the skins with a mild soap and water before using.


Step 2: slice down each lemon to almost the end (but don’t cut all the way through!) Make two slices to create 4 quarters. Fill as much Kosher or sea salt you can into the center.


Step 3: jam as many lemons as you can into a clean, sterilized jar. Sprinkle a bit more salt and seal.


Place in fridge for at least a month. Shake every once in awhile to distribute juice and salt. After a month rinse before using and slice off the outer skin to use in your favourite dish.


I made a couscous salad with mine


  • 2/3 cup dry couscous
  • 1 tbsp olive oil
  • 1 cup boiling water
  • 1/2 onion
  • 1/2 preserved lemon – use skin only
  • 2 tbsp chopped parsley
  • 2 tbsp chopped basil
  • 1/4 cup toasted pumpkin seeds
  • salt/pepper to taste


Step 1: rinse under cold water and remove flesh and most of the pith. Chop skin.


Step 2: in a pan heat olive oil and toss couscous to toast for a minute or two.


Step 3: add boiling water, cover and remove from heat. Leave at least 5 minutes, once done fluff grains with a fork.


Step 4: in a small pan saute onions with salt and pepper until just starting to develop some browned edges.  Remove from heat and chop fine and add parsley, basil and lemon.


Step 5: toast pumpkin seeds in same pan for a few minutes.


Toss all ingredients and add a bit of fresh olive oil and perhaps a squeeze of lemon juice.


Tea Infused Plum and Cereal Pinwheels


These are simple and delicious. A few plums, some blueberries and your favourite breakfast cereal wrapped in a sheet of puff pastry.


You will need:

  • 3-5 plums (depending on size – if small use more)
  • 2 cups water
  • 2 black tea bags
  • 2 berry or fruit tea bags
  • 1/2 cup sugar
  • 1 sheet puff pastry thawed
  • 1 cup crushed breakfast cereal – I used Kashi Blueberry Nut Clusters
  • additional vanilla or regular sugar – enough to generously sprinkle over fruit (approx 1/4 cup)

Heat oven to 375 degrees F


Step 1: run your knife around each plum so that tea will infuse into fruit.


Step 2: in a small saucepan heat water, tea bags and sugar until they come to a boil. Stir to dissolve sugar and place in plums. Turn off heat and let sit for 5-10 minutes until fruit is soft and skin ca be removed.


Step 3: drain liquid and let fruit cool completely. Peel skin and slice or pull fruit away from pit. It can be very soft and still work fine in this dessert or if it has shape then you can slice thin. Mine were quite ripe so they were soft and I just tore them into pieces once cooled.


Step 4: roll out puff pastry sheet and place a layer of crunched cereal (I just crush in my hands and sprinkle over dough) on puff pastry. Add your tea infused plums and some fresh blueberries. Generously sprinkle a layer of sugar or vanilla sugar over fruit and roll up.


Step 5: with a sharp serrated knife slice roll in half and each half into 3 equal pieces. Place in a lightly buttered muffin tin (you can also sprinkle a bit more crushed cereal or sugar on each top) and bake 20-25 minutes until crisp and browned. Let cool 5 minutes, run knife around cup and eat while warm.


Eat warm with a big mug of berry herbal tea.


Butternut Squash and Goat Cheese Ravioli


I love pasta and any excuse to make pasta. You can make a batch and eat some and freeze the rest for a later date when you don’t feel like cooking. Making your own pasta is not hard and you can fill them with so many good things. This one has butternut squash and some goat cheese. It makes a nice delicate interior and I just serve simply with some good olive oil or butter, fresh sage and Parmesan.


You will need:


  • 1 small butternut squash peeled and cut into pieces (approximately 2 cups)
  • 3 tbsp olive oil
  • few sprigs of fresh thyme
  • 1 small onion diced
  • 1 clove garlic
  • salt/pepper
  • 1/4 cup water
  • 1/2 tsp fresh grated nutmeg
  • 1/2 cup fresh goat cheese
  • breadcrumbs if too wet 

Pasta


  • 3 eggs
  • 2 cups flour
  • 1 tbsp olive oil
  • 1 tsp salt


  • 3 tbsp butter or olive oil
  • few sage leaves
  • Parmesan cheese to top – grated freshly
  • salt/pepper to taste


Step 1: peel and chop your squash into similar sized cubes. I used a small squash and chopped it made just over 2 cups of squash.


Step 2: you can roast the squash in an oven or I just cooked slowly on the stove on medium low heat until soft. I cooked the squash in olive oil with a few sprigs of fresh thyme, an onion, garlic, salt, pepper and a few gratings of fresh nutmeg. Let cook until soft. After a few minutes add 1/4 cup of water and let cook until all water has evaporated and all ingredients are soft.


Step 3: add squash and other ingredients to a food processor. Add goat cheese and puree until smooth. Place in a covered bowl and let set in fridge while you make pasta. If after it sets it appears too wet you can add a few tbsp of breadcrumbs at a time until it has a soft consistency but not wet at all.


Step 4: in a food processor add flour, salt and eggs and oil (I started with 2 eggs but definitely needed 3 total) Let machine go until it almost starts to create a ball in the machine. The dough is wet but if you press it it will hold together.


Step 5: gather all contents and form a ball. I did not need any extra flour. Wrap in plastic and let rest 1 hour.


Step 6: divide dough in 4 then cut each piece in half to make 8 equal portions.


Step 7: Dip ball in flour and flatten. Run through a pasta roller starting at the largest setting and running until it is thin but still thick enough to hold your filling. I go 1 or 2 settings before the lowest. I run 2 pieces at a time keeping the other dough pieces wrapped to prevent drying out.


Step 8: once I have 2 sheets of almost equal size I place some small teaspoon sized blobs of filling over the dough. You can dip your finger in water and run around each filling. Place the second sheet over the first and carefully using your palm and fingers seal each ravioli allowing the air to escape before sealing. This dough is pretty forgiving and you can stretch it a bit if necessary. Once all are sealed I used a 2 1/2 inch biscuit cutter to cut out ravioli. I do not re-use use the scraps. I do this again rolling out two sheets and filling until I am finished.


Step 9: place on a floured cookie sheet. Once finished you can immediately cook or place cookie sheet in freezer. Once frozen place in a Ziploc bag to save. Make sure you have flour on the ravioli or they will stick and tear on the cookie sheet.


Step 10: to prepare place ravioli in salted boiling water. Wait until they float to the top and then cook one more minute. Remove with a slotted spoon and place immediately in a hot pan with some butter or great olive oil and a few sage leaves. Cook gently for a minute or two. Sprinkle with salt and pepper.


Serve with a generous grating of fresh Parmesan and I have used a few tomatoes to decorate the plate. Simple, elegant and delicious!