Columba Di Pasqua – Italian Easter Bread


Columba Di Pasqua sometimes called Columba Di Pasquale  is an Italian Easter bread which literally means Easter Dove and traditionally it is made in the shape of a dove although the shape usually looks more like a cross to me (one long piece in the middle and two balls usually get baked in a paper mould) This bread is very similar to the Christmas Panettone which I just love (I have posted a recipe  for Panettone )  This bread usually has candied orange peel  or other fruits but, unlike the Panettone does not normally have raisins in it. Very few people ever make this or the Panettone because it is a labour of love and is made over two days. I say what a nice way to show someone you love them by making this kind of special treat! Mine has the lovely scent of orange, lemon, candied ginger and a bit of orange flavoured cranberries.


The house smells magnificent!


You will need:


Biga (overnight starter)


  • 1 cup flour
  • 3/4 cup warm water
  • 1/8 tsp dry yeast (instant or regular is fine here)

OR


First Rise – Started the day before you want to bake this bread

  • 3/4 cup starter or the Biga recipe above which you need to make 2 days before baking the bread if you have a sourdough starter that you keep in the fridge you just need it to come to room temp and use it the day before you bake this bread
  • 2 cups flour (all-purpose)
  • 1/4 cup honey
  • 3 egg yolks – room temperature
  • 1 cup warm water
  • 1/8 tsp yeast
  • 1 stick of unsalted butter – cut into small cubes and then allow to come to room temperature

Second Rise – This is done on the day you are baking the bread and after the first rise has occurred.

  • all the dough from the first rise plus….
  • 1 1/2 cups flour
  • 2 tbsp honey
  • 2 tbsp olive oil – I used a fruity Donna Ricca
  • 1 tsp salt
  • 3 egg yolks – room temperature
  • 2 tsp pure vanilla or vanilla paste
  • 1 tbsp orange zest
  • 1 tsp lemon zest
  • 1 – 1 1/2 cups chopped candied peel like orange and lemon or other dried fruits you like. I made mine with candied orange and lemon peel, crystallized ginger and a bit of dried orange flavoured cranberries.
  • 1 cup additional flour for kneading out on counter

Icing/Frosting

  • 1/2 cup ground almonds – I used sliced almonds with the skins on
  • 1/2 cup icing sugar
  • 2 egg whites
  • 2 tbsp olive oil
  • 1/2 cup sliced almonds for top


2 days before you want to bake your bread


If you do not have a sourdough starter then you need to create a quick overnight starter. Make the Biga by mixing all ingredients and leaving in a covered plastic container on the counter for 15-19 hours. So…if you want to make your bread on a Saturday create the Biga on a Thursday and leave it until Friday when you will start to make your bread with the First Rise portion of the recipe. This is important because time creates a better flavoured bread rather than making it quicker with more yeast. I told you this was a labour of love! This is what the Biga looks like after 17 hours.


1 day before you want to bake your bread

In the bowl of a stand mixer add everything for the First Rise: your Biga or sourdough starter, flour, honey, egg yolks, water and yeast. Mix well to incorporate and then mix on high for 5 minutes. Once you have mixed it then add your softened butter and mix another minute. At this stage the dough is very wet. Cover with plastic wrap and leave on the counter to rise 15-18 hours. I started mine in the afternoon and then did the second rise the next morning.


This is how much it rises after 17 hours


The day you are going to bake


Chop all your peel (I make my own – see link) and dried fruit.  Add everything to the bowl for the Second Rise: the dough from the day before, flour, honey, olive oil, salt. 3 egg yolks, vanilla, orange zest, lemon zest, chopped orange peel, lemon peel, candied ginger and cranberries. Mix until incorporated and then mix on high for 5 minutes.


Cover and let rise 3 hours. The dough will still be quite wet.


In a food processor make frosting. Mix all ingredients for 1 minute. Set aside.


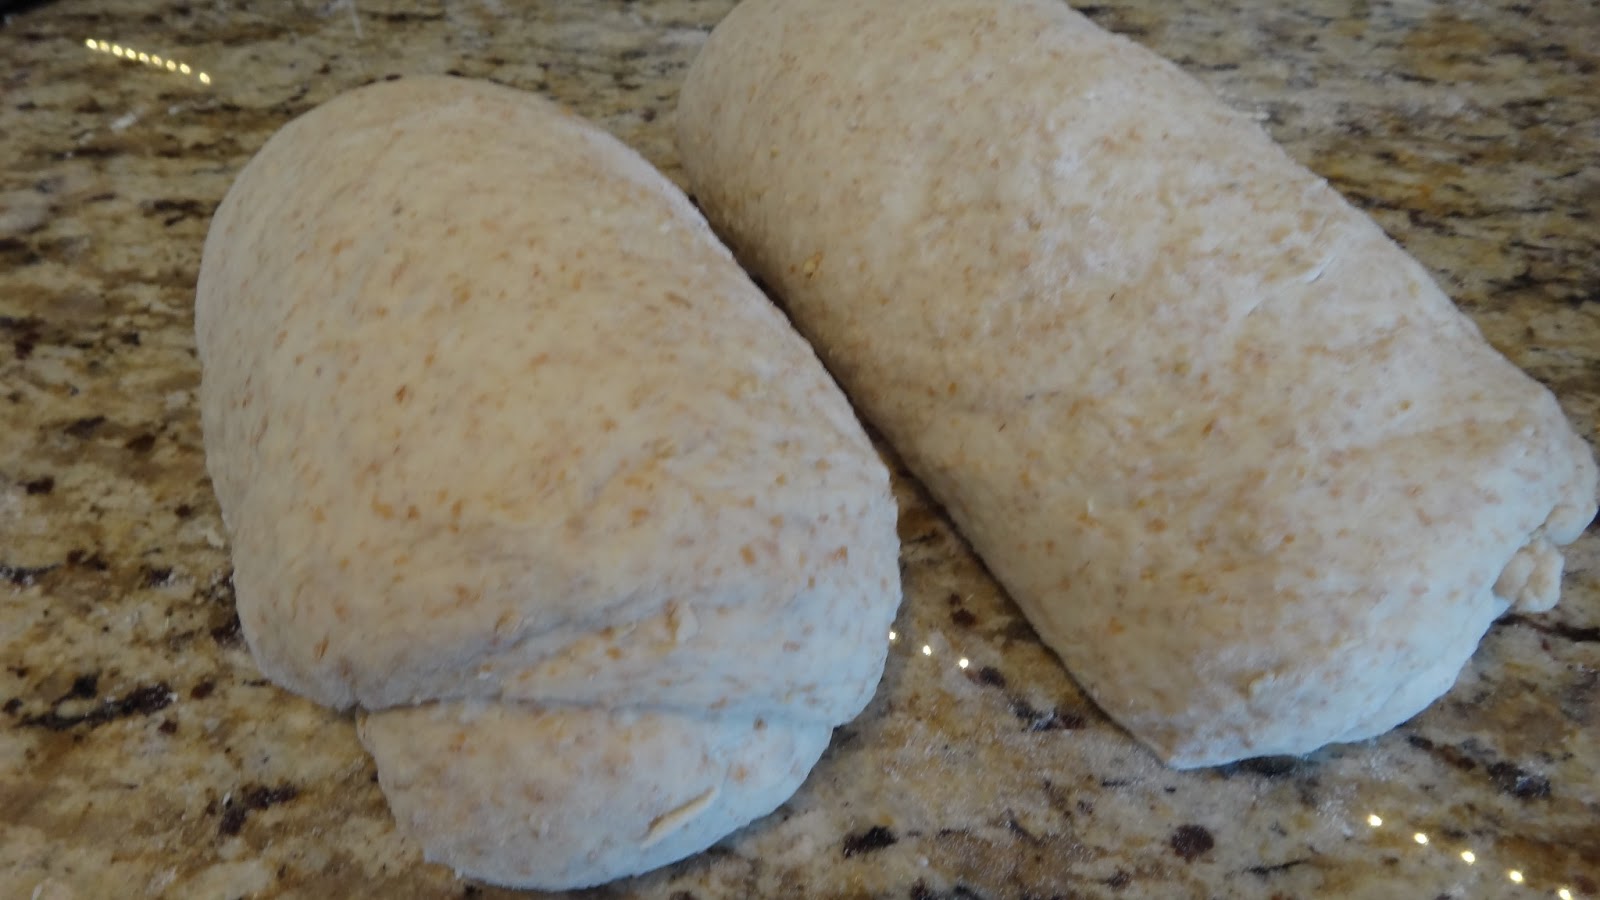
Once the dough has risen for 3 hours take the additional 1 cup of flour and add a bit at a time until it is all incorporated. I like to do this by hand because I like to feel the bread. The dough is very soft at this stage and I use a scraper to move it around the flour until it is dry enough for me to start kneading. If you prefer you can simply add the flour to the dough in the stand mixer with the dough attachment until it is absorbed and easy enough to manage. 


You can form into the traditional dove shape or make into smaller loaves. I made 3 so I could share with my neighbors.


I used foil tins because I was giving them away but, they are not ideal. Make sure you oil them to avoid sticking and I turned up the rim of the tins so they would contain the frosting. Generously add frosting and then a sprinkle of sliced almonds. When I make the Panettone I like to use tall sided non stick baking pans.


Let rise again 1 hour. Heat oven to 350 degrees F.


after their final rise


Bake for 30-40 minutes. I like to put a sheet of foil under the pans because they will rise high and some of the topping will overflow


Let cool and then slice  and enjoy! Share with your neighbors while the bread is still warm for optimal wow factor!


Turkey Bolognese

Turkey Bolognese is as good as making it with beef and wonderful for a change. The top picture is my plate with a beautiful drizzle of  great olive oil a sprinkling of fresh basil and some grated Parmesan and the second picture is Big Pete’s plate you would think I never feed the boy!

You will need:

  • 1 lb. ground turkey – I use a combination of dark/white meat
  • 1 small onion
  • 1 carrot
  • 1 stalk celery
  • 1 tsp fresh thyme
  • 4 cloves garlic
  • 4 tbsp olive oil
  • 1/2 cup white wine
  • 2-3 tbsp milk
  • 1 tbsp Italian Seasoning
  • 1/2 – 1 tsp chili flakes
  • 1 19 oz. can crushed or whole tomatoes pureed in a blender
  • 2 tbsp balsamic vinegar
  • 2 tbsp fresh basil
  • 2 tbsp fresh Italian parsley
  • sat and pepper
  • fresh Parmesano Reggiano for serving
  • a drizzle of exceptional Olive oil for the finish!

Step 1: in a food processor add onion, carrot, celery, fresh thyme, garlic cloves and a couple of basil and parsley leaves. I like to add more at the end for a fresh taste but, I still want to add some flavour while it is cooking. I puree until finely chopped. When you grate the vegetables very fine they almost dissolve in the sauce (good way to hide vegetables if some people in your family complain that they don’t like them. Don’t leave them out….hide them!)

Step 2: in a saute pan with a few tbsp of olive oil and Italian seasoning cook your turkey until water evaporates and it starts to brown. This may take 10 minutes.

Step 3: Once most of the water has evaporated add your vegetables and continue to cook another  10 minutes.

Step 4: Add chili flakes and white wine. Cook a few minutes until wine reduces and add milk.

Step 5: Add tomatoes, balsamic vinegar and salt and pepper. Taste it and adjust salt and pepper. Most people are terrified of salt and pepper but, I assure you tomatoes need salt and if you cook chances are you add way less salt then the food you buy when you are out. I then turn down the heat and let the sauce cook for 1 -1 1/2 hours. The sauce will thicken and it should just quietly “blip” along with the occasional stir from you.

If it gets too dry add some of your starchy pasta water to thin it out.

Step 6: prepare your pasta – never over cook it!

I like to add the basil and parsley at the last-minute and a drizzle of good oil and some cheese if you like. YUM!!

Hawaiian Rice


Ham and pineapple are amazing on pizza and in this rice. When you have some extra ham this is a great thing to make. I take the ham and use a food processor to make it finely minced but, if you like chunks feel free to chop it as you like.


You will need:


  • 1 cup rice – cooked in 2 cups of water – let come to a boil then cover and turn to low and leave it.
  • 2 cups chopped ham
  • 1 onion – finely chopped
  • 1 tsp fresh thyme
  • 1 fresh red chili – minced fine
  • 1 cup chopped pineapple (fresh or canned)
  • olive oil
  • 2 spring onions – finely chopped
  • 1 tbsp fresh cilantro – chopped
  • salt and pepper to taste
  • 1 tbsp soy sauce


Step 1: cook rice,  (or use leftovers) chop onions, red chili and clean thyme leaves from stalks.


Step 2: mince ham in a food processor. In a pan saute ham, pineapple, onions and thyme. Cook to remove some of the water and start to brown.This will take 5-10 minutes on medium heat.


Step 3: add rice, chopped chili, spring onions and cilantro along with a few tbsp olive oil. Fry on high heat for a few minutes. Taste and add salt and pepper and a bit of soy sauce.


Makes a good side dish or add some chicken and you have a meal (I cooked mine in some olive oil and mango juice, salt and pepper to stay with the sweet theme!)


Lemon, Goat Cheese and Asparagus Tart


This tart has the beautiful fresh taste of lemon and herbs along with the slightly sharp tang of young goat cheese, asparagus and eggs. Served with a drizzle of exceptional oil like Mandranova Biancolilla, some more fresh basil and a salad and you have the perfect spring lunch.


You will need:


  • 1 sheet of all butter puff pastry – thawed according to directions
  • 1 small bunch of fresh asparagus – woody bottoms removed
  • 1 small leek – sliced
  • 2 eggs
  • 2 tbsp milk
  • 1 tsp lemon zest
  • 1 squeeze fresh lemon juice
  • 4 fresh basil leaves – sliced into thin slices (chiffonade)
  • 2 spring onions – sliced fine
  • 1 tbsp fresh parsley – sliced fine
  • 30 g goat cheese (2 tbsp)
  • 1/2 cup shaved Manchego cheese or Parmesan
  • salt/ pepper
  • olive oil


Step 1: remove woody bottoms of asparagus and in a small pan with 1 tbsp of olive oil and 2 tbsp water, salt and pepper cook asparagus and sliced leek for 3-4 minutes until the water evaporates and the asparagus gets bright green. It should still be crunchy but, no longer raw.


Step 2: in a small dish or baking pan unfold the thawed puff pastry. I used a narrow ceramic dish just to have a lip of pastry to contain your eggs. You can use a pie plate or any square baking pan. I just made sure that the puff pastry went up the sides of the dish. Dock the pastry with a fork so it doesn’t puff too much and place asparagus spears in a decorative manner that you like!


Step 3: in a small bowl add eggs, ,milk, (or cream, or non dairy substitute) lemon zest, lemon juice, basil, spring onions and parsley (leave some fresh basil for sprinkling on top just before serving) Beat with a fork until mixed well and pour evenly over tart. Add small blobs of goat cheese  and the leeks.


Step 4: add some shaved Manchego cheese and a sprinkle of salt and pepper.


Bake in a heated 350 degree F oven for 30-35 minutes until top is browned and beautiful.


Immediately add a drizzle of good olive oil and some chopped basil. Serve with a side salad. I just had a sliced tomato, olive oil, salt, pepper and a bit of balsamic vinegar.


Pizza Al Olio

Topped without mozzarella cheese just Parmesano Reggiano

Topped with some fresh mozzarella

Added some artichoke olive spread to this one!

Is it a pizza, is it a focaccia, is it the best garlic bread?!! who cares… It is seriously good eats!!

This was right up there with my very favorite pizzas EVER!!! It is simple and bursting with awesome flavor. My favorite pasta dish is Spaghetti Aglio e Olio (which just means garlic and oil in Italian) so I thought why not try to make the same ingredients into a pizza and I am telling you this is a winner! Garlic, fantastic olive oil, chili flakes, fresh Parmesano Reggiano and a glass of vino!!

If you want to get crazy add some artichoke olive spread!! we could not stop eating it!

You will need:

Dough

  • 1 1/2 cups warm water
  • 1 1/2 tsp dry yeast
  • 1 tbsp honey
  • 3 cups “00” flour (if possible) if not use all-purpose flour
  • 1 tsp salt
  • olive oil to coat bowl while dough rises

Topping

  • lots of the best quality robust extra virgin olive oil you have- I used Foxy-Wild Groves (California)
  • 4 cloves garlic – sliced thin
  • 1/2 tsp chili flakes (or more if you like)
  • flaked sea salt – like Maldon – use a sprinkling over crust
  • 1/2 tsp dry oregano
  • fresh grated/shaved Parmesano Reggiano
  • fresh mozzarella pieces
  • fresh basil leaves

Optional buy this and take it up to another level:  Artichoke Olive Spread – WildGroves

Note: if you want awesome pizza made at home invest in a pizza stone – it will change your life! Heat pizza stone for at least 30 minutes at 500 degrees F before baking pizzas.

Step 1: You can do this all in a stand mixer which is the fastest method or slow it down  and place water, yeast and honey in a bowl. Stir and allow yeast to bloom 5 minutes.

If using a stand mixer add water, then honey, yeast and flour and mix and then add the salt last.

Step 2: add flour and salt and stir with a wooden spoon in the bowl until it becomes too stiff. Pour everything out on to the counter and gather flour and knead dough until it is no longer sticky to the touch. Knead dough for a few minutes. Drizzle olive oil in the bowl and coat dough and bowl. Cover with plastic wrap and place in fridge for 24-48 hours for best results. 

But, if you do not want to wait that long leave on counter at least 1-2 hours to double in size.  I promise even the quick method makes a great chewy pizza.

Makes 2-3 pizzas.

Step 3: divide the dough into 2 or 3  pieces and press or roll out a thin pizza on a piece of parchment paper. I use a pizza stone to bake my pizza. I like the parchment to keep the stone clean and for easy removal. Pour a decent amount of a great olive oil on your dough. This is an ingredient not just a fat so use the best you have.  I also added more once I removed it from the oven for that fresh olive oil taste)  I spread it over the entire dough with my hands or you can use a brush.

Step 4: add sliced garlic, chili flakes, dry oregano, flakes of sea salt (this is very important do not omit this!) and a generous shaving of Parmesano Reggiano. I add more Parmesan after the pizza comes out of the oven so do not put too much on at this stage.

Step 5: Bake for 5 – 8 minutes or until it is browned and bubbly and has a nice crunchy bottom. Top with another shaving of Parmesan and another drizzle or fantastic olive oil.

I also added more olive oil and some chopped fresh basil leaves after the pizza was out of the oven.

This pizza is better than any garlic bread you have ever eaten!


Chicken Pasta Primavera


You can make this dish with or without meat. Pasta Primavera is typically pasta with fresh vegetables, lots of herbs and grated cheese at the end. You can make this with almost any kind of vegetables you like. I have prepared mine with purple kale, cabbage, red peppers and some fresh spinach and herbs. A good drizzle of olive oil and perhaps some grated Parmesano Reggiano and all is well in the world tonight!


You will need:

  • pasta – enough for your crowd – cooked al dente – I used tagliatelle which is a flat egg noodle but you can use any noodle you prefer.
  • 2 chicken breasts – optional
  • 4 tbsp olive oil (more to finish)
  • 1 small onion – diced
  • 1 tbsp dry Italian seasoning
  • salt/pepper
  • red kale chopped equalling  1 cup packed
  • 4 leaves purple cabbage – sliced thin
  • 1/3 cup chopped red pepper
  • 2 tbsp fresh red chili – chopped fine
  • 1 spring onion – chopped fine
  • handful of spinach or mixed greens – chopped fine
  • 4 – 5 leaves fresh basil – sliced into ribbons (chiffonade)
  • 2 cups your favourite tomato sauce – I use a can of crushed tomatoes with seasonings added (see recipe for more details
  • freshly grated Parmesan and good olive oil for serving


Step 1: chop chicken and onions. In a large pan with olive oil cook chicken, onions, Italian seasoning, salt and pepper until starting to brown and carmelize. This will take approx 15 minutes stirring to avoid burning. If you have bits that stick to the bottom of the pan this is good and imparts lots of flavour to the finished sauce.


Step 2: add your tomato sauce. I prepare my sauce by taking a carrot, a stalk of celery, a 1/2 onion, 3 cloves garlic, 5 basil leaves and a handful of parsley and puree until almost a paste in a food processor. I then pour everything into a pan with a good glug of olive oil and cook for 5 minutes. I add a can of tomato puree and cook 10 minutes. Add salt and pepper and that is your base sauce. You could always add a decent can of spaghetti sauce if you prefer not to make your own.


Step 3: get your water going to cook your pasta. Cook according to your pasta instructions.


Step 4: chop all remaining ingredients and in a saute pan with a bit of olive oil cook kale, cabbage, red pepper, chili pepper until partially cooked. This will only take 5 minutes. Add to the tomato sauce.


Step 5: just before serving add spring onion, basil and mixed greens or spinach. Taste and adjust salt and pepper if necessary.


Step 6: drain pasta (always keeping some of the pasta water to thin out the sauce if necessary!) Toss pasta in sauce and coat until combined.


Serve with a good drizzle of your best olive oil and some grated Parmesan cheese if you like.


Jicama and Apple Salad


Jicama (pronounced Hee-Ka-Ma) is one of my favourite ingredients to add to a salad. It is a crunchy, slightly sweet root vegetable. In this salad I have sliced jicama, apples and some purple cabbage and tossed with some good olive oil, some lime, fresh basil and mint to create a fresh, bright and crunchy salad. You could also add more cabbage to create more of a slaw if you like.


You will need:


  • 1 small jicama – peel and sliced and cut into fine sticks
  • 1 apple – your favourite variety –  I have used an Ambrosia
  • 1 tbsp fresh red chili pepper – chopped very fine
  • 2-3 leaves purple cabbage – sliced as thin as possible
  • 1/2 lime juiced
  • 4 -5 tbsp of your best Olive Oil – I used Donna Ricca Italian
  • 1 tbsp Dijon mustard
  • 2 tbsp cider vinegar
  • 1 – 2 tbsp honey (add 1 then taste to see if you want more)
  • 4 fresh basil leaves – sliced into fine strips (chiffonade)
  • 6 fresh mint leaves – sliced into fine strips
  • salt and pepper to taste.


Step 1: Jicama can come waxed or un-waxed. This one is covered in wax to store it longer in the store. Slice off the outer skin and then slice the inside white flesh into thin slices and then into sticks.


Step 2: slice the apple into thin slices as well. Add both the apples and jicama to a large bowl.


Step 3: chop your chili pepper, cabbage fresh basil and mint. Add all remaining ingredients to the bowl and toss to combine. Taste and adjust seasoning as necessary.


It`s fresh, crunchy and bright!


Honey Buttermilk Bread


Buttermilk makes everything moist and tender. I love it in breads,  in chocolate cakes or it is perfect for tenderizing chicken. They always sell it in large containers so when I buy it I have to come up with multiple things to make with it to avoid wasting it. Next time you see some in the store pick it up you might just be amazed!


You will need:

  • 1 1/2 cups buttermilk
  • 1 cup instant/quick cooking oats
  • 1 cup warm water
  • 2 tsp dry yeast
  • 1/2 olive oil
  • 1/2 cup honey
  • 1 cup whole wheat flour
  • 3 cups all-purpose flour or bread flour
  • 1 tsp salt


Step 1: place buttermilk and oats in a small bowl or measuring cup and stir to combine. Microwave on high for 1 minute. Set aside to cool.


Step 2: stir yeast in warm water and leave 5 minutes to bloom and activate.  If you see yeast rise and bubble to top of water it is fresh and active.


Step 3: add yeast, buttermilk oat mix, olive oil, honey and whole wheat flour into the bowl of a stand mixer or in a large bowl if mixing by hand. Mix well and leave 20 – 30 minutes.


Step 4: add 2 1/2 cups of the white flour and the salt and run the mixer for 5-7 minutes to combine well.  I like to remove the wet sticky dough from the mixer at this stage and combine the last 1/2 cup by hand on the counter.  If you are kneading entirely by hand you will need to add all the flour and possibly a bit more on the counter. I found this amount of flour perfect for a slightly sticky dough once done. It was slightly wet however because there was oil in the dough it did not stick to my hands once I was done.


Step 5: place in a lightly floured large bowl and cover with plastic. Let rise until double in size 1-2 hours (I typically let it go the 2 hours – it is more important that it be doubled rather than to focus on an exact time.


Step 6: turn out dough on a lightly floured counter and deflate. Divide into two and flatten into a rectangle. Roll up starting at the width end tightly and place in an oiled loaf pan. Cover and let rise another hour.


Step 7: bake in a preheated 375 degree F oven for approx 25 – 35 minutes or until nicely browned on top. Before baking you can brush with egg wash or spray with water and sprinkle some oats on top. I used water. Turn out on cooling rack and allow to cool completely.


what could be nicer!


Lemon Crab and Avocado


Just a small amount of crab can make a nice appetizer or lunch. This combination of lemon and crab, along with the smooth avocado and some good olive oil make a beautiful little tea sandwich or cracker topping or perfect just sprinkled over a salad.

You will need:


1 can crab or 4 oz fresh

3 tbsp good olive oil – like Mandranova orange label

1 tsp fresh mint

1 tbsp fresh parsley

1 spring onion or shallot (1 tbsp fine mince)

2 tbsp fresh lemon juice

salt and pepper to taste

1 avocado

soft bread -toasted or served soft or cracker


Step 1: this is best if you have fresh but I bought a can of crab to try it and was pleasantly surprised. It is a perfect amount for two people as well. Drain water and add crab to a small bowl.


Step 2: chop mint, parsley, spring onion or shallot and add to crab.


Step 3: Add lemon juice, olive oil, salt and pepper to crab. Toss gently so crab maintains some shape.


Step 4: mash an avocado and add an additional squeeze of lemon, salt and pepper.


I add a green salad and a sliced cucumber and topped simply with the great olive oil, salt and pepper.


Orange Olive Oil Pound Cake

This is a moist and delicious pound cake made with olive oil instead of butter and dotted with blood oranges. It bakes up perfectly and I love knowing that I am using a healthier fat that in now way reduces its flavour. Try it.

You will need:

  • 3 small blood or regular oranges segmented plus zest from 1  orange (=1 tbsp)
  • buttermilk – added to orange juice should total 2/3 cup
  • 1/2 cup fruity olive oil – like Frantoia Italian Oil
  • 3/4 cup sugar
  • 2 eggs – room temperature
  • 1 tsp real vanilla or vanilla paste
  • 1 1/2 cups flour all-purpose or cake and pastry flour
  • 1/2 tsp baking soda
  • 1 1/2 tsp baking powder
  • 1/4 tsp salt
  • optional whipped cream to top along with orange supremes (segments without the pith)

Step 1: Wash and zest one orange to get 1 tbsp of zest. Place zest into a  glass measuring cup.

Step 2: Remove top and bottoms of 2 oranges. Slice off peel by slicing knife down the peel. Carefully slice the orange segments with a small knife leaving the membrane between each orange segment. Place segments into the glass measuring cup. Squeeze the remaining membrane into the measuring cup to extract any additional juice. Top off with buttermilk until you get 2/3 cup liquid.

Step 3: Supreme the third orange and set aside to place on top of batter.

Step 4: In a bowl add orange/buttermilk mix, olive oil, sugar, eggs and vanilla. Whisk to incorporate.

Step 5: In another bowl add flour, baking soda, baking powder and salt. Mix with a whisk.

Step 6: Add wet ingredients to dry and stir until just combined.

Step 7: pour into buttered and floured pan. Add additional orange segments. Bake in a 350 degree F oven for 45 minutes until nicely browned and a toothpick inserted in top comes out clean.

Let cool 10 minutes and remove to a cooling rack.

Step 1: Wash and zest one orange to get 1 tbsp of zest. Place zest into a  glass measuring cup.

Step 2: Remove top and bottoms of 2 oranges. Slice off peel by slicing knife down the peel. Carefully slice the orange segments with a small knife leaving the membrane between each orange segment. Place segments into the glass measuring cup. Squeeze the remaining membrane into a measuring cup to extract any additional juice. Top off using buttermilk until you get 2/3 cup liquid.

Step 3: Supreme the third orange and set aside to place on top of batter.

Step 4: In a bowl add orange/buttermilk mix, olive oil, sugar, eggs and vanilla. Whisk to incorporate.

Step 5: In another bowl add flour, baking soda, baking powder and salt. Mix with a whisk.

Step 6: Add wet ingredients to dry and stir until just combined.

Step 7: pour into buttered and floured pan. Add additional orange segments. Bake in a 350 degree F oven for 45 minutes until nicely browned and a toothpick inserted in top comes out clean.

Let cool 10 minutes and remove to a cooling rack.

Slice and serve with a blob of whipped cream and some orange segments.