Koulouria – Greek Easter Cookies

These Greek cookies always remind me of my first boyfriend Peter’s Mother. She was a great cook! They remind my husband of his grandmother. I have never attempted to make them before so I thought I would try. All the recipes on the Internet have enormous quantities that make 150 cookies or use crazy amounts to make enough to feed thousands. My recipe is for 2 dozen and they can be frozen, if you don’t have an army to feed. They turned out great and the house smells of orange and vanilla when they are in the oven. Simply glorious!  They are a dry dense cookie that is not too sweet and perfect for dunking into to steaming hot mugs of coffee or tea. My version uses Olive Oil instead of butter because…well, I love Olive Oil and will always choose it first.

You will need:

  • 1/2 cup mild Extra Virgin Olive oil (there are lots of mild options from California or Texas)
  • 1 cup sugar
  • 4 eggs
  • 1 tbsp fine orange zest
  • 1/2 cup fresh orange juice (1 orange)
  • 1 tsp pure vanilla extract (or vanilla paste if you can find it)
  • 1/4 whipping cream
  • 1/4 tsp ground cinnamon
  • 1 tsp baking powder
  • 1 tsp baking soda
  • 5 1/2 cups of fine pastry flour
  • 1 egg & 1 tsp water for egg wash
  • some sesame seeds for sprinkling on tops

Step 1: gather all ingredients so you don’t forget anything – measure and place them in order.

Step 2: With a paddle to begin and the dough hook to finish, add the Extra Virgin Olive Oil and sugar and blend for 1 minute.

Step 3: add eggs, orange zest, orange juice and vanilla, cream and cinnamon. Mix until blended well. Leave it running for a good 2 minutes.

Step 4: In a bowl add flour, baking soda and baking powder. Mix with a whisk to incorporate. Change the paddle for the dough hook- this will get dense because you are going to form cookies with your hands. Add flour 1 cup at a time and just mix until incorporated a few seconds, then add more flour until you get a heavy dough. This will be sticky but if you pat it will not stick to your hands. Once you are there stop. (don’t over mix)

Step 5: place dough on floured surface. You wont need too much flour since there is oil in the batter. This is where you can use an ice cream scoop to get even sized balls or just divide the dough in half and then keep cutting everything in half until you get 24 even sized balls. Should be a ball that can fit in your hand slightly larger than a golf ball.

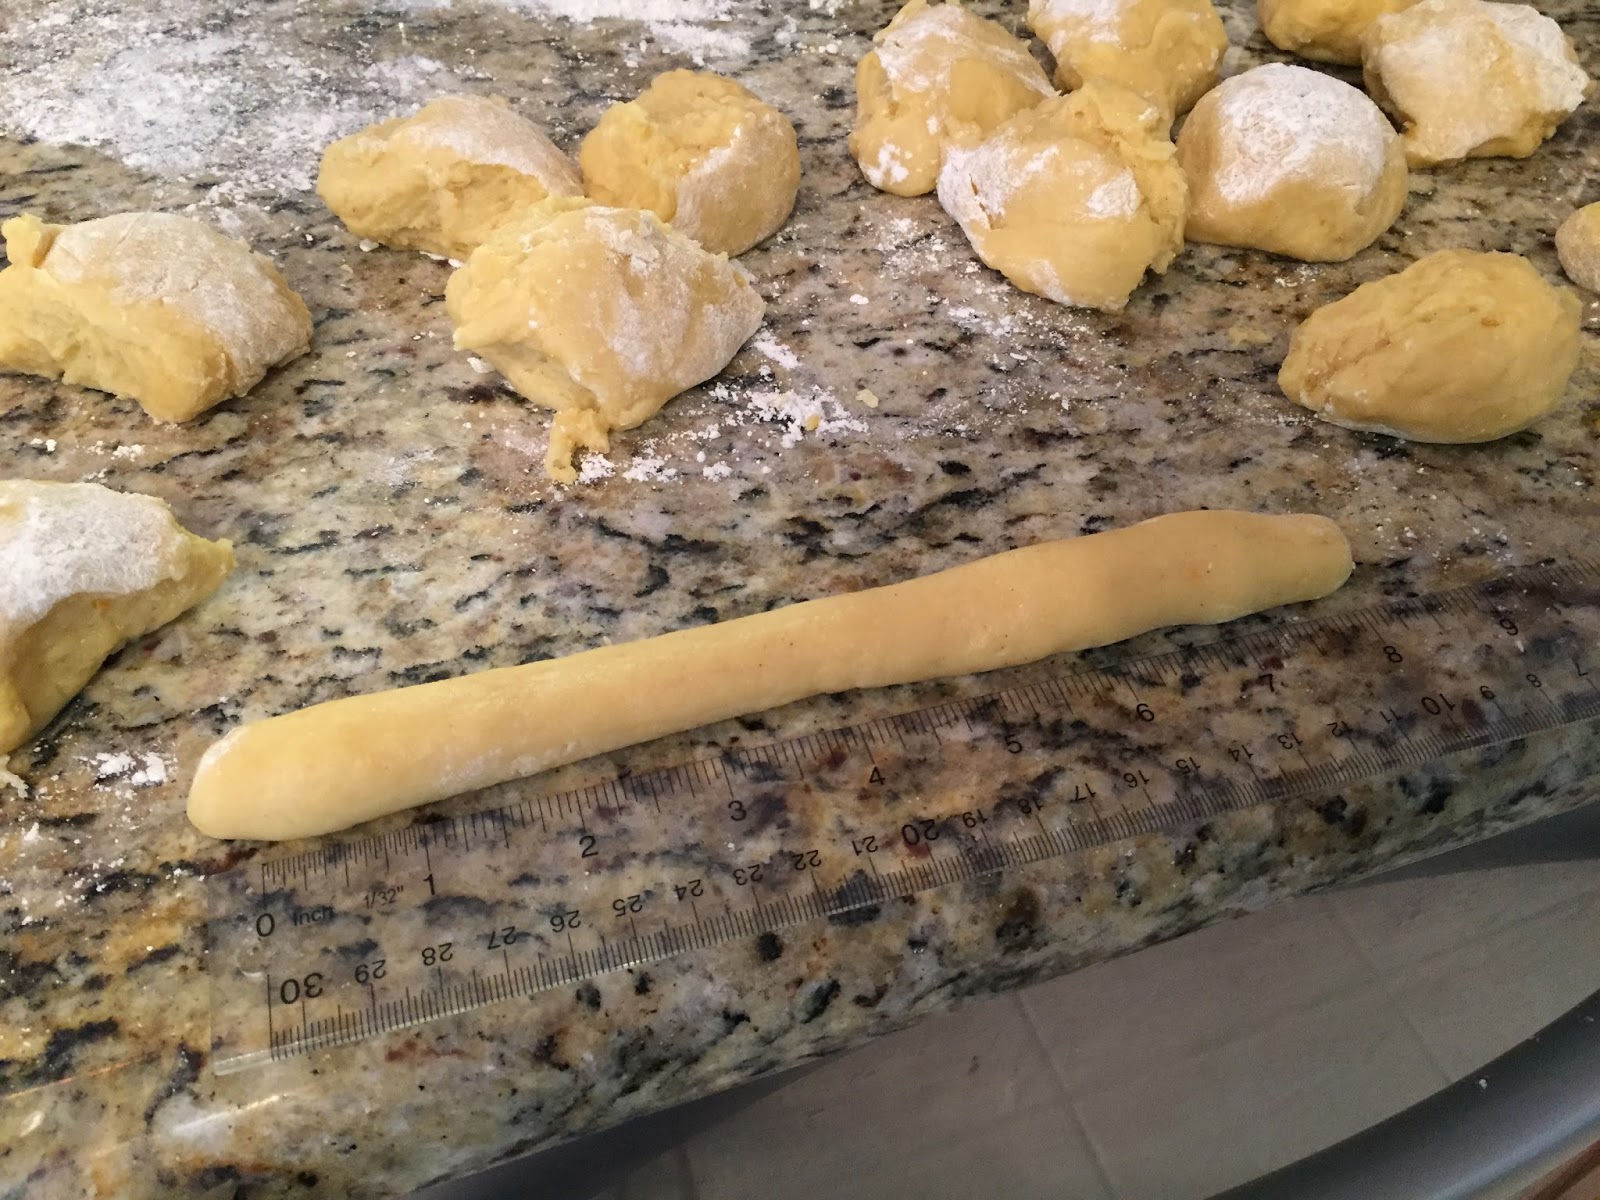
Step 6: roll out each ball into a log with a bit of flour so it doesn’t stick to the counter. You can roll out to about 10-12 inches in length. Fold in half and roll it around itself until it looks like a rope.

Step 7: place on parchment lined cookie sheets -there should be a bit of room between them as they will rise a bit. Mix the egg and water and whisk with a fork to make the egg wash. Brush each cookie and sprinkle on sesame seeds.

Bake at 325 degrees F for 20 to 25 minutes turning to make sure they bake evenly.

Served warm they are great but they will last a few days in a Ziploc bag and this is when they are perfect for dunking! or you can freeze some for another day. The Easter Bunny came to the window because it smelled so good too….I guess that is a lucky sign!

Happy Easter!

Chocolate Almond Olive Oil Biscotti

I always try to replace butter with Olive Oil when I can and most times the swap works out quite well. These rich, deep chocolate, almond biscotti are not too sweet but, the addition of the chocolate drizzle on top made them perfectly decadent. They can be sliced thin for a very dry, hard biscotti, which is perfect for dipping into steaming mugs of hot coffee or make a thicker slice wrapped in pretty cellophane for a special treat.

These are Big Pete approved which is saying something since he is pretty picky.

You will need:

 
  • 2 cups of all purpose flour
  • 1/3 cup unsweetened cocoa powder -best quality
  • 1 tsp baking soda
  • 1/4 tsp salt – I used a chocolate sea salt but you can use plain as well
  • 1/2 cup Mild Extra Virgin Olive Oil – I used a Oltremonti from Corsica, France
  • 2 large eggs
  • 1 cup sugar
  • 1 tsp vanilla paste (or pure vanilla extract)
  • 1/2 cup dark chocolate chips (the best quality you can get)
  • 1 cup whole almonds
  • an additional 1/2 cup chocolate chips for melting drizzle topping
Heat oven to 350 degrees F.


 Step 1: in a large bowl combine all dry ingredients. Add flour, cocoa, baking soda and salt. Sift the cocoa powder into bowl to remove any lumps. Combine all dry ingredients with a whisk.

Step 2: in another bowl add olive oil and sugar and mix until it resembles wet sand. Add 2 eggs and  vanilla paste if you can find it (regular real vanilla extract if you can’t find the paste) Whisk hard for a full minute. You can of course use a hand mixer but, I like to make it an arm workout!

Step 3: add the dry ingredients and stir with a wooden spoon until it gets too stiff then turn out the whole mess and incorporate on the counter.

Step 4: when the flour is added add the chocolate chips and almonds. I basically roll them and press them into a dense paste. Form a log and press top to make a long log. You can make this thicker or thinner depending on whether you want thin slices or think logs.

Step 5: place log onto a cookie sheet lined with parchment paper. You can form the log directly on the paper if you do not wish to move it. If it sticks you can use a spatula to loosen it for moving onto cookie sheet.

Bake for 30 minutes and remove from oven for 5 minutes. (this is what is looks like after 30 minutes)

Step 6: with a very sharp serrated knife saw the logs into individual biscotti. If you do not have a good sharp knife you may want to use sliced almonds in the recipe.

Place the slices on their sides and bake another 10 minutes, then flip over and bake an additional 10 minutes.

In a small bowl over boiling water melt final 1/2 cup of chocolate chips. Place melted chocolate in a bag, slice off end and drizzle over tops.

Coffee optional but definately recommended!


Chocolate Hazelnut Fudgy Cake Cookies

These are quite simply the best fudgy,chocolaty, cakey cookies I have ever made! They hard on the edges and soft and moist on the inside and they stay moist for days if you should have any left over. There are some very high quality chocolate bars available in your plain old grocery store these days, try a really good bar or two instead of dull old chocolate chips or reaching for the Baker’s chocolate for a really fantastic cookie. Big Pete said he could eat these all day.

Get out a glass of milk and enjoy!

You will need:

  • 200 grams of the best chocolate you can find 70% ( Lindt or similar bars are usually 100grams each and not a bad option but, if you can get something really good try it….it’s only a small amount!)
  • 1/2 cup softened/room temp unsalted butter
  • 3/4 cup dark brown sugar
  • 2 eggs room temperature
  • 1 tsp best Vanilla (never use artificial Vanilla its made from a wood by-product)
  • 1/2- 3/4 cup toasted hazelnuts – roughly chopped (I like lots)
  • 1 cup all purpose flour (depending on the chocolate you might need another tbsp or two)
  • 1 tsp baking powder
  •  pinch of salt

Step 1: buy some really great bars of chocolate. I bought these in my plain old grocery store in the speciality chocolate aisle (don’t use the Baker’s chocolate or choc chips if you have some better options. This is the star of the cookie and you will be amazed at the difference it will make. Of course it is still a good cookie with any chocolate but….just sayin!!! (look how pretty that bar is)

Step 2: chop chocolate into large chunks and place in a large bowl over a pot with a few inches of water. Allow the water to simmer on a medium heat for a few minutes. Once it looks like half of the chocolate has melted you can gently stir a few times to incorporate. Remove bowl from pot and let cool on the counter slightly. Be aware that the bowl should be bigger than the pot  and you should not get any steam or water in the chocolate or it may seize up on you.

Step 3: in another bowl add softened butter and sugar. You can mix with a stand or hand mixer but, I am lazy and will avoid washing extra things if possible so I just used a wooden spoon and mixed by hand. Don’t worry if it seems too dry, once you add eggs it will be fine.

Step 4: add the eggs and vanilla and beat for 2-3 minutes. I actually changed from a wooden spoon to a whisk at this stage to get it fully incorporated.

Step 5: toast nuts in a dry pan for a few minutes and you can remove some of the skins by placing the warm nuts in a clean tea towel and rubbing them. I take off some of the skins and leave most but you do them as you like. You can be flexible and add a bit more or less nuts. Add nuts and stir into mix.

Step 6: add your slightly cooled melted chocolate and stir to incorporate.

Step 7: add your flour, baking powder and salt and stir until incorporated. It should thicken up enough to glob a heaping tablespoon of thick batter on a parchment lined cookie sheet. If it is too thin add another tbsp of flour until it looks thick enough.

Step 8: with a tablespoon measure out a large blob of batter and using another spoon you can scrape off dough onto sheet. Pile 6 cookie blobs per parchment lined cookie sheet. I got 10 big cookies in total from my mix. Make sure there is lots of room around each cookie.

Bake at 350 degrees F for 10 minutes (no more) – to make a giant soft, gooey cake cookie. You will think the cookie is not done but, I assure you it is better to under bake a cookie than to over bake it. 10 minutes and you should have a puffy, crackled cookie but it will be too soft on the inside. It will harden as it cools on the tray. Don’t try to remove to a cooling rack, just leave them for a good 15-20 minutes. They will harden up enough to pick up however, they will still be a delicate cookie with a cakey interior. This is also why they should be exactly 1 tablespoon in size – if you make them too big they wont hold together and will just crumble if you try to pick them up. 1 tbsp size =  10 perfect cookies.

You know you are dying to eat one of these!!

Peanut Butter and Jam Smile Cookies

These little peanut butter and jam smile cookies have the peanut butter and jam in a yummy cookie that you can shape into a slice of bread and when you roll it up the jam looks like a smile. They freeze well and you bake up a few when you like. Makes me think of my childhood when the only school lunches anyone every brought to school was the baloney sandwich with mustard on white bread or the peanut butter and jam on white bread. Back in those days no one had a peanut allergy!!

You will need:

  • 1/2 cup = 1 stick unsalted butter – at room temperature
  • 1/2 cup brown sugar
  • 1/2 cup sugar
  • 1/2 smooth peanut butter
  • 1/2 tsp vanilla
  • 1 egg
  • 1/4 tsp salt
  • 1/2 tsp baking soda
  • 1/2 tsp baking powder
  • 1 1/4 cups all-purpose flour
  • 2-3 tbsp jam – I used blackberry

Gather all your ingredients and measure everything out so you don’t miss any items.

Step 1: cream butter, brown sugar, sugar and peanut butter until smooth.

Step 2: add vanilla and egg. Mix again.

Step 3: add salt, baking soda, baking powder and flour.

Step 4: flatten with a rolling pin between 2 sheets of plastic wrap. Chill in fridge 20 minutes.

Step 5: spread out some jam (any kind you like)

Step 6: fold over sides to middle and shape slightly as a slice of bread. If you find it too soft put in fridge or freezer for 20 minutes to firm up. It will be easier to slice when it is partially frozen as well.

Slice

Bake at 350 degrees for 12-14 minutes or until just starting to brown around edges.

Let cool slightly and then eat them with a big glass of milk!!

Lemon Olive Oil Cookies


These are a yummy little cookie with a chewy texture almost like a lemony macaroon with a nice  sugary crust. They are best eaten the same day but, they are still good the next day. They hold their shape because you freeze the cookies before baking which prevents them from spreading. If you want them to spread then don’t freeze them.


You will need:


  • 2 cups flour
  • 1 cup sugar
  • 1/4 tsp salt
  • 1/2 tsp baking soda
  • 1/2 cup olive oil – I used Italian Frantoia Olive Oil
  • 2 tbsp milk
  • 1 lemon zest
  • 4 tbsp lemon juice
  • 1 tsp vanilla paste or extract
  • 1 egg

Step 1: In a large bowl add flour, sugar, salt, baking soda and lemon zest. Set aside.


Step 2: In a large measuring cup add wet ingredients. Add olive oil, milk, lemon juice, vanilla paste (or extract) and egg. Mix well. Add wet ingredients to the dry and stir with a wooden spoon until just mixed. It should resemble wet sand.


Step 3: with a small scoop or spoon (I use a small ice cream scoop) form 26 balls. Once formed place cookies in the freezer for 30 minutes. This will help the cookie to not spread as much as if you place into the oven to bake immediately.


Step 4: toss in a small bowl of sugar and place on parchment lined cookie sheet. Bake in a 350 degree F oven for 12-15 minutes.  Mine were lightly browned on the bottom and pale like a sugar cookie.


I froze the remaining balls and can toss them in sugar just before I bake them right from the freezer when I am ready. It is always nice to have cookies in the freezer for those times you just gotta have something sweet to end a meal!


These were wonderful eaten warm with a nice mug of lemon tea!


Salted Chocolate Chunk Cookies


Chocolate Chunk Cookies with a sprinkle of flaked salt on top. I love the contrast but, if you prefer you can always make these without the salt.


You will need:


  • 1 stick unsalted butter (1/2 cup) room temperature
  • 1/2 cup brown sugar
  • 1/3 cup granulated sugar
  • 1 egg
  • 1 tsp real vanilla (never use artificial it’s made from wood!)
  • pinch of salt
  • 1 cup all purpose flour plus 1 tbsp
  • 1/2 tsp baking soda
  • 1/2 tsp baking powder
  • 1 cup chopped chocolate – dark chocolate or milk and dark
  • 1 tsp flaked sea salt for tops of cookies


1. In a bowl cream together butter and sugars. Mix until smooth.

2. Add egg and vanilla and mix well until incorporated.

3. In another bowl add flour, baking soda, baking powder and pinch of salt.

4. Chop chocolate or use chips if you prefer. I think the cookie tastes better with dark chocolate but, you decide what kind you like best.

5. Add the dry ingredients to the butter mix and mix with a spatula or wooden spoon until just blended.

6. Add chocolate and fold in until mixed throughout.

7. Place cookie dough in fridge 20 minutes to firm up.

8. Use a small ice cream scoop or 2 spoons to form individual cookies. Leave space for cookies to spread while baking. Place on a parchment lined cookie sheet and put back in fridge for another hour to firm up.

9. press down on each cookie slightly and sprinkle a few grains of salt on top (You can omit this if you don’t want them salted.

10. Bake in a 375 degree F oven for 12-14 minutes until just starting to brown around the edges. The cookies will appear under baked and that is fine. Let cool and eat!

1. In a bowl cream together butter and sugars. Mix until smooth.


2. Add egg and vanilla and mix well until incorporated.

3. In another bowl add flour, baking soda, baking powder and pinch of salt.


4. Chop chocolate or use chips if you prefer. I think the cookie tastes better with dark chocolate but, you decide what kind you like best.

5. Add the dry ingredients to the butter mix and mix with a spatula or wooden spoon until just blended.


6. Add chocolate and fold in until mixed throughout.

7. Place cookie dough in fridge 20 minutes to firm up.

8. Use a small ice cream scoop or 2 spoons to form individual cookies. Leave space for cookies to spread while baking. Place on a parchment lined cookie sheet and put back in fridge for another hour to firm up.

9. press down on each cookie slightly and sprinkle a few grains of salt on top (You can omit this if you don’t want them salted.


10. Bake in a 375 degree F oven for 12-14 minutes until just starting to brown around the edges. The cookies will appear under baked and that is fine. Let cool and eat!


Walnut Lemon Meringue Cookies -Schtange od Oraha


Schtange od Oraha – which translates to sticks of walnuts in Croatian were my very favourite cookies when I was a little kid. They look like logs with snow on them.

My best friend Kim’s mom made these along with my other favourite Almond Crescent Cookies every Christmas and I couldn’t wait to eat them.  Auntie or Teta Mitcica (Teta Meet Seet Sa) as everyone called her was/is an amazing cook and baker. These cookies are a simple walnut and egg white cookie with a lemon meringue hard icing on top. There are very few ingredients and they create a chewy, nutty cookie with a hard icing. Auntie said that she always made these after she finished her other cookies because you turn off the oven and then put the cookies in and let them stay in from 3-8 hours to dry out slowly just like a meringue. Her cookies were much prettier than mine but, they taste like childhood!

You will need:

  • 250 grams walnuts -ground in food processor = 1 cup and 2 1/2 tbsps
  • 250 grams sugar = 1 cup and 2 1/2 tbsps
  • 2 egg whites
  • zest of lemon
  • juice of half a lemon
  • icing sugar to roll out
heat oven to 350 degrees F. 
Step 1: weigh the sugar and walnuts. If you do not have a scale then look at the container your walnuts come in (mine was 300 grams) so you can roughly determine it or you can measure approximately 1 cup plus 2 1/2 tbsp once ground.

Step 2: grind walnuts until they are a fine powder. Do not over grind or the oils will come out of the nuts and start to become a walnut butter. Tip: store all your nuts in the freezer to retain their freshness as long as possible. Nuts are full of oils and can become rancid quite quickly.

Step 3: zest the lemon into the sugar. Squeeze half the lemon through a sieve to catch any pulp or seeds.

Step 4: in another bowl whip the egg whites with a hand mixer for 2 minutes. Slowly pour the sugar and zest into whites with mixer running. Whip on high for another minute, then add lemon juice and continue whipping on high for another 4 minutes. 
Step 5: divide the meringue evenly into two bowls. Stir the nuts into one half.
Step 6: sprinkle a generous amount of icing sugar (also called confectioners sugar or powdered sugar) on the counter. You are using the icing sugar instead of flour to form your dough. This is a very sticky and wet, loose dough. You make sure there is enough sugar to pat down and form a log that should be the length and width of a finger. You will use lots of sugar to avoid sticking.
Step 7: cover a cookie sheet with a sheet of parchment paper. Carefully with a large knife slice into fingers and using another knife slide off the knife with the help of another knife. I find it easiest to chop a slice and tip the knife to move to the cookie sheet and then I use the other knife to slice off the  dough from the knife (like cutting off the cookie from the knife) I also wash and dry the knife after each slice because it will have some sticky dough left on it. Once I have placed all my sticks on the sheet I then used a small off-set spatula to carefully spread the icing on each cookie. I think in future I will put the meringue in a Ziploc bag and slice off a corner and just pipe on a small amount and then smooth with a spatula. 
*Kim told me that her mother puts the icing on top and then slices but, I find this way more difficult and not as clean as putting on the icing after they are sliced.
Once you are ready to bake the oven should be set to 350 degrees F. Turn OFF the oven, wait 5 minutes then place cookies on the middle rack and leave them in the turned off oven for 3-8 hours to dry out as the oven cools. I did it for 8 hours and found they are hard and I prefer them to be in the oven for approx 3 hours so they stay more chewy like a pavlova type of meringue. They are sweet, nutty and lemony and to me they look like snow on logs.