Orange Chocolate Panettone

 I haven’t posted in ages! but I am back! There is so many good things to eat and this is definitely one of them!

Look at this glorious chocolate orange panettone!!

An enriched sweet bread originally from Milan loaded with candied fruit and raisins. It is a typical offering during Christmas. I have chosen to make mine with chocolate and orange. Most people feel that it is just too intimidating to even attempt to make and I am here to tell you you can make this!!

Gorgeous for days and if you have left overs they can be frozen or make into crazy gorgeous French Toast or the bread pudding of your dreams.

You will need:

Starter

  • 3/4 cups of bread or all purpose flour
  • 1/2 tsp instant yeast (dry)
  • 1/2 cup warm (not hot) water

Candied Orange Peel

*You may skip this if you purchase good quality candied orange peel

  • 1 large organic orange
  • 1 cup water
  • 1 cup sugar
  • 1/2 cup sugar – to toss peel in once removed from syrup

Dough

  • 2 1/2 cups of bread or all purpose flour (you may need more)
  • 1/3 cup sugar
  • 1/2 stick of butter (1/4 cup) softened/room temp.
  • 1/2 cup of orange juice (if you make the peel use this orange for the juice)
  • 3 eggs room temperature
  • 1 tbsp instant yeast (dry)
  • 1 tsp kosher salt
  • 1 tbsp vanilla paste (or pure extract )
  • 1 tsp orange extract
  • 1 bar of best quality chocolate chopped finely

Plus: egg wash for brushing before baking

Note: you will also need a tall pan or panettone molds

Step 1: if you do this over 2 days. In the morning make the starter. In a small bowl mix the flour, the instant yeast and the water. Leave this covered for the day -This was mine after 8 hours on the counter.

Step 2: peel the order (not the pith just the rind) place in the sugar and water and let it come to a gentle boil for 10 minutes to soften.

Step 3: Once you have simmered the peel strain out the peel and toss in the 1/2 cup of sugar to coat them all and separate. I keep the syrup to brush on top of the bread when it comes out of the oven.

Allow the peel to dry overnight until you are ready to add to the dough the next day.

Step 4: squeeze the orange that you just used and set 1/2 cup of the juice aside to be added to the dough.

Step 5: add all your starter to a large mixing bowl if you are making this by hand or I definitely recommend making this in a stand mixer for ease and also so that you do not add too much flour to this wet dough. I made this recipe both ways and it turns out well either method.

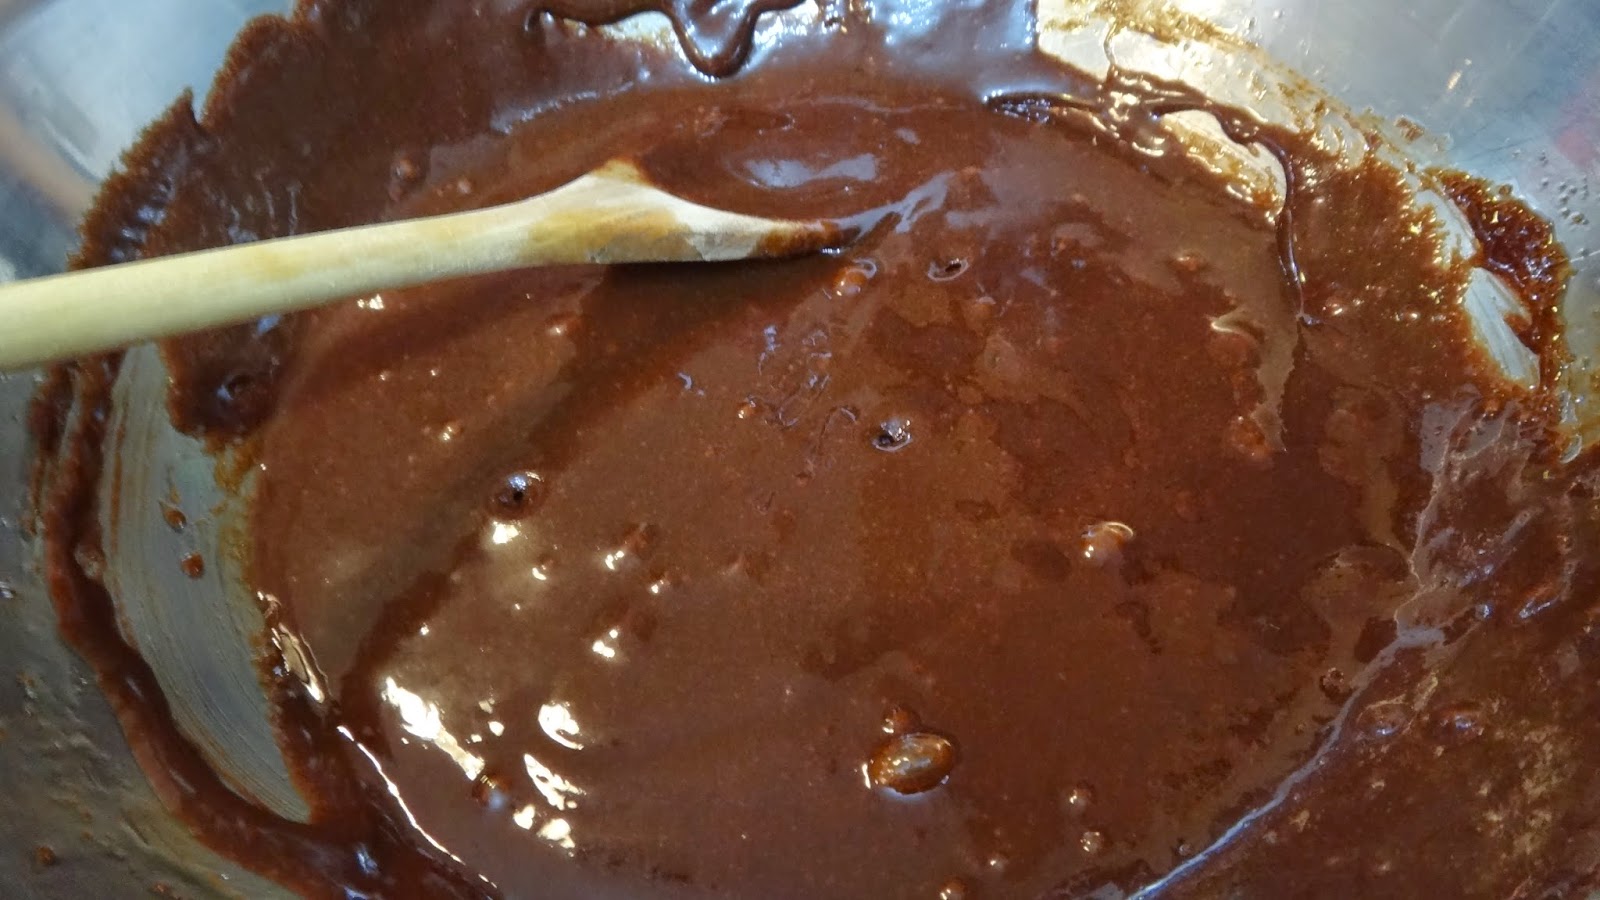
Step 6: add the rest of your ingredients except the peel and the chocolate that goes in after the first rise (proofing) Add the starter, the flour, the sugar, the soft butter, the orange juice, the eggs, 1 tbsp of dry instant yeast, kosher salt, vanilla paste and the orange extract.

Vanilla Paste is an expensive product but I find it very good and worth the money- if you don’t have it use good quality pure vanilla extract (never artificial as its made from a wood product and really makes such a difference)

This is the orange extract I used however, the product on the right is also a good product called Fiori di Sicilia and is a citrus based extract from King Arthur Flour.

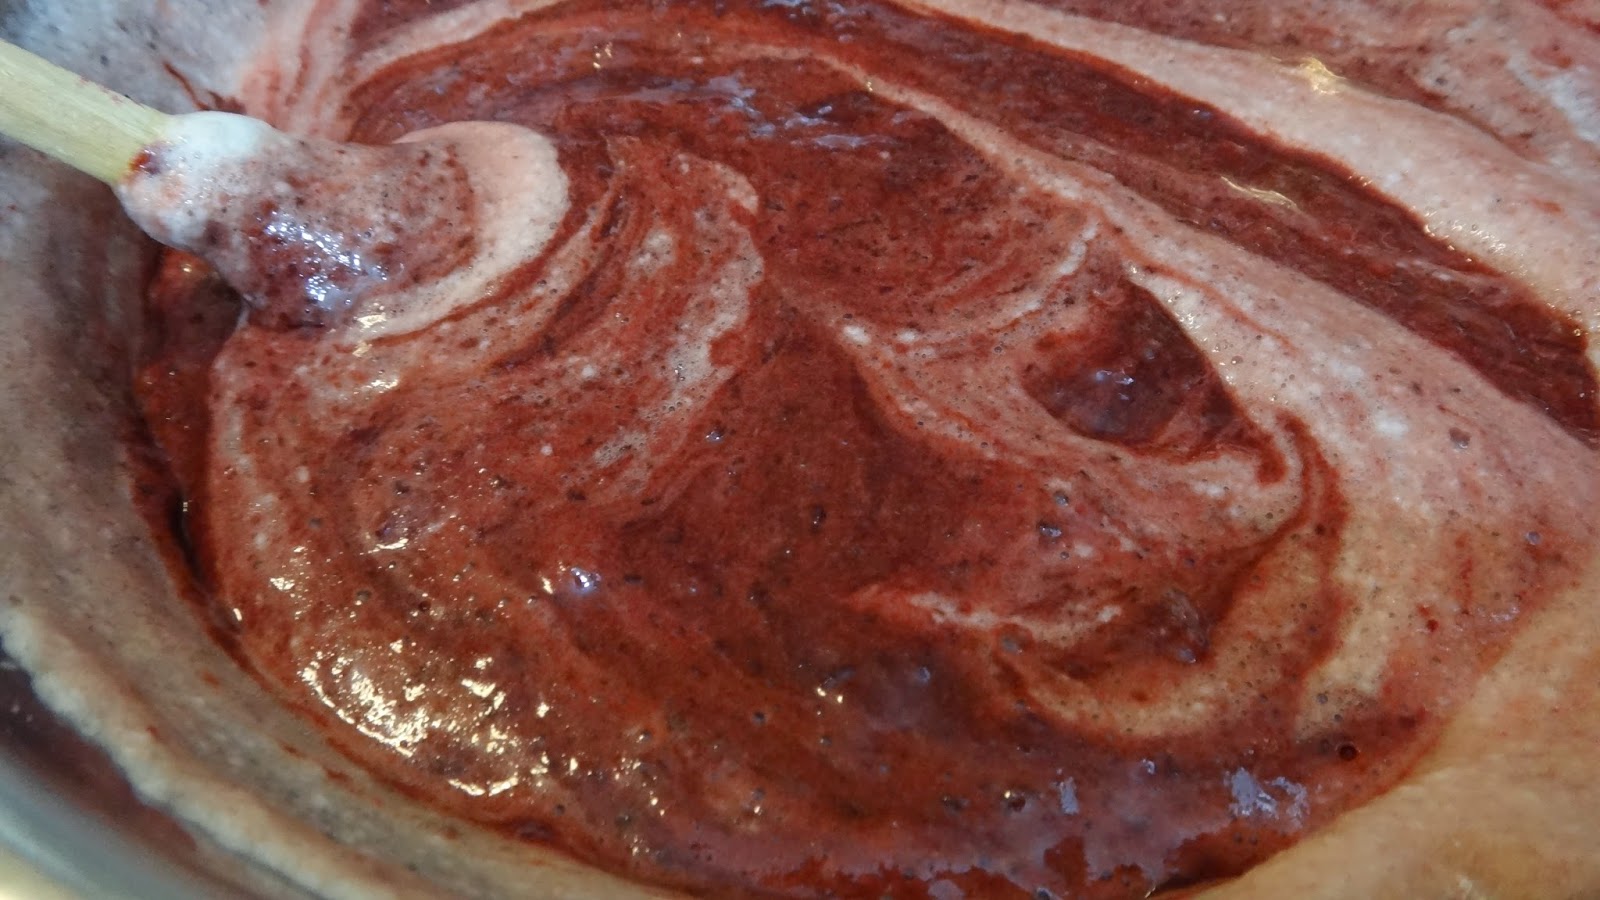
Step 7: if using the stand mixer (with the dough hook) let the machine mix for at least 5 minutes and if working this mix by hand you can start by mixing with a wooden spoon however, once it gets too difficult scrape out all your ingredients on the counter and knead for 5-7 minutes. You may need to add another 1/4-1/2 cup if its too sticky. Try not to add too much flour. Once soft and tight place your dough back into a large bowl with a greased piece of plastic wrap and leave overnight in the fridge. Let it stay in he fridge for 8-12 hours.

**The next morning leave it covered on the counter for another 2-3 hours to come to room temperature.

These are Panettone paper molds that you can buy from Amazon or at specialty food stores like Sur La Table, or even Michael’s arts and crafts. They are inexpensive and important to get the bread to rise tall. You can also make a collar or some people even bake them in coffee cans. I think these make the bread look professional and festive and makes a perfect gift wrapped in cellophane and a big bowl.

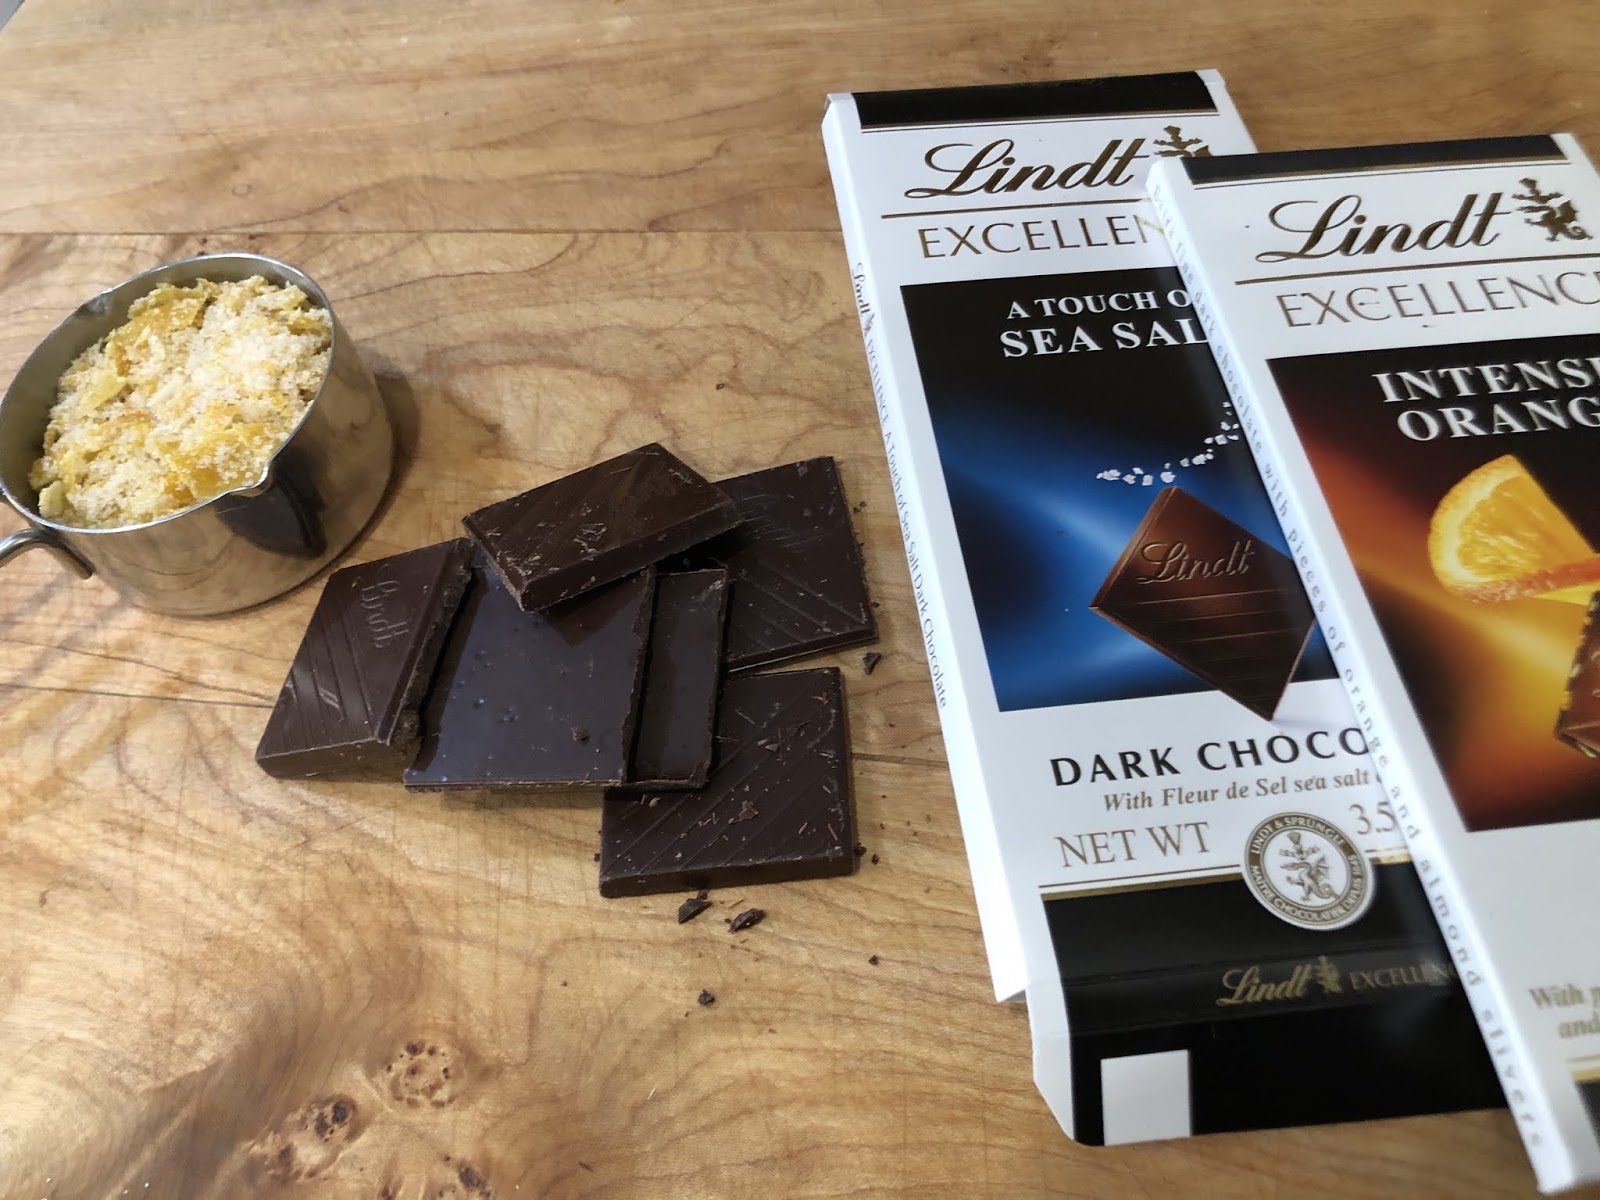
Step 8: I  buy a decent quality bar of chocolate which also works out to the correct amount. I like both of these as options (you only need 1 chopped bar for this recipe) Chop your orange peel finely and include both the sugar and peel here.

Step 9: remove your dough from the bowl and place on a lightly floured counter.

Step: 10: make the dough into a flattened disc and add your chocolate and orange.

Step: 11: roll up and knead the dough to make sure the chocolate and peel get worked into the dough evenly. You might need a bit more flour – knead 1-2 minutes until you can feel the contents have been distributed throughout.

Step 12: place your dough into the paper form – You can add a bit of butter to the bottom of the form. Butter a large sheet of plastic wrap to cover the dough (the dough will stick to the plastic if you don’t grease it)

Cover and I place this heavy loaf in another pan just for ease of moving. I then leave this covered in a warm place to rise until it is over the bread mold. You MUST be patient here. It may take 3-4 even 5 hours to get it nicely proofed (or proved as the English say!)

This is my bread raw after the final proof ready to be baked. I have added some large sugar here as a topping after brushing the top gently with an egg wash. The egg wash is 1 egg and 1 tsp of water whisked and brushed carefully as not to deflate the bread and sprinkled with sugar.

The oven is set to 350 degrees F and I bake in the lower to middle for 20 minutes uncovered and then I make a tent and cover the panettone for the last 25 minutes so it does not get too brown- you may also want to spin the pan halfway through the baking.

Remove from the oven and let almost come to room temp – do not eat this when it is hot. Brush with your leftover orange syrup when it comes out of the oven and is still hot.

Gorgeous!!

So delicious with a cup of coffee and someone you love!! I promise it’s worth the effort.

Chocolate, Beet and Olive Oil Cake – Naturally Red Velvet!

This cake is good for your HEART and your SWEETHEART!! 

Make it with buttery extra virgin olive oil and beets to replace a bottle of red food colouring and it tastes like…..chocolate cake!! Crazy I know!

 You can top it simply with powdered sugar or a drizzle or even make it fancy with chocolate ganache (which is really just melted chocolate and whipping cream)

It can go from everyday to Valentine’s Day with a bit of chocolate icing.

You will need:

  • 225 grams/8 oz beetroot – cooked and grated/processed
  • 100 grams – good quality dark chocolate
  • 2 tbsp unsalted butter
  • 1 cup sugar
  • 1 tsp vanilla (pure never artificial cause that stuff is made from wood! look it up!)
  • 1/4 cup hot coffee
  • 4 eggs (separated)
  • 1/2 cup good Extra Virgin Olive Oil – I used a mild and buttery Oltremonti from France
  • 1 cup flour (all purpose)
  • 1 1/2 tsp baking powder
  • 3 tbsp cocoa powder (unsweetened)

Heat oven to 350 degrees F.

Step 1: Use an 8 inch spring form pan. Place a sheet of parchment paper on the bottom of the pan and lock. Butter and flour pan and tap out any excess. Set aside.

Step 2: Boil or roast beets. I used 2 small beets and cooked for approximately 1 hour until tender. Run the beets under cold water until you can handle them and cut off tops and bottoms and  rub off the skins.(PS. if you are lazy they actually sell cooked beets in grocery stores now!) Weigh beets and grate them by hand or just put them in a food processor for a few seconds until they are coarsely pureed.

Step 3: Take a bowl and place over a pot with a few inches of water. Chop chocolate into pieces and place in bowl. Heat pot on medium heat until chocolate starts to melt.Add butter and stir once melted enough to combine.

 Step 4: Remove from heat and add sugar and vanilla and combine.

Step 5: Add hot coffee to chocolate and mix. Separate yolks and whites into 2 bowls. Add the yolks to the cooled chocolate and whisk in. (put the whites in another bowl and set aside) Add olive oil to chocolate and whisk until incorporated. Finally add beets and mix then set aside the wet ingredients.

Step 6: Whip egg whites until light and fluffy (few minutes) and they form stiff peaks.

Step 7: In another bowl  add dry ingredients: flour, baking powder and cocoa powder. You can sift if your cocoa has lots of clumps or use a whisk to mix all dry ingredients. Add dry ingredients to chocolate (wet ingredients) and stir to just combine with a wooden spoon.

Step 8: Fold in the egg whites until just incorporated and then pour into prepared pan.

Step 9: Bake 40 minutes until a toothpick inserted into center comes out almost clean. Let cool 10 minutes then un-latch spring form pan and let cool completely.

\

You can just top with a dusting of sugar or mix the powdered sugar with a few drops of juice or water to create a glaze or make a chocolate ganache icing (which is the simplest icing in my opinion and only has heated whipping cream poured over chocolate chunks and stir…TA DA!!)

and guess what!! it tastes like CHOCOLATE CAKE!!

Shut the front door!!

Chicken Bahn Mi Meatballs

This is my simple version of a Vietnamese favorite street food. My Bahn Mi (Meatball) sandwich is made with ground chicken and served on a soft roll. Make lots they will want seconds!

You will need:

  • 1 lb ground chicken – dark and white is best
  • 1 tbsp finely chopped white part of lemongrass
  • 3-4 cloves garlic – chopped finely
  • 2 tbsp chopped fresh cilantro/coriander
  • 1 small fresh chili – chopped finely (use 3/4 in the meatballs and 1/4 in carrot topping)
  • 1 tbsp brown sugar
  • 1 tsp salt
  • 1 tsp fish sauce
  • 1 tsp sesame oil
  • 2 tbsp breadcrumbs
  • enough good extra virgin olive oil to cover the bottom of pan while cooking the meatballs (you could use peanut or another oil but. I love olive oil so I use it for everything!)
  • a bit of ginger ale to deglaze the pan
  • 2-3 small carrots -sliced into fine matchsticks
  • 1/4 cup rice wine vinegar
  • 1.4 of the chopped chilies
  • 1 tsp chopped cilantro
  • 1 tbsp sugar
  • 1 mini English cucumber – sliced into matchsticks
  • salt and pepper to taste
  • fresh buns
  • more cilantro
  • lime wedges
  • sweet Thai chili sauce

Start with a good quality ground chicken. I like a blend of dark and white meat for a more tender meatball.

Step 1: in a large bowl combine chicken, lemongrass, chopped garlic, cilantro, chili, brown sugar, salt, fish sauce, sesame oil and breadcrumbs.

mix to combine

Step 2: form into balls and you can store in fridge for a few hours or heat oil and prepare right away.

I used a Planeta Olive oil from Sicily to cook on medium heat until browned and cooked through.

At the last minute I pour over a good glug of ginger ale to add a bit of sweetness and also to deglaze the pan.

Step 3: While the meatballs cook I prepare the vegetable/quick pickle

Chop carrots into think matchsticks

Chop chili, cilantro and cucumber. Add rice wine vinegar, sugar, salt and pepper to taste.

Serve a few meatballs on a soft roll top with a squeeze of lime,  the vegetables, more cilantro and some Sweet Thai Chili sauce if you like or even a bit of sliced mango!!

Giardiniera – Mixed Vegetable Pickle

This is my version of a mixed vegetable pickle. There are some regions where the vegetables you put in the mix are a very specific combination but, I say add whatever you like the best. This is my preserved vegetable pickle often called Giardiniera in Italian. You can add or omit some chili peppers if you wish to make spicy and it is a combination of vinegar and olive oil, in my case….. lots of GREAT Extra Virgin Olive Oil!! 

You will need:

  • 3 small carrots
  • 2 stalks of celery
  • 1/3 of a small cauliflower (about 3 cups of florets when they are separated)
  • 150 grams or a handful of green beans
  • 3-4 fresh or dried small onions (I used both)
  • 1 sweet red pepper
  • 125 grams of eggplant cut into strips and salted for at least 30 minutes 
  • 2 chilies – I used a milder Fresno chili which was hot enough for me- you add whatever you prefer!
  • 1/2 small bulb of fennel 
  • 3-4 cloves of garlic sliced thinly
  • 1 cup white wine vinegar (I used champagne vinegar)
  • 15 peppercorns
  • couple of big bay leaves
  • 2 tsp of salt 
  • 1 cup of water
  • 1 bottle 500ml of great extra virgin olive oil- I used Casas D Hualdo Organic
  • 3 tsp of dried oregano
  • 3 cloves of garlic -sliced
  • 1/2 tsp chili flakes
  • 1/2 tsp celery seed
  • some fennel fronds chopped if you like
  • 100 grams of olives pitted and chopped.
  • 2-3 tbsp of chopped flat Italian parsley (it has better flavor than the curly in my opinion)

Step 1: sterilize 3 x 2 cup preserving jars by washing thoroughly. You can also rinse them with a little vinegar after they are washed. If you have new jars I like to wash them, place them in boiling water for 2 minutes and then rinse with a bit of white vinegar and dry well. 


Note* Once you have filled your jars you can pasteurize them by sealing them well with new lids, wrap the jars in tea towels, place in a lar pot filled just above the jars with water. Let come to a boil and then turn down to a medium low boil for 30 minutes. Then allow to cool in the water bath before removing jars. They can then be stored in the cupboard. Once opened they should be stored in the fridge. 

Step 2: slice or chop all vegetables in chunks or thin slices of a similar size (I like the look of the thinner finer slices but you can chop them in chunks if you like) 

Step 3: in a pot you will add the vinegar, peppercorns, bay leaves, 3 cloves of garlic, salt and water. 


Step 4: in batches you will add the vegetables to cook and soften in the vinegar bath. Then remove with a slotted spoon onto clean towel. Then into a large bowl to dry slightly and cool. 


These are approximate times depending on how you slice your veggies, it could be a bit more or less. 

Carrots, celery and cauliflower 5-7 minutes

Green beans 4 minutes

Peppers, fresh chilies, fennel and onions 3 minutes

Eggplant 2 minutes

Step 5: add about 1/2 cup of the olive oil just to toss all ingredients in the bowl and then you will top off the rest once in the jars. 


Step 6: add the dried oregano, sliced garlic, chili flakes, celery seed, fennel fronds and chopped parsley and toss to combine. 

Step 7: carefully fill the jars, pressing down the ingredients trying not to break them while getting the jars filled. 


Step 8: using a chop stick you can pour over the great oil and move the veggies to let the oil get in all the cracks. Seal and Pasteurize as described in Step # 1. Or you can just store in the fridge and consume within a few days if you don’t wish to preserve.

Once the jar is opened you may wish to top off with a few more tablespoons of vinegar and you can also add a bit more olive oil. 

Any remaining pickle should be stored in the fridge once the jar is opened.

It is natural to have the olive oil solidify when in the fridge so don’t be alarmed. Before eating  leave the jar on the counter for a few minutes and it will go back to it’s liquid state. The cold will not harm the oil. 

Cevapcici – Croatian Grill

Oh yes you do want to make these my friend!

I have several versions on this blog but this is definitely my favorite! I ate a version of these growing up at my Best Friend Kim’s house. They are simple to make and quickly cooked on the grill for an anytime meal.

Other recipes with slight variations:

CROATIAN CHEVAPCICI AND SOPOVA SALAD

LEMON SUNDRIED TOMATO TURKEY CHEVAPCICI


You will need: 

  • 1 lb of Ground Beef
  • 1 lb of Ground Pork (or you also use lamb or a combination as you like)
  • 4-5 cloves of garlic- minced finely
  • 1 tsp of ground Paprika (I used half sweet and half spicy)
  • 1 small onion gated
  • 1 tbsp finely chopped parsley
  • 1 tsp baking soda
  • salt and pepper to taste
  • extra virgin olive oil for forming sausages

Optional: lemon for grilling.

Step 1: 

In a large bowl add the combination of meats you like.

Step 2:

On a box grater – grate 1 small onion and add to the bowl with meat.

Step 3: 

Mince garlic and add to the bowl along with all other ingredients.

Step 4: Form into sausages using some olive oil on your hands.

Step 5: Once formed place in fridge for 20 minutes to firm up and get your grill hot.

Step 6: Grill rotating often to avoid burning for a few minutes on each side.

Step 7: Serve hot with side salad or in a wrap. Make lots!!

Come See The New YouTube Channel


Big News!! we are now on YouTube creating all the recipes from the blog and more.


There will be olive oil classes and tastings along the way too!

I hope that you will find them to be a helpful addition to our blog. 

The recipes are available along with lots of pictures on the blog and now videos on YouTube to guide you.

I want to cook that on YouTube

If you want to receive notifications of new videos please hit the Subscribe button along with the Notification Bell. 

Please ask questions and make comments to engage and tell me what you want to learn to make. I hope you use my ideas and recipes as a start to make them in your kitchen. 

Modify the recipes and make them your own family favorites. 

My goal is always to get you try something new, to make it yourself, and always use great olive oil when you can!

Thank you

I hope these recipes make you say “I want to cook that!”

Love

Hildie

Chocolate Hazelnut Spread

When I was a kid we used to eat chocolate hazelnut spread (specifically Nutella!) everyday after going to the corner store to buy fresh Italian bread. My friend Kim’s Mom would slice big fat slices of bread and we would slather on the Nutella every afternoon as soon as we got home from school.  My Dad would make crepes (“Palacinka” – which are a Slovak version) and he would sprinkle lemon and sugar or Nutella on them for me and jam on them for him! Of course you can buy spread in the store but, I like my version because I know the quality of ingredients is higher and I know what’s not in them! preservatives.

I was just recently in Milan and Genoa and when in Eataly I found an entire shelf of better quality versions but in most North American places it might be difficult to find anything other than the basic versions. I did find an Organic version in my local grocery story but why not try making your own. It makes a nice gift and can be used in Crepes, on Croissant or even melted and poured over Ice Cream!!

If you want to use a different type of nut or a combination of nuts go ahead !! experiment away!

You will need:

  • 1 cup of hazelnuts  (if you have hazelnut butter you can use that instead)
  • 12 oz of Milk Chocolate (or of course you can make the dark version)
  • 1 tbsp cocoa powder
  • 3 tbsp Extra Virgin Olive Oil – I used Bondolio from California
  • 1 tsp Vanilla extract (pure never artificial)
  • 1/4 tsp sea salt
  • 1/4 tsp cinnamon
  • 1 tbsp pure maple syrup

I made both a milk chocolate and a dark chocolate version.

Step 1: place hazelnuts ( also sometimes called filberts) on a baking sheet and toast for 8 -12 minutes – turn them halfway and be careful to watch they do not burn. Once they come out of the oven place in a clean tea towel (kitchen towel) and try to rub some of the outer husk off- I never get them clean if the hazelnuts are fresh so don’t worry if there is lots left on. I leave the husks and place the somewhat cleaned nuts in the food processor or a good quality blender to make into butter. If you happen to find hazelnut butter you ca use that and skip this step.

 Step 2: I like to line up all my measured ingredients  so that I don’t forget anything. Remember this was a double recipe because I made one in the traditional milk chocolate and the other dark chocolate.

Step 3: I washed a few little jars for my finished spread. Although these are cute I would suggest a plain glass jar so that you can microwave for 10-30 seconds to get the spread more liquid when you want to use it. Because there are not preservatives in the spread it will thicken and harden especially if you keep it in the fridge. You can microwave for a few seconds before spreading which brings it back to is almost liquid consistency. It is essentially a nut butter with chocolate.

 Step 4: you will need to be patient for this step. The nuts will turn into a powder and you should stop the machine every 30 seconds to 1 minute and scrape down the sides until eventually it will turn into a thick butter. This takes about 5 minutes in total.

Step 5: in a heat proof container melt the chocolate in the microwave for 1 minute then stir, melt again for 30 seconds and stir and only if necessary melt for a final 30 seconds.

 Step 6: Mix in a large bowl the nut butter, the melted chocolate, the Extra Virgin Olive Oil (or you can add melted butter) pure vanilla extract, salt, cinnamon and maple syrup.

 Step 7: place in a glass jar (so that you can melt safely when it solidifies. It is not safe to melt things in the microwave in plastic containers.

 This is a better glass jar because there is no metal (you have to remove the metal from the other jars so they are safe to microwave) They are not as pretty but way easier to melt so that the spread becomes like a thick melted chocolate butter.

YUM!!

Banana Yeast Bread

OK ! this is the bread I am going to make in my diner when I quit my job and do something crazy!

 Makes the BEST French Toast!

This is the French Toast Guy Fieri is going to tell me is money! I am sure it will have a blob of whipped cream on it and some crushed praline nuts on it as well but that’s just glamming up for the cameras!

You will need:

  • 3 over ripe bananas
  • 1/2 tsp fine zested orange peel
  • 2 eggs
  • 2 tbsp butter
  • 1 tbsp great Extra Virgin buttery mild oil
  • milk (I will explain the amount further in the recipe) -less than 1 cup
  • 2 tsp dry yeast
  • 3 1/2 cups all purpose flour (possibly a bit more or less depending on humidity)
  • 1/2 tsp flaked salt

Step 1: using the bread or paddle attachment- squish bananas in a stand mixer – of course you could do this recipe by hand if you want a workout.

Step 2: add eggs to a liquid measuring cup, whisk with fork. Add orange zest, 2 tbsp of melted butter, olive oil and then fill with milk of your choice until you reach 1 cup on the measure.

Step 3: add the liquid to the bananas and change to the paddle attachment.

Step 4: add the yeast and leave for 10 minutes.

Step 5: add flour and salt and mix on slow to incorporate and then on high for at least 3-4 minutes with the dough hook. Turn out onto the counter and hand knead for a few seconds to make sure that the dough is not sticky. This is where you feel the dough and add small sprinkles of additional flour until it no longer sticks to your hands.

Step 5: wash the bowl and butter sides, then coat the soft dough with enough butter so so that the plastic wrap that you will cover the bowl with doesn’t stick to the dough if it rises to the top. Leave in a warm place for 2 -2/12 hours. this is a rich bread and you are looking for it to be doubled in size how ever long that takes.

Step 6: turn out the dough from the first proof and gently deflate and roll up to fit into a buttered bread pan. Cover with a buttered or oiled piece of plastic wrap -I just use the one I had on it for the first rise. Leave until doubled again this is only about 1 hour.

Step 7: bake at 350 degrees F 30-45 minutes. If bread appears to be browning too quickly tent with aluminium foil for the last 10-15 minutes.

brushed with a bit of butter !

Great the next day as French Toast (just mix eggs with milk or cream a bit of sugar or honey, soak bread for a minute they fry in some more butter and top with maple syrup,sliced bananas and powdered sugar!!

Get the coffee you are gonna love this!

Orange Cardamom Baklava

This is an orange, lemon, cardamom and honey scented baklava. I also use butter and olive oil to brush in between the filo (fee-low not fy-low!) layers.

You can use all almonds or pistachios however, I prefer half and half.

You will need:

  • 1 box of frozen filo/phyllo dough- thawed in the fridge.

Nut filling

  • 1 lb/454 grams of nuts (pistachios and almonds)
  • 1/2 cup sugar
  • 1 tsp ground cinnamon
  • 1/4 tsp fresh ground cardamom (I use a mortar and pestle)
  • 1 stick unsalted butter -melted
  • 1/4 cup buttery mild olive oil

Syrup

  • 3/4 cup sugar
  • 1/2 cup of honey
  • 1/2 tsp orange extract (optional if you can’t find it)
  • 1 tbsp orange finely zested
  • 1 tsp lemon finely zested
  • 1/3 cup water
  • 1/3 cup orange juice (or the juice from a big fat orange)
  • glass pyrex dish wide enough to fill a sheet of phyllo/filo width -3 qt size or 9×13 -glass is easier to cut on

Step 1: in a food processor pulse almonds and pistachios until rough chop- you don’t want to take it too far or it will turn to a nut paste. There can be some larger chunks. If you have a scale weigh the nuts before putting in the food processor.

Step 2: Put the nuts in a large bowl and add, sugar, cinnamon, crushed cardamom. I use the cardamom that is whole in the pod and then remove seeds and crush in the mortar and pestle. You can also buy it ground. Mix to distribute.

Step 3: some boxes have a perfect 24 sheets which can make 3 layers of 8 buttered sheets in between 2 layers of nuts. If your box has more divide into whatever works and if a few get torn no problem – no one will know! I thaw in the fridge over night.

Step 4: butter the glass dish.

Step 5: melt the butter and mix in the olive oil. Get a brush to paint on the butter and oil gently between each layer or filo/phyllo.

Step 6: with a gentle hand paint a light coating on a sheet of filo and then add the next sheet and repeat until you have 8-10 buttered sheets (depending on how many sheets come in your box some have 24 sheets some have 40)

Step 7: if you are doing 2 layers of nuts in between 3 x 8 sheets of buttered filo then divide the nut mixture in half- if you want 3 layers then divide nuts into 3 equal portions. Sprinkle on top and spread evenly.

Step 8: brush another 8 sheets buttered to form the next layer, then add your nuts  and finish with another 8-10 sheets for the top. Make sure the top has a generous coating of butter to finish.

Step 9: carefully with a sharp serrated knife cut all the way through to cut squares or diamond shapes. If your dish has rounded edges you can carefully trim your filo to make it neat in appearance.

Bake at 350 degrees F for 30- 35 minutes until browned.

Step 10: while the Baklava is baking make your orange/lemon syrup in a small pan. Add the sugar (mine is Vanilla sugar- I just stick vanilla beans in sugar and leave them for months and keep adding sugar) add honey, orange extract or Fiori Sicilia, orange zest, lemon zest, orange juice and water. Heat to melt sugar and set aside.

Step 11: as soon as you remove the baklava from the oven carefully pour the syrup to cover the entire surface. It will make noise because its hot but that’s ok. Make sure to drizzle the syrup all over the entire top. You will think that it is too much liquid but it is not.

Re-cut the separations one more time while warm.

Let cool, dig in!!

Continue reading

Orange Chocolate Olive Oil Truffles

Dark chocolate enriched with extra virgin olive oil is associated with an improved cardiovascular risk profile, according to research presented  in 2017 at the ESC Congress.


So of course I had to create a recipe! I just happened to have this really fabulous Orange Extra Virgin Olive Oil from California. I have been using this Orange Olive Oil from Bondolio in my donuts and a sweet orange Panettone and now these truffles.


They are so easy to make and how great its this that they are also good for your heart as well as your chocolate SOUL!!


You will need:

  • 8 oz of best quality dark chocolate chopped
  • 1 tsp finely grated orange zest
  • 1 tbsp Cointreau or other orange flavored liqueur
  • 1/3 cup Orange Olive Oil – I used Bondolio from California
  • a pinch of sea salt -I used Maldon Flaked Sea Salt
  • 1/2 room temperature Mascarpone Cheese
  • 1/3 cup good quality cocoa powder to roll in


Step 1: chop 8 oz of the best quality dark chocolate you can find. The better the quality chocolate the better the truffle. I had a few kinds in my pantry so I chopped them all up as well as a few chocolate chips.

Step 2 : add all ingredients except the Mascarpone cheese and melt in a bowl over a pot of gently boiling hot water.

Step 3: once melted and still warm add the Mascarpone cheese and whisk until smooth.

Step 4: remove from bowl and place in shallow dish. Let chocolate come to room temperature and then place in fridge for 30 minutes to harden. Scoop small balls and roll in your hands to make into neat balls. You may need another small spoon to get the chocolate mixture out of the scoop as it is sticky.

Step 5: sift good quality cocoa powder into another shallow dish and place balls in cocoa- moving bowl to roll and coat. Tap off excess cocoa and place in a pretty dish to serve or place in a candy cup – like a muffin paper cup only smaller.

They are very rich with a beautiful subtle hint of orange from the zest, the oil and the Cointreau. They make a very nice gift or are perfect served with coffee after dinner. 

Italy – Imperia and Rome

“Travel is the only thing you buy that makes you Richer!”-unknown

I really think travel opens you up to new languages, customs, wonderful people and of course good food!

We are all more alike than different, and food and music always has a magical way to unite us.

Let me share my most recent Trip to Italy and show you all the sights and beautiful food from my point of view.

I must stop and have a glass of Prosecco at the Dallas airport to celebrate that I am going to Italy !

I have been lucky enough to go to Italy each year for the last 4 years.

 It all started with a phone call and a friend telling me I needed to become an olive oil sommelier. Once I decided to do it I located the oldest and most reputable school, which happened to be located in Imperia Oneglia, Italy. This is in the north of Italy about an hour from Nice, France.

 ONAOO is the National Organization of Olive Oil Tasters and is dedicated to teaching people about tasting oils and identifying defects from all over the world. I started with the first class which basically sees if you have sensory ability to taste. This is a 5 day course in order to determine if have the sensory ability to taste. I have been taking an additional 3 year course to become a Certified Professional Olive Oil Taster (all of these previous years are in this blog -search Travel to read)

THIS post is my last year of this course and my travels to Rome after.

Flying into Nice is always spectacular even in December but if you get a chance to go when it is warmer please do it is sooooooo beautiful!!

I meet my fellow student Karen in London where we take the 1 hour train to Imperia. Of course we have a bottle of wine for the train!

You are just passing the French and Italian Rivieras.

Imperia Oneglia is a little port town with a wealth of people with generations of olive oil knowledge. It’s sister town of Porto Maurizio is a pretty little harbor with lots of giant yachts parked waiting for  sunny days to sail these beautiful waters.

The town square and port are easy walking distance to the school and our hotel. My favorite big olive tree  is right by the water.

It’s almost time for dinner.

We stop by Gusto for an aperitif before dinner. They have a great selection of wines by the glass and affordable prices by the bottle.  I love how in Italy when you stop for a drink they bring a big plate of appetizers for you to enjoy with your wine.

Dinner at a pretty little restaurant we have never been to before. Dalla Padella alla Brace is fantastic and great value for the money.

This is the Liguria region of Italy and the home of Pesto. This is a typical dish from the area. I love it Trofie pasta with pesto.

Always fish because this is a seaside town.

We have 2 days of prep before our exam in class

Tasting defects- YUCK

Getting our overview on the global status of production for this recent harvest and being prepped by the Master Taster Marcello Scoccia.

Our translator Silvana is really really good !

More tasting oils both good and bad from all over the world!

Isn’t it amazing the differences in color! By the way color does not indicate quality of oil – it can deceive you!

After my last day of prep I am taking home my best defects so I can study tonight and first thing in the morning before the exam. You have to memorize smells and tastes and they can be strong or mild and you have to be able to determine the levels. It’s not easy and we are all anxious!

There are people coming in that will be our unbiased judges. They will give us our exam and we are just known to them by our number. I am number 15. We have to smell, taste and evaluate several oils determining the positive attributes and  those levels. We then taste several more with defects doing the same. A theory exam and an oral and we are done. Phew!!

 A coffee and a Rum Baba from Picardo. Remember a cappuccino is only for the morning!


Melograno (pomegranate) is always great for a pizza and wine at crazy good prices!

 No visit to Imperia is complete without a trip to Salvo Cacciatore always elegant with great service.

A beautiful risotto with artichokes

Grilled Tuna was so tender and perfectly seasoned.

 Sarri is a 1 star Michelin restaurant with fantastic food.

stuffed anchovies

Tuna that exploded with flavor

a foam with Bacala (salt cod) and pesto, was probably my favorite

Oh wait the ravioli with fish and lemon zest maybe that was my favorite?!

 more beautifully prepared fish.

Apple pie and raspberry sorbetto! Roll me home I am full!!

Now on to Roma!

The eternal city is fantastic to just wander and explore It is also a great food town!

 No matter what your religious point of view you cannot be amazed at the beauty all around you.

could that sky be any bluer? wow what a day!

I just love churches and St. Peter’s is the most magnificent.

Michaelangelo’s Pieta greets you when you first arrive.

look at this light! sometimes things are just magical.

Time for dinner!

 look at those truffles…..YUM

 Our first dinner in Rome was the best!! at Roscioli right near our apartment. We sat in the deli in front of these cases and had one of the best meals ever! 

The most tender beautiful Iberico Ham – Pata Negro

 (I know its from Spain but seriously folks!! Ahhh!!!)

That’s really good mortadella with Parmesan shaved on top

Ok ! this is 7 euros worth of pasta and 40 euros for 5 grams of white truffles…yup I ate every bite and it was worth every penny.

Typical dish from Rome Cacio e Pepe – 4 ingredients but to make it well is an art!

Cannoli to die for and a Vin Santo to finish. Just when we thought we were done they brought us some shortbread cookies and warm melted chocolate to dip in ! Mamma Mia!!!

Our apartment was a few feet away from the Campo de Fiori and each day there was a fabulous market. I love seeing what is available at different markets while travelling.

artichokes were on every menu- I love them

This was my new find! I couldn’t stop ordering it. This is Punterelle- a slightly bitter chicory that is typical of Rome. They slice it thin and make a salad served with a garlic, anchovy dressing!

bitter greens

they will even clean your artichokes for you.

How is it that this is December and these tomatoes look so good?

Karen taught me how to make coffee in a Moka, Now I want one!

My husband would be out of his mind with this Parmesan!

Roasted chestnuts always remind me of my father. Hi Dad!

Spaghetti alla Carbonara- another typical Roman dish of bacon and eggs

oooy gooey Torrone! (nougat) I love it

Turn a corner and out of the blue a magical courtyard invites you in.

Another beautiful day to explore

\

 More gorgeous pasta with ricotta and spinach -sitting beside the window with a woman rolling pasta.

Arancini and Supli – rice balls

come on!

pasta with black truffles

I cant forget the Gelato

Torrone and chocolate from Venchi

Caramel and chocolate from Fatamorgana

Mint choc chip from  Fatamorgana

this is really good by the way!

glaced chestnuts reminded me of being in Paris

Piazza Navona

The Spanish Steps with the sparkly Bulgari Tree

Ah Roma!

Oh by the way Karen and I both passed!! we are Certified ONAOO Professional Tasters !!

 It’s official I made a wish at the Trevi Fountain so I will be back!!

Herb and Olive Oil Focaccia

Is there anything more inviting on a cold day than a warm bowl of soup and the aroma of freshly baked bread…ok, maybe a blanket and a fire but this goes with that too!

You will need:

  • 1 cup water
  • 1 tbsp honey
  • 2 tsp dry yeast
  • 2 cups of flour
  • 1/2 great extra virgin olive oil – do not use the stuff from the grocery store for $9.99 that’s junk!
  • 2 cloves of garlic- minced finely
  • 1 tbsp dry Italian Seasoning herb mix
  • 1 tbsp fresh chopped Basil
  • 1 tbsp fresh chopped Parsley (flat Italian)
  • 1 tsp flaked sea salt (like Maldon)
  • 1 finely minced spring onion
  • 1 tsp dry chili flakes (pepperoncino)
  • 1/4 tsp fresh cracked pepper
  • 1/2 cup of finely grated Parmegiano Reggiano cheese and more sea salt

Step 1: heat water in microwave for 1 minute. Add yeast and honey and mix. Leave 5 minutes to activate yeast.

Step 2: chop the fresh herbs and mince garlic. Find a delicious Olive Oil – this one is a Hojiblanca from Spain. Place the oil, garlic, dry seasoning, fresh herbs, salt, green onion, chili flakes and pepper in a small pot and heat on low for 1 minute so that the garlic blooms and all the herbs open up then turn off and set aside.

I add 2 cups of flour to the yeast mix and stir in a large bowl. Let sit 20 minutes.

Step 3: add half the oil blend to the dough, the other half will be spread on top.

Step 4: I add another cup of flour to the counter and plop the wet mix on top. I use a bench scrapper to fold in more flour until it becomes manageable. I knead by hand and keep adding a sprinkle of flour until no longer sticky. This might be up to 2 more cups for a total of 4 cups.

Place in oiled bowl and cover with plastic wrap until double in size. This will take 1 -1 1/2 hours.

Step 5: Add a generous glug of oil to the bottom of the sheet pan and place the soft dough on top pushing down with your fingers pressing into the corners. Pour the rest of the oil mix on top and don’t forget the grated Parm and another sprinkle of sea salt.

Bake at 325 for 20- 25 minutes until golden and fragrant!

Soft and delicious !!